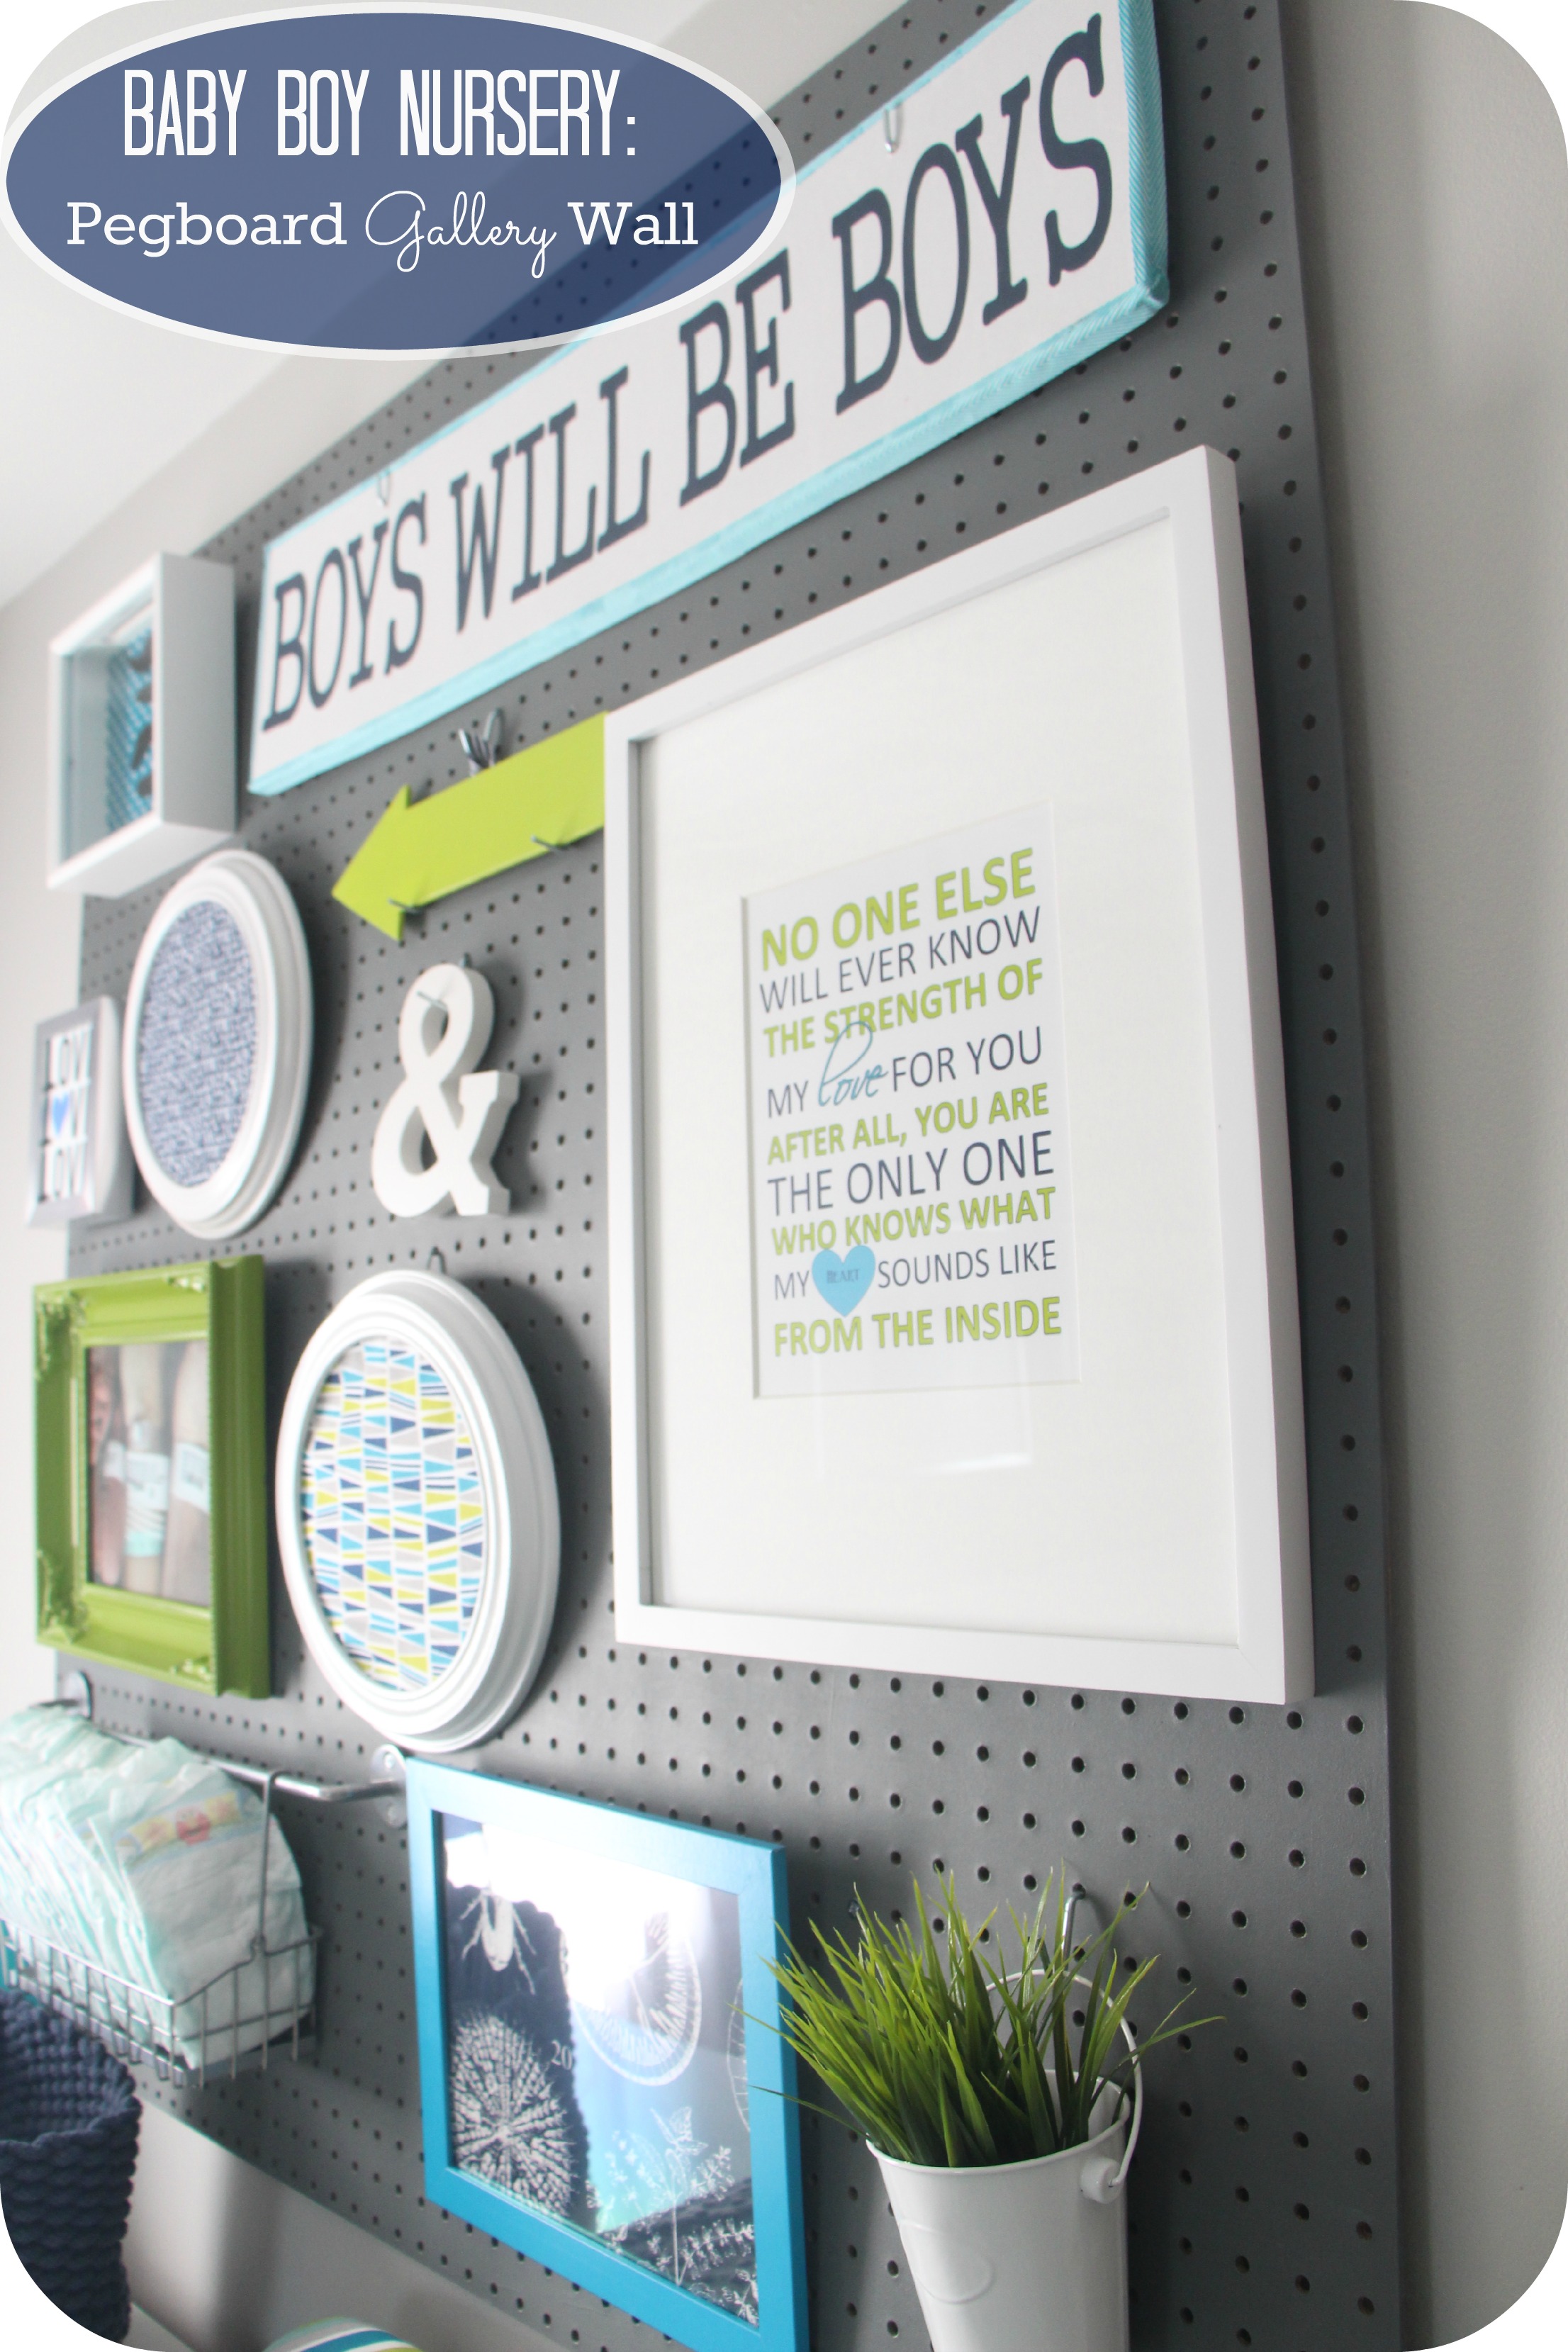
Hello! So I mentioned last week that I am working on some plans for our little playroom just off the family room. I spent a couple hours last week going through toys – sorting them, pitching them, searching for them. Lets just say we needed to do some organizing in there or I was going to lose my mind! I know it is not going to be a room that stays clean, but as long as everything in it has a home, it will eventually make it back there someday 🙂 Along with some organizational strategizing, I began to do some decorative strategizing! A shelf we had in the room with some art and books on it…well… came crashing down a couple of weeks ago and I am not going to be putting the shelf back up. In its place, I am thinking I will put together a little gallery wall with a mix of art, photos and typography. While pondering the design today, it got me thinking… I have had quite a few people ask me about the pegboard gallery wall I did in Simon’s nursery and I never really did a follow-up post with the deets, so thought it might be a good idea to revisit the nursery and give everyone some info on one of my favorite walls in the house.
The photo of this wall has been my most popular pin on Pinterest so far!
So, here we go…
I first went to Lowes & picked up a 4′ x 4′ pegboard. I think it was about $8. I also bought a small foam roller and a few paint samples. I went with shades of dark gray to test out.
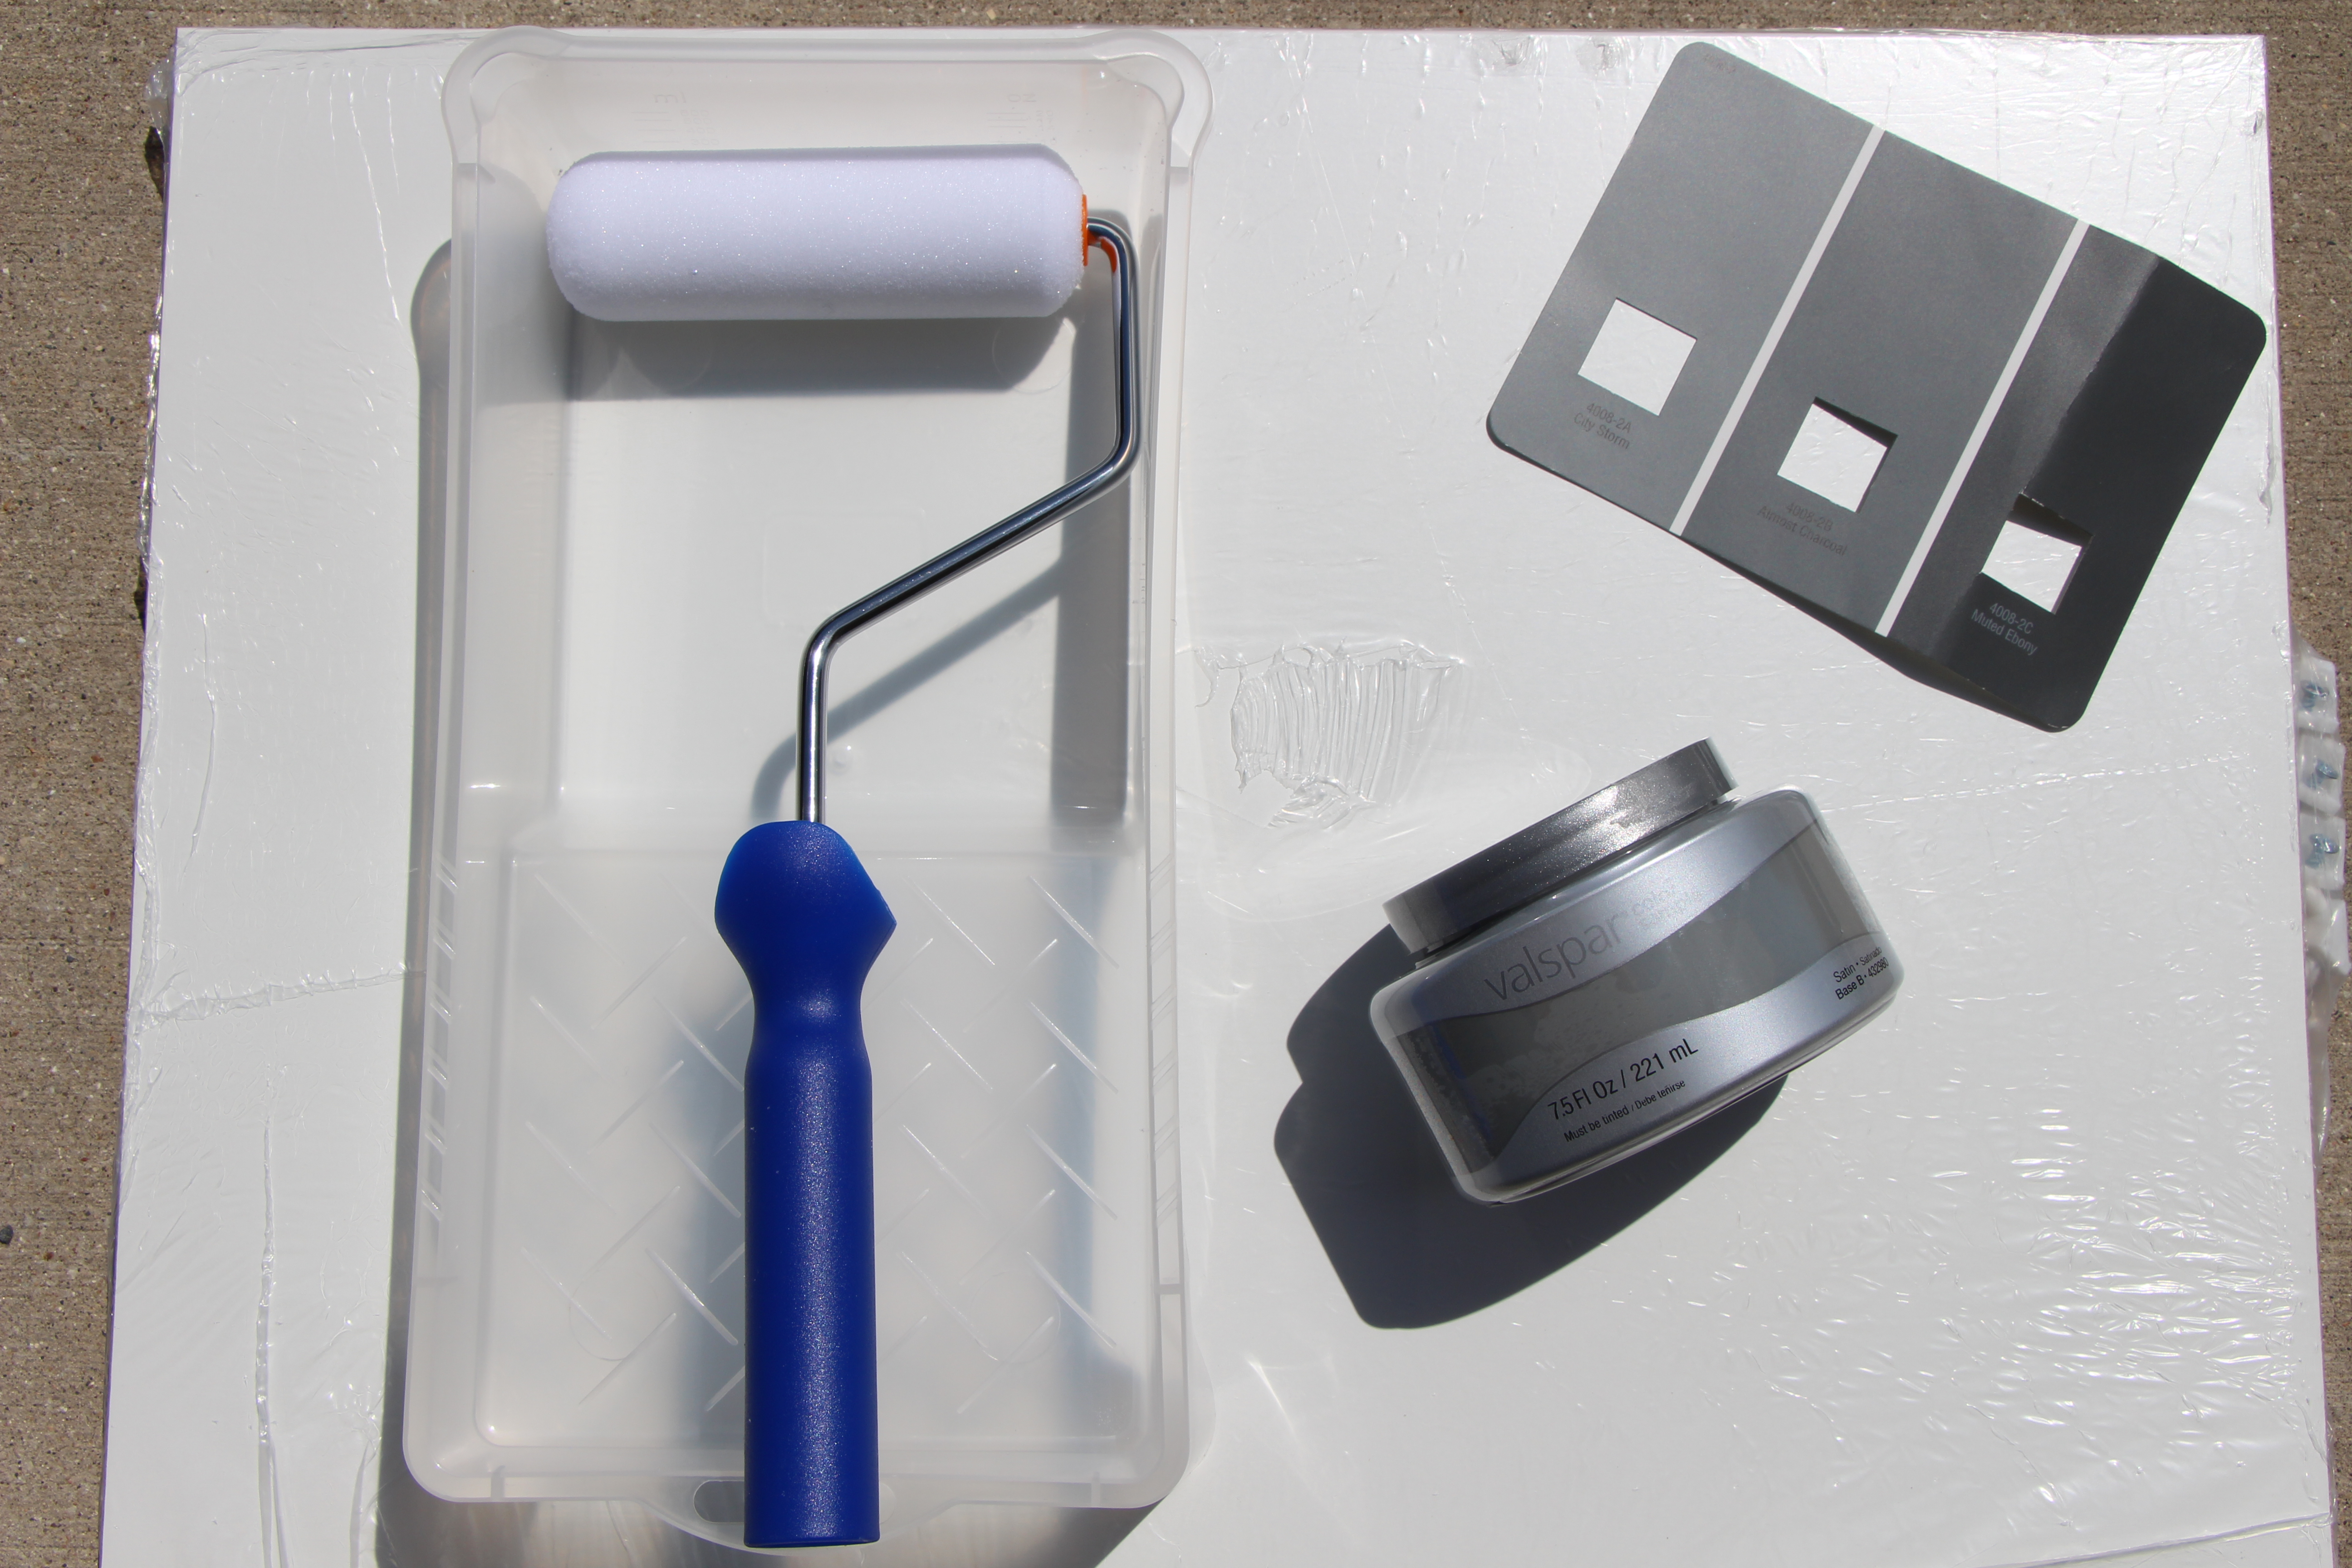
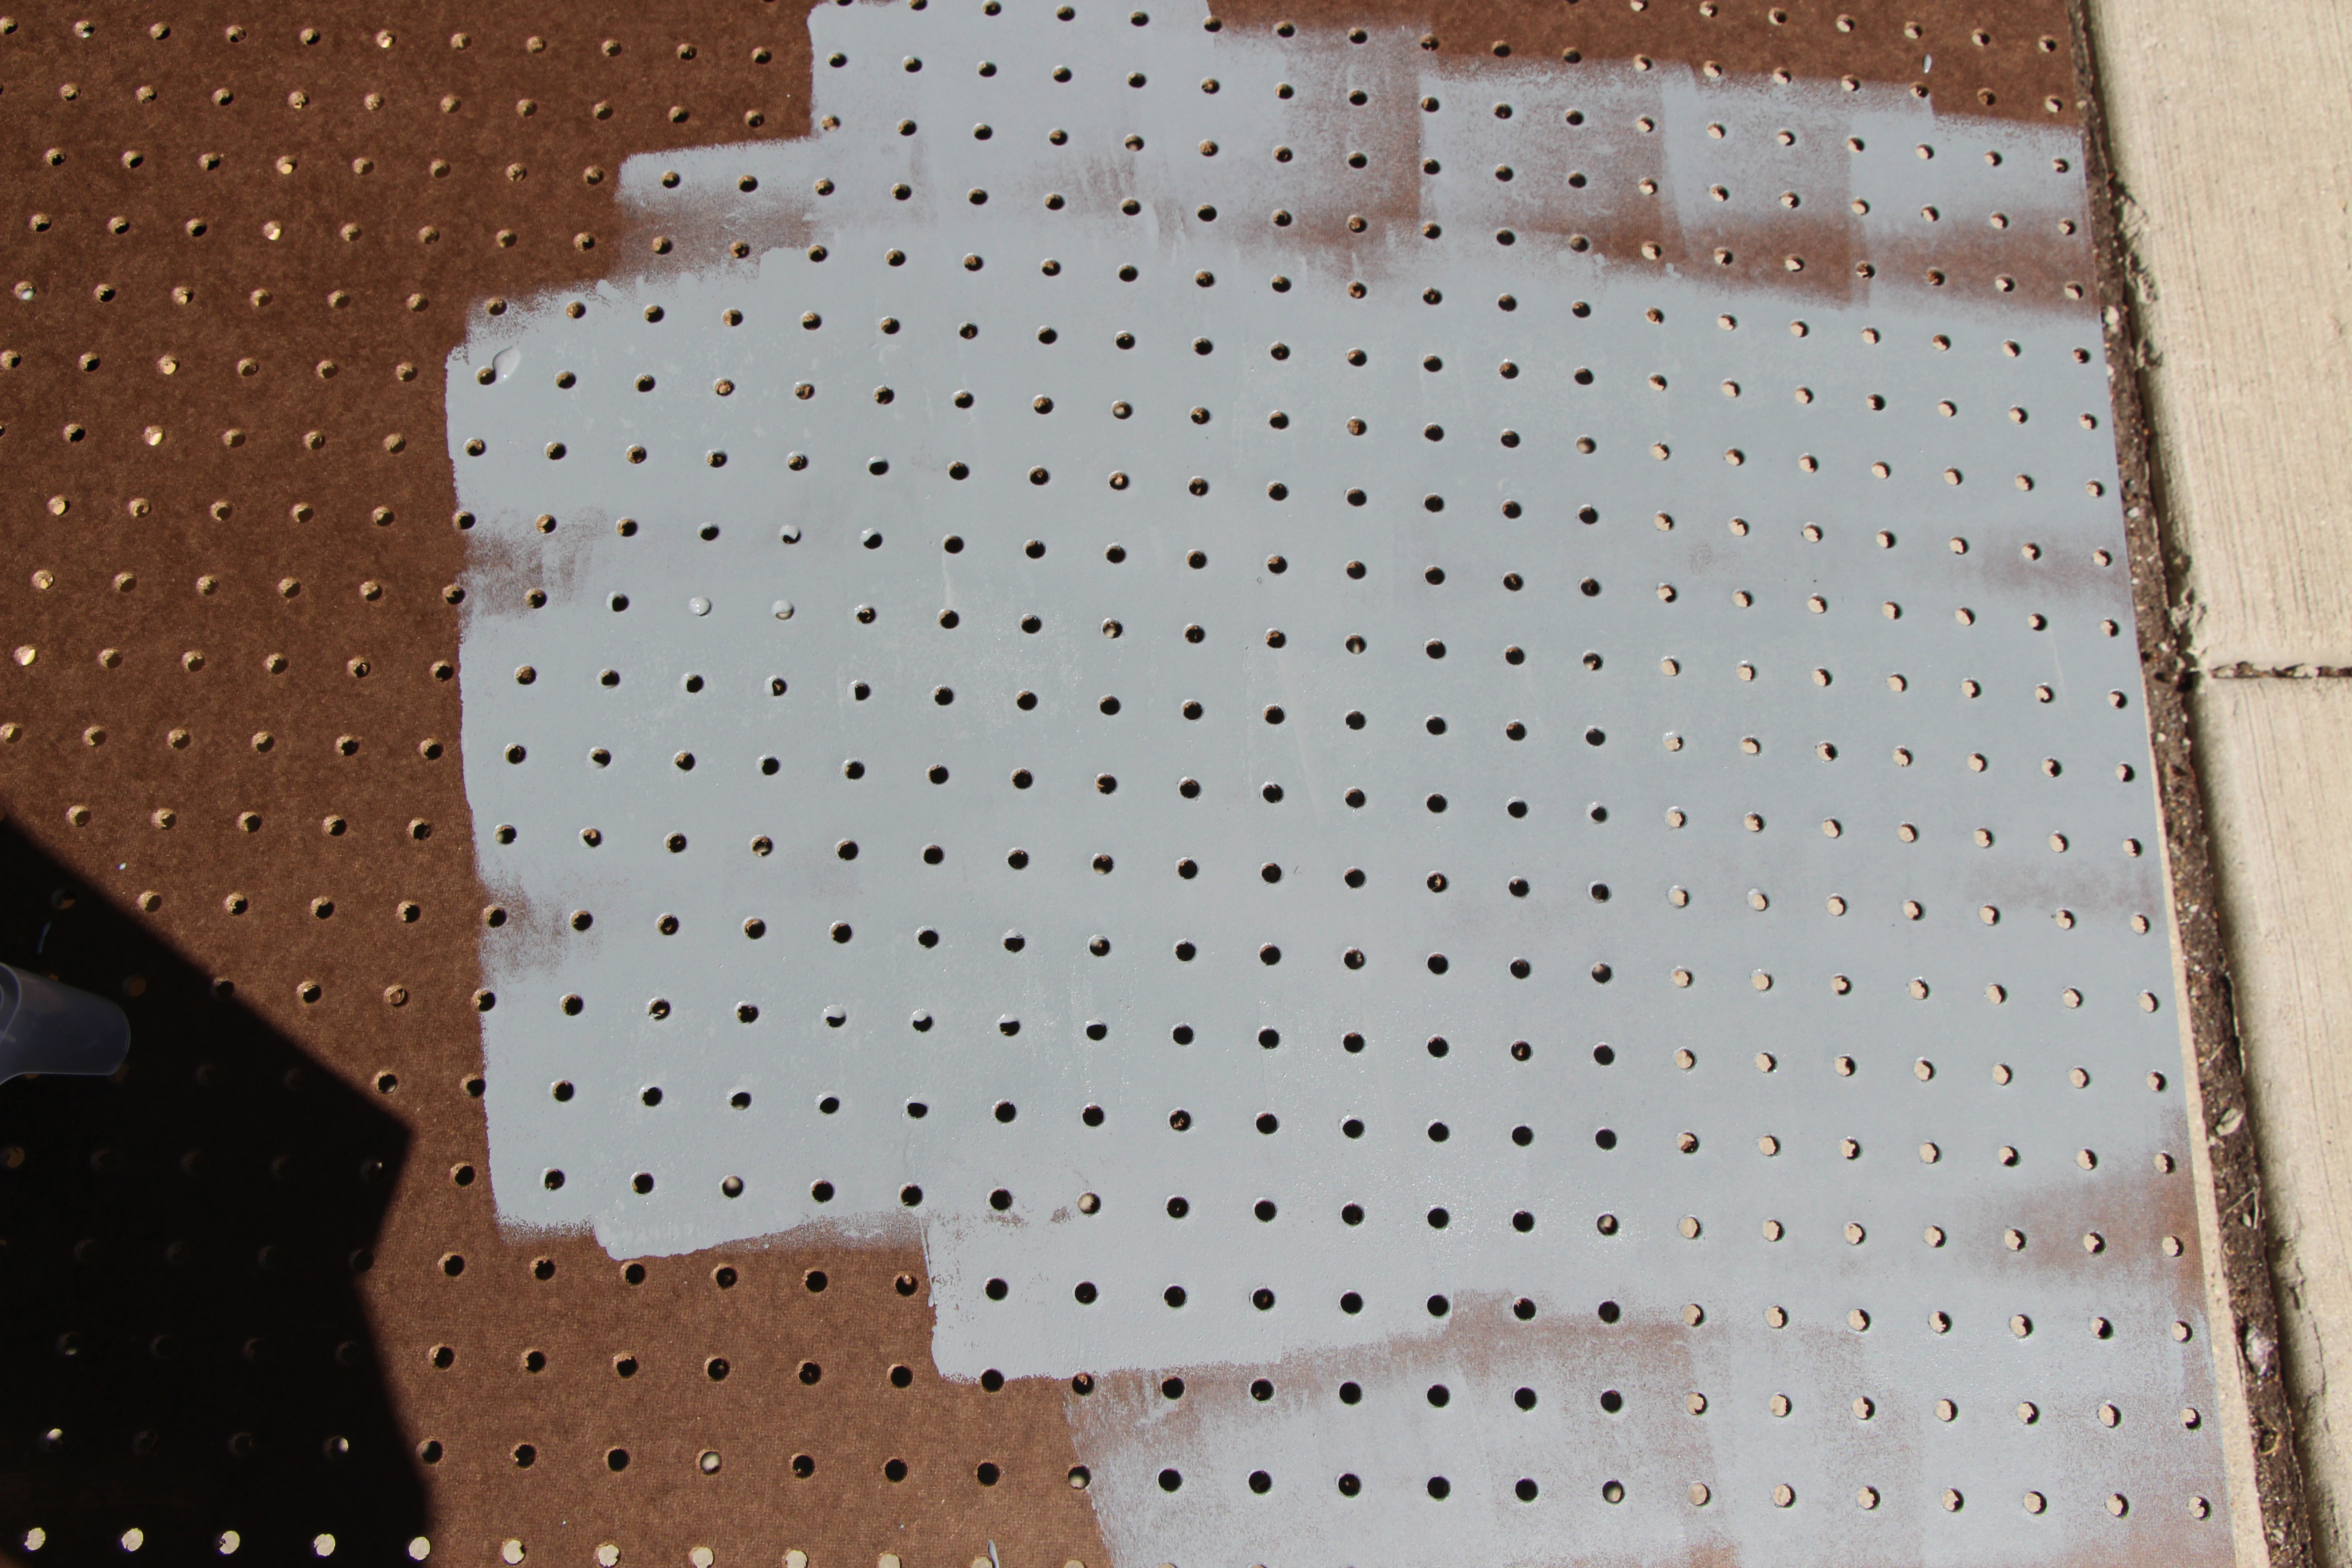
I ended up mixing all 3 of the paints together until I got the color I was aiming for. It took about 3 – 4 coats of paint for complete coverage.

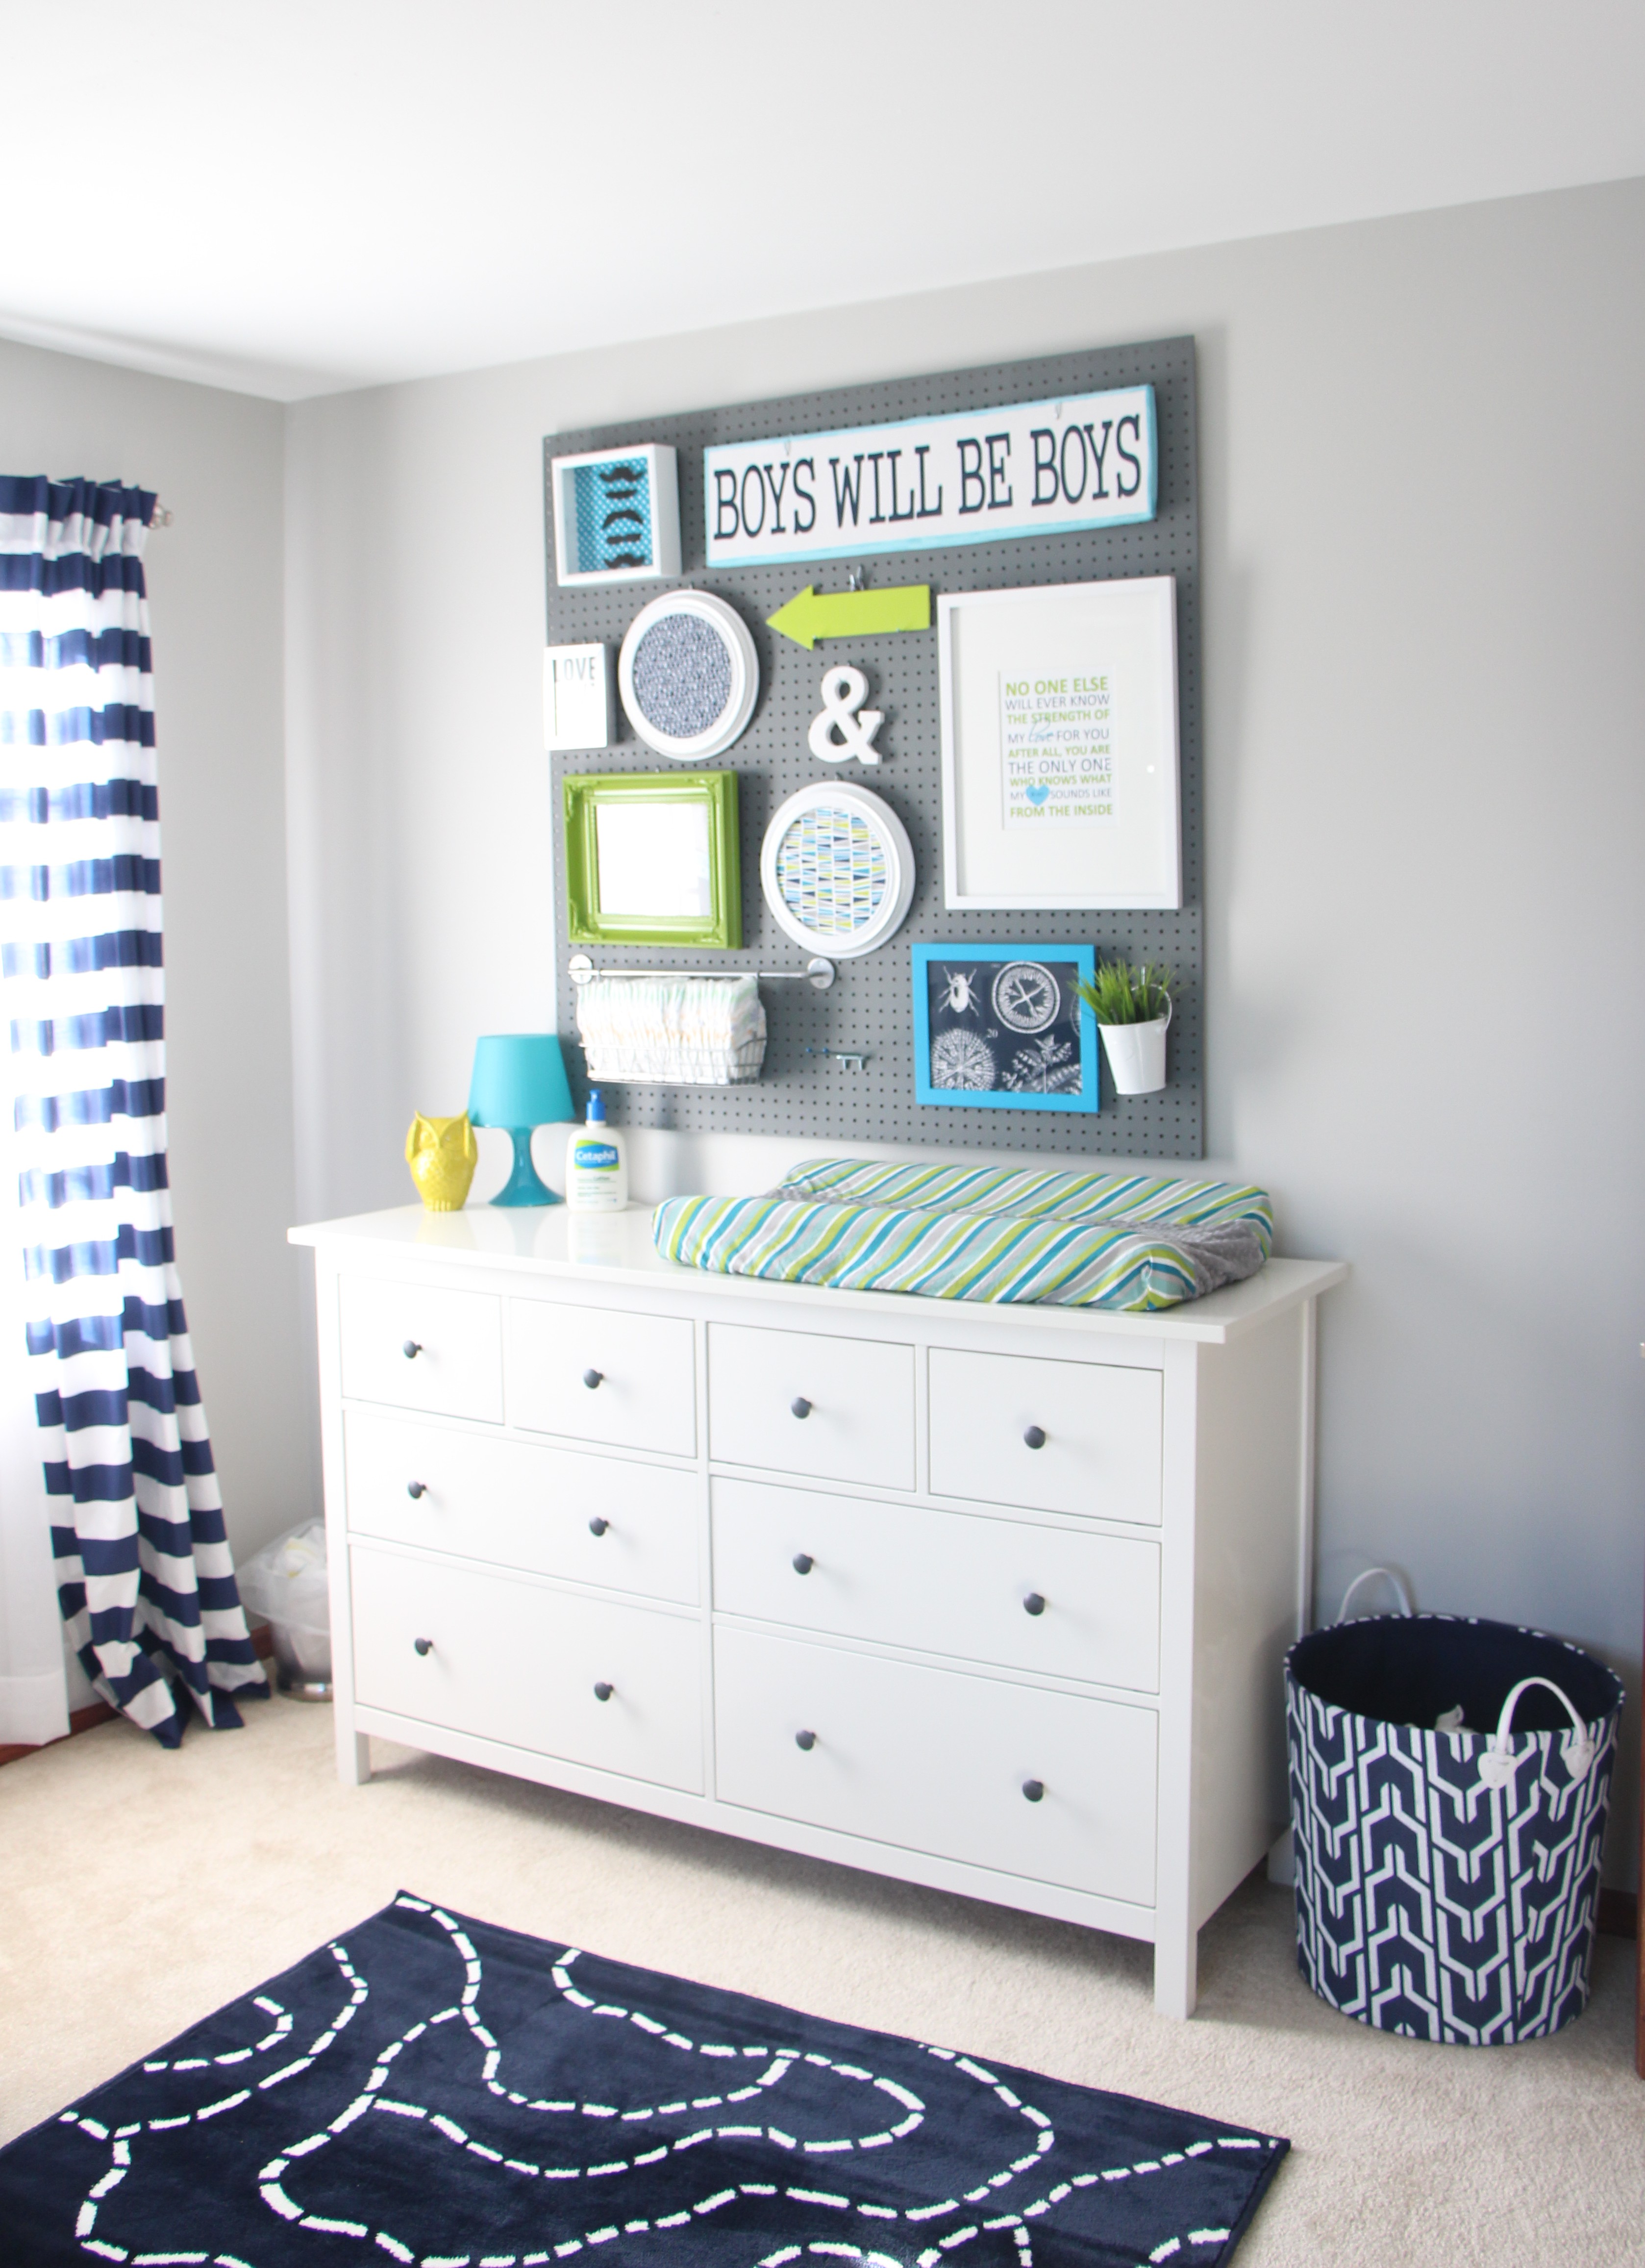
Next we cut 2 pieces of plywood (1″ x 4″) and laid them across the back horizontally. We placed a couple of screws in each piece of wood to secure them to the pegboard. We then measured our wall, found our studs and marked the wall where we wanted to drill. We were able to drill into the plywood pieces from the front with long extra long screws, enter the wall and catch the stud. The plywood allowed us to secure the pegboard firmly to the wall and also act as a spacer between the pegboard and the wall in order to be able to hang things on it from the front.
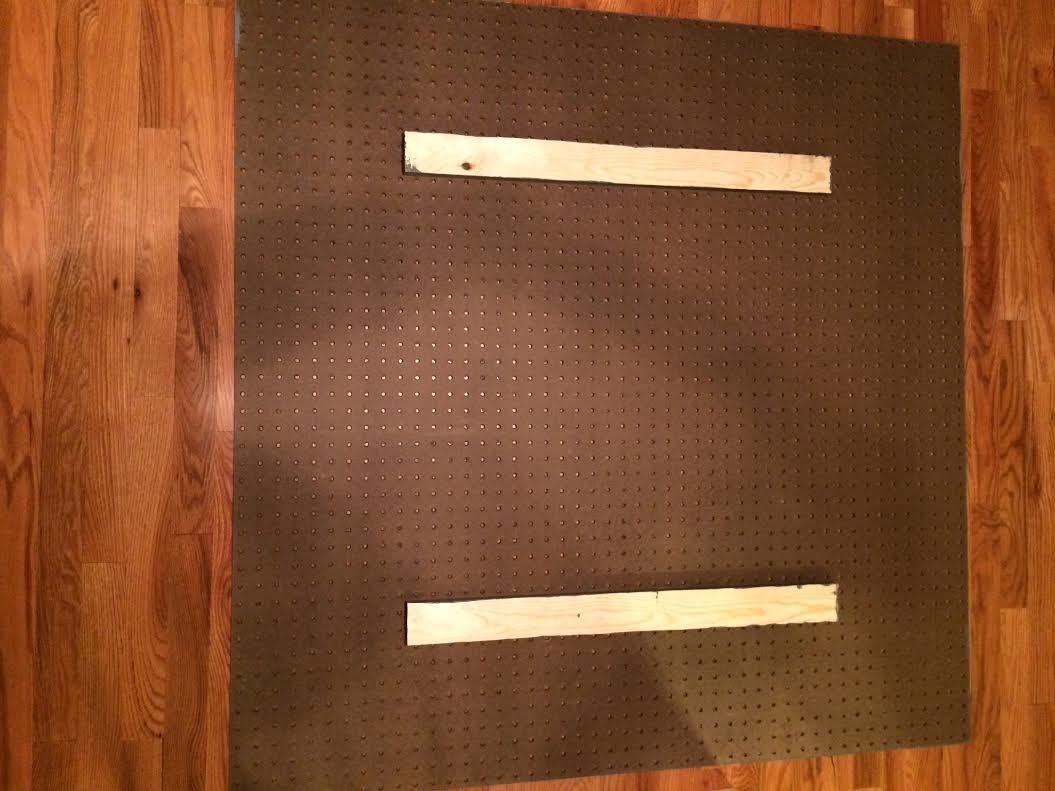
We used screws to hang the Bygel rail & basket and we placed them so they hit the lower piece of plywood. Everything else was hung with pegboard hooks (see link in source list below)
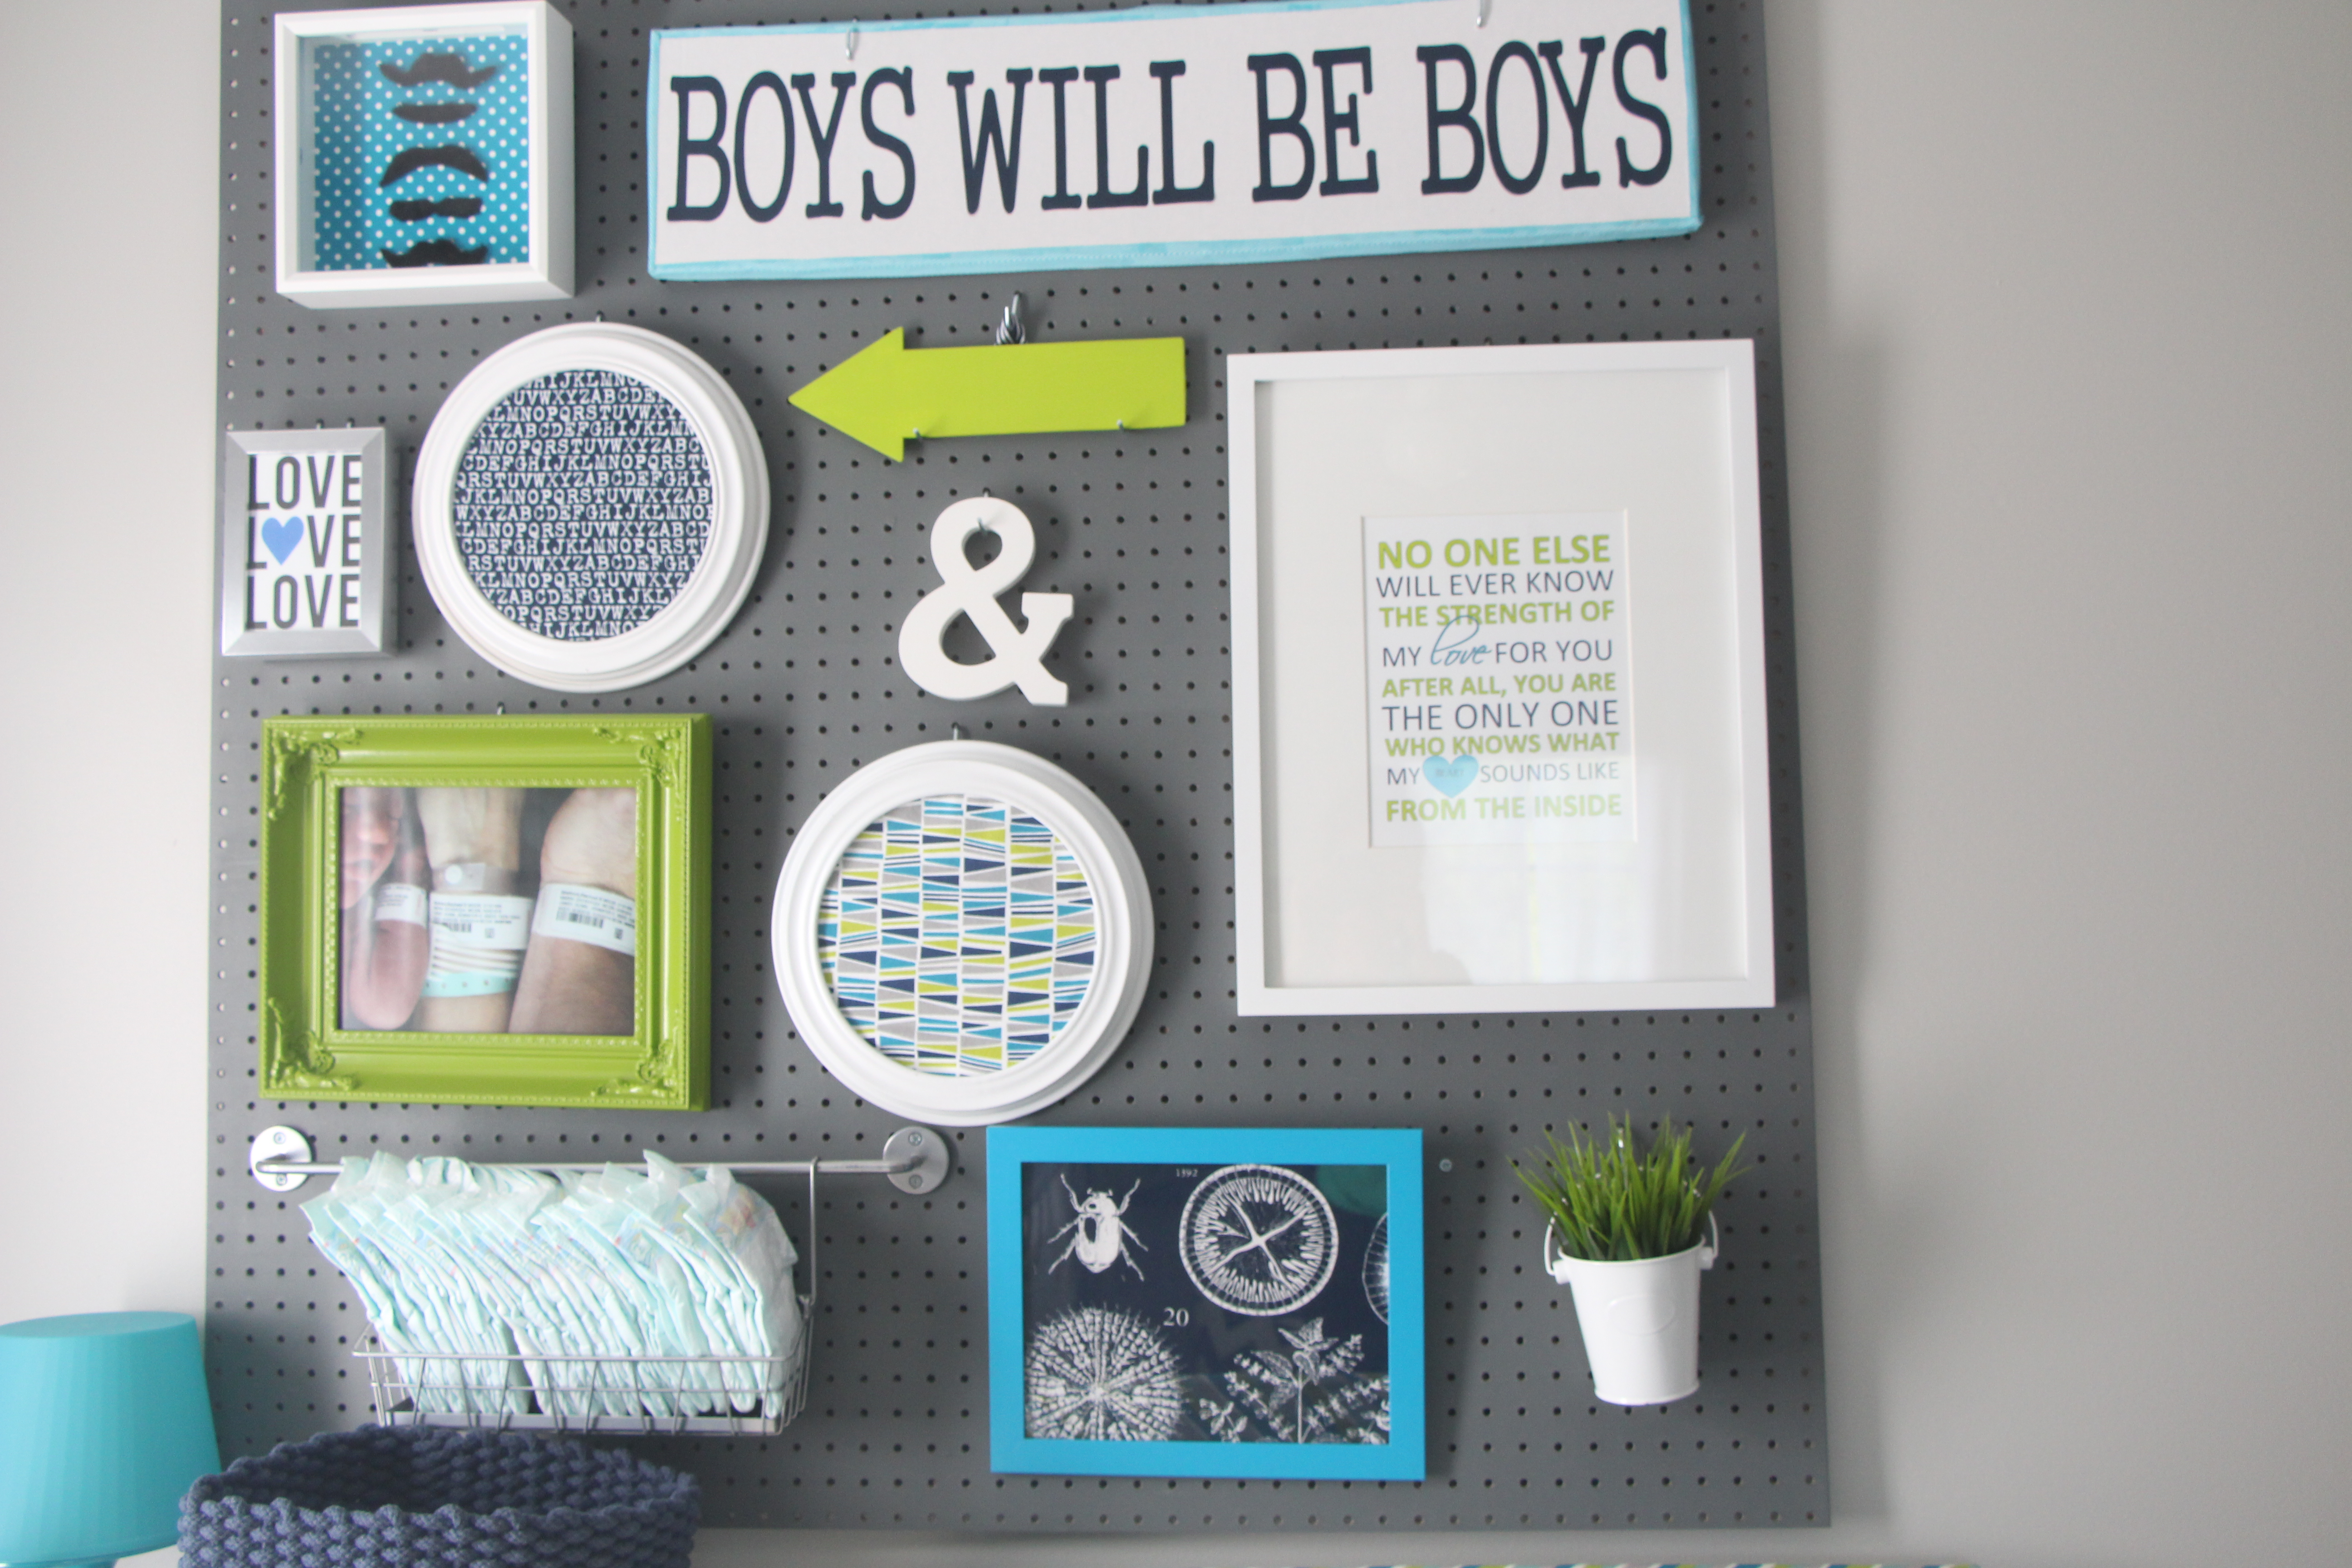
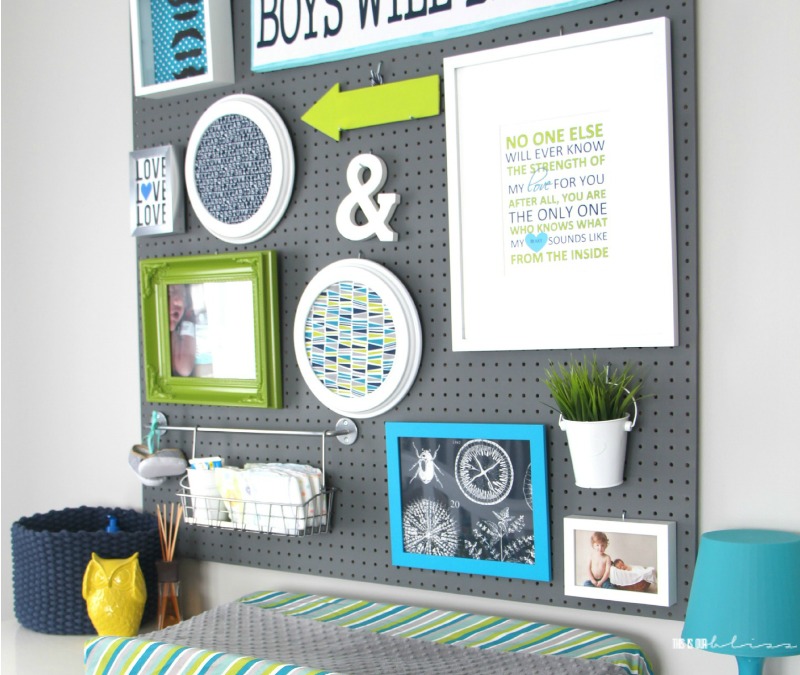
There it is! We hung the pegboard on the wall before attaching any of the frames, etc. I am not one to lay out my frames on the floor beforehand and I definitely don’t take the time to trace out the frames and tape them on the wall in order to determine my placement. I guess you could say I just wing it. I need to get better about my planning when nailing into the wall, but the nice thing about working with a pegboard as your backdrop is you don’t have to worry about random nail holes in the wall! Not that I ever put 2 or 3 holes behind each picture before I get it where I want it or anything 🙂
Here is my source list from the original nursery post:
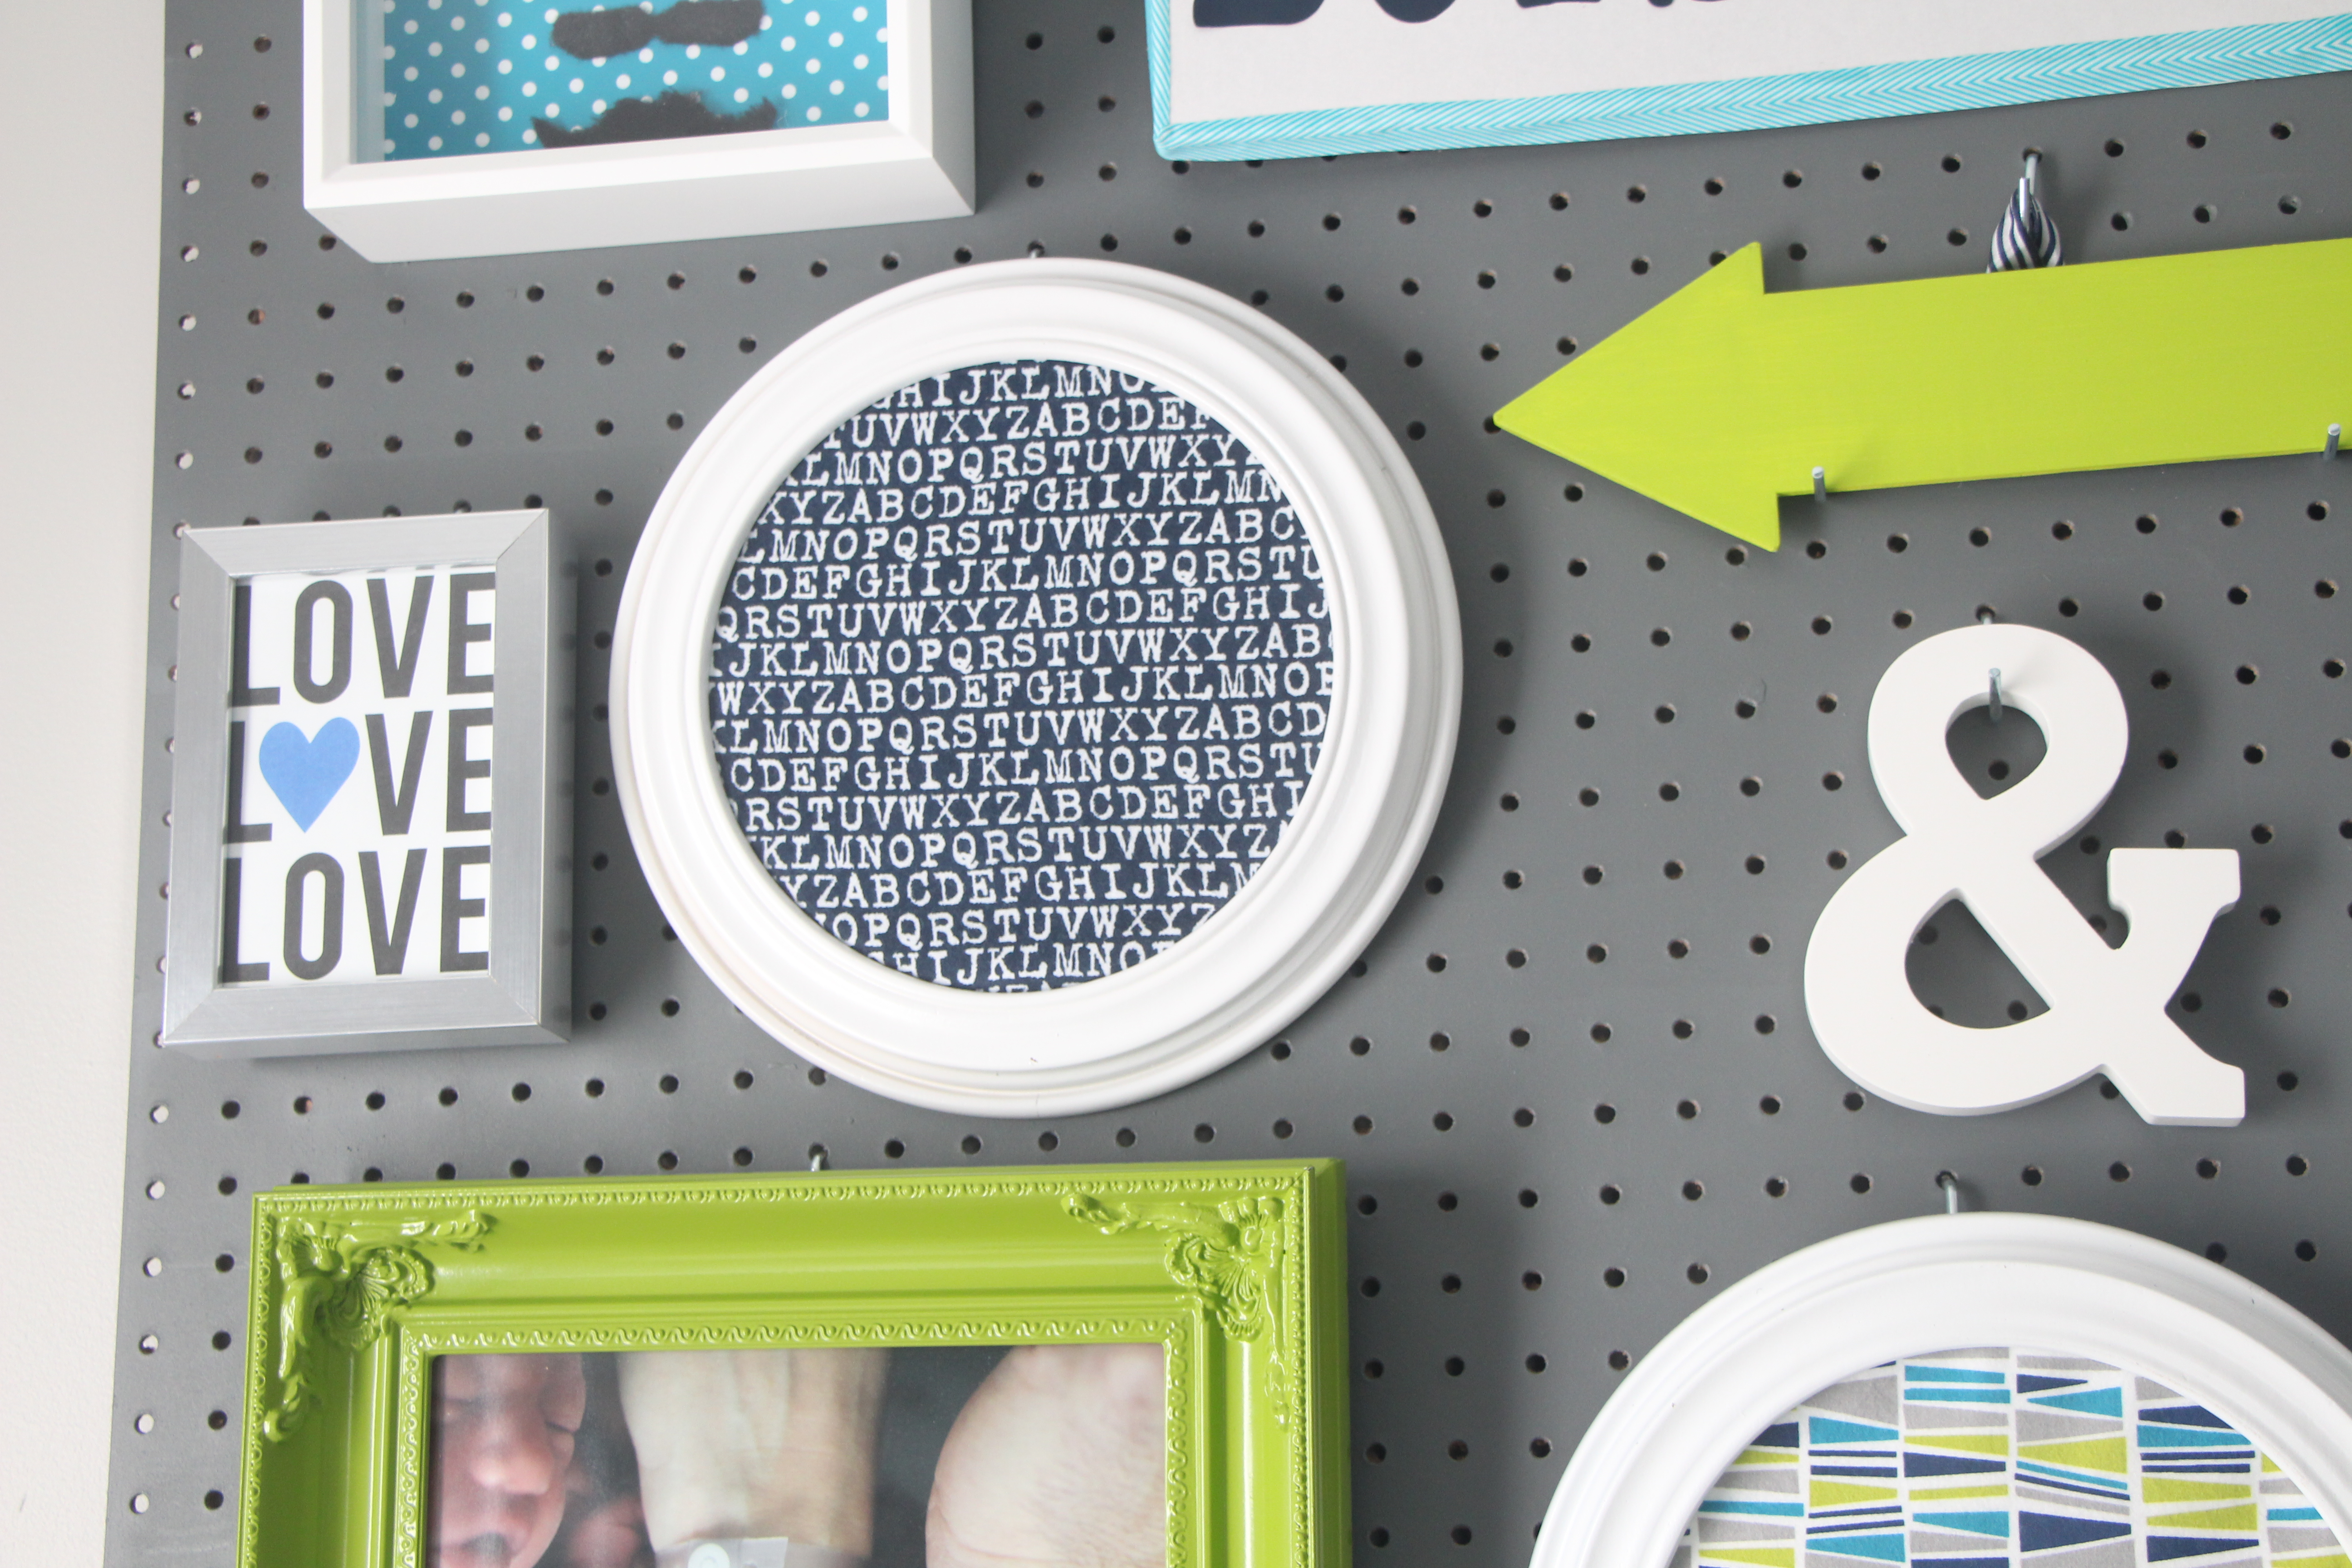
- Arrow (painted green) – Michaels
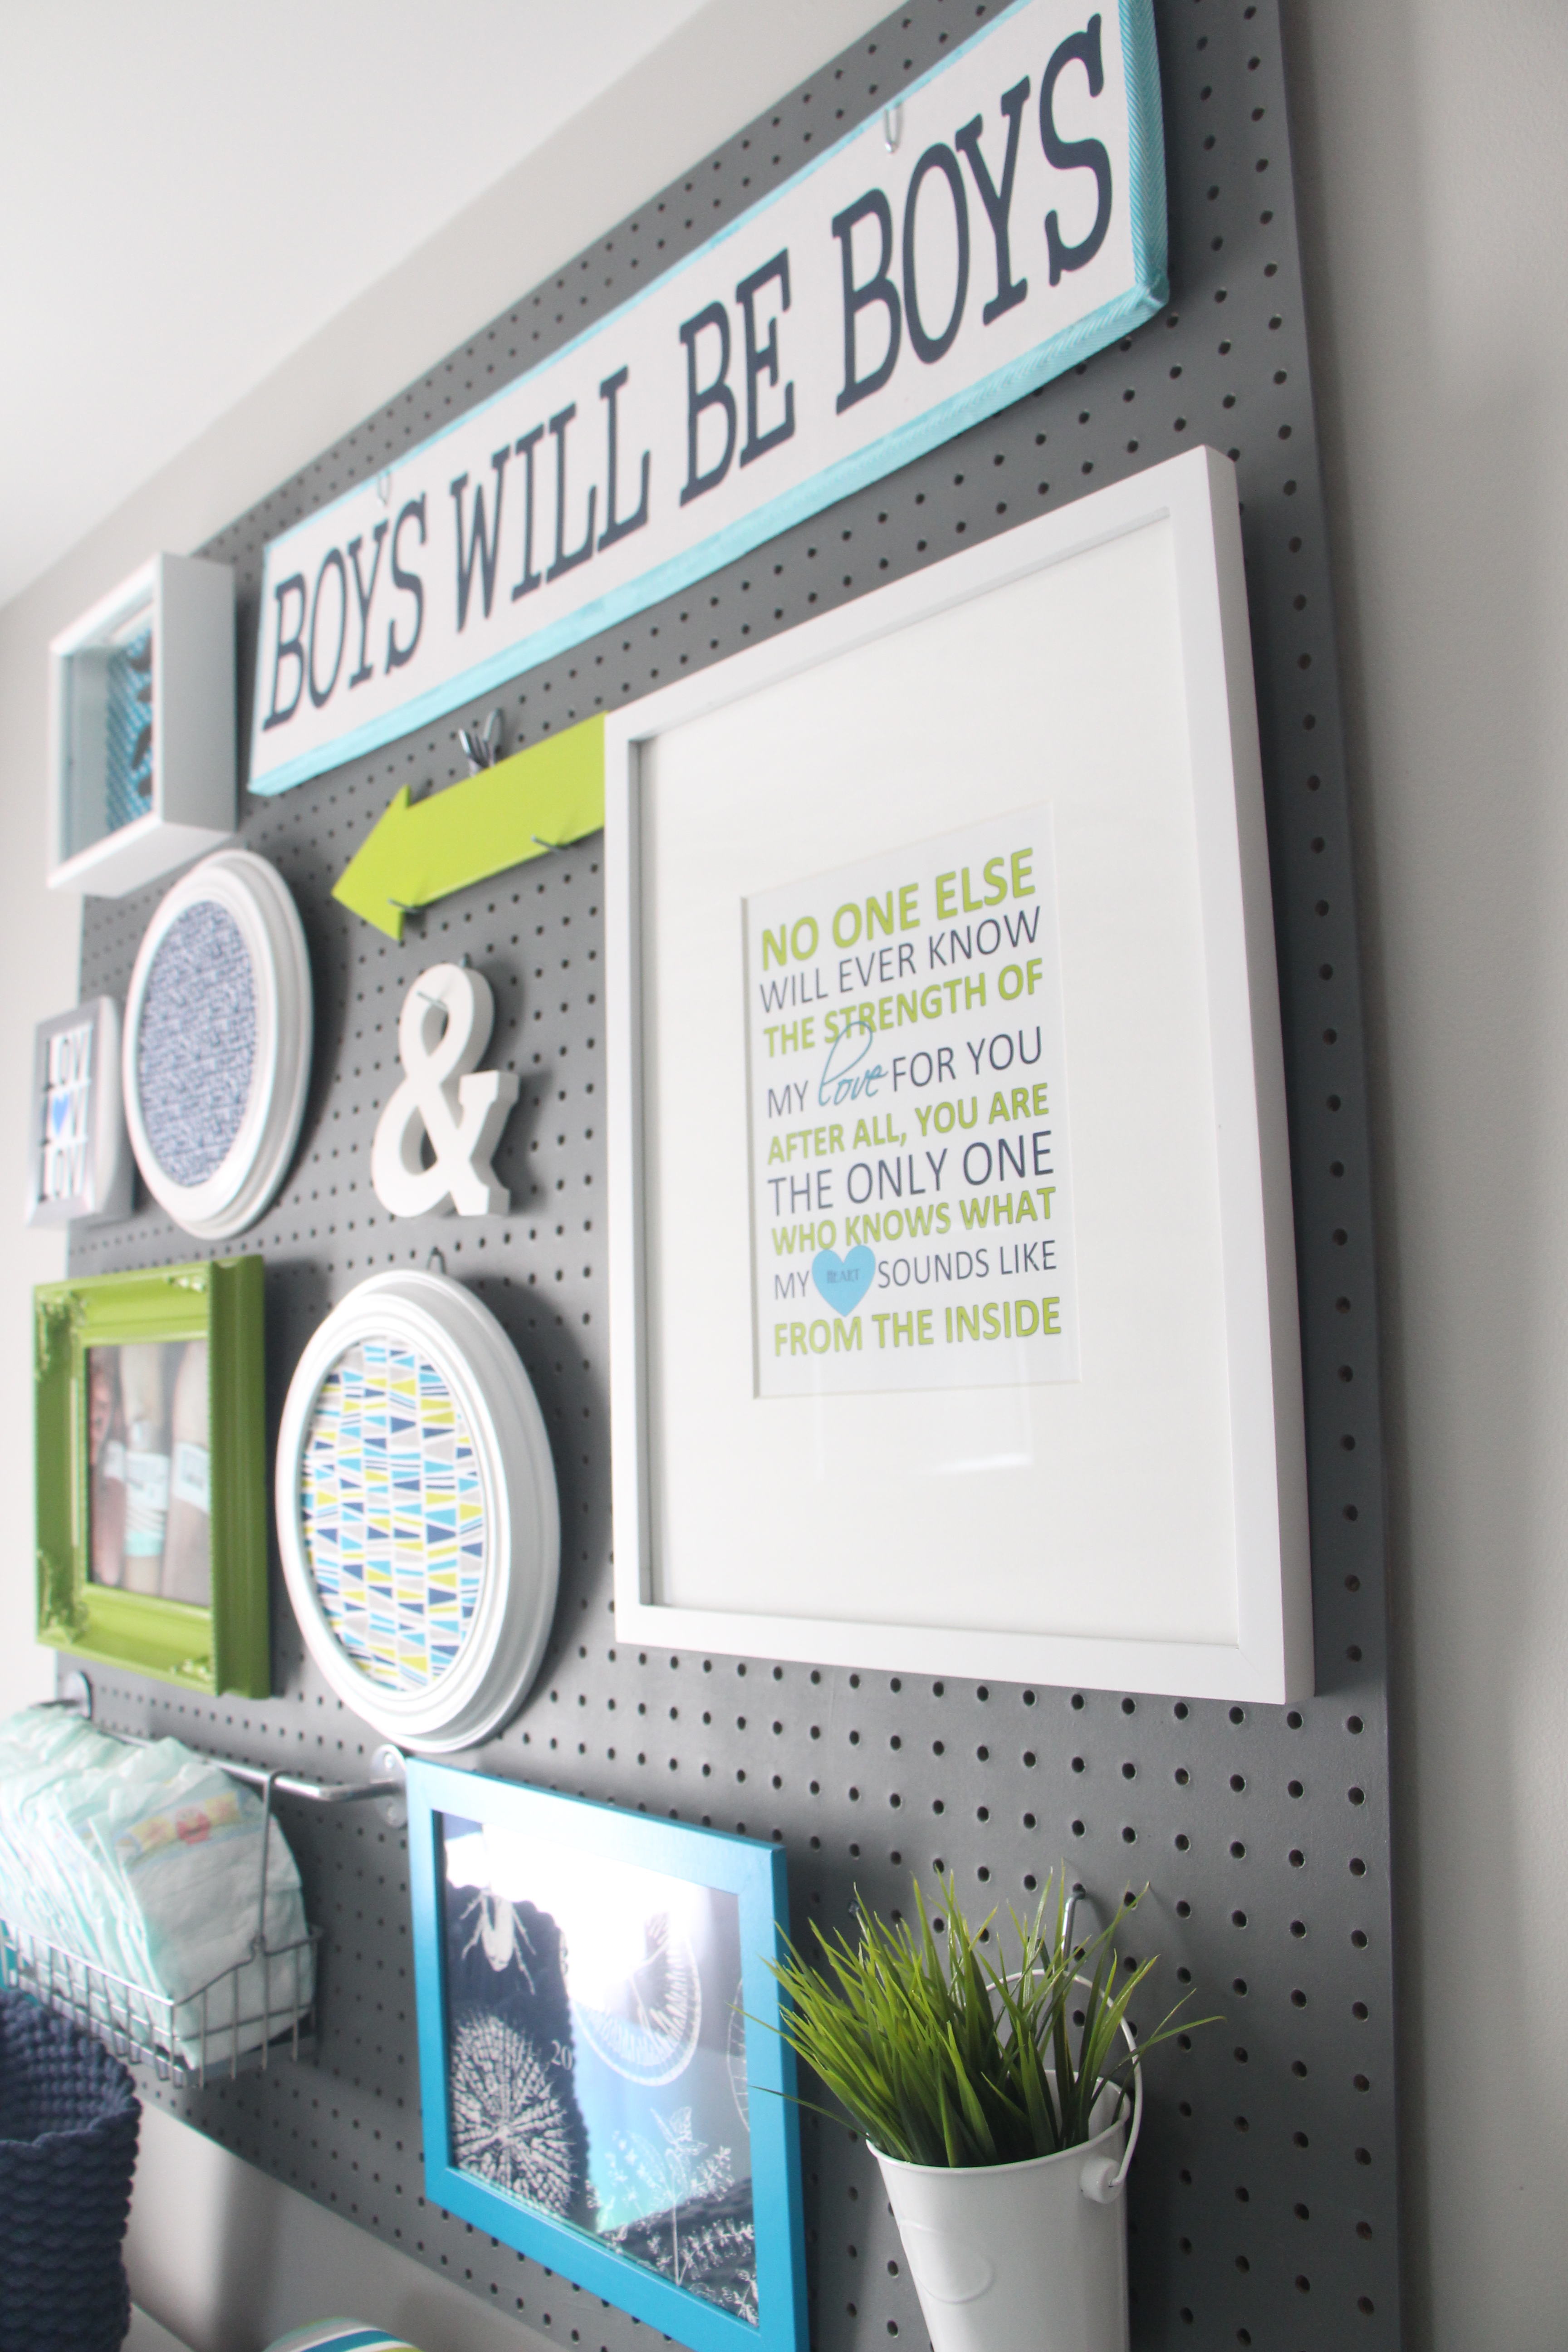
- Boys Will Be Boys sign – DIY Project
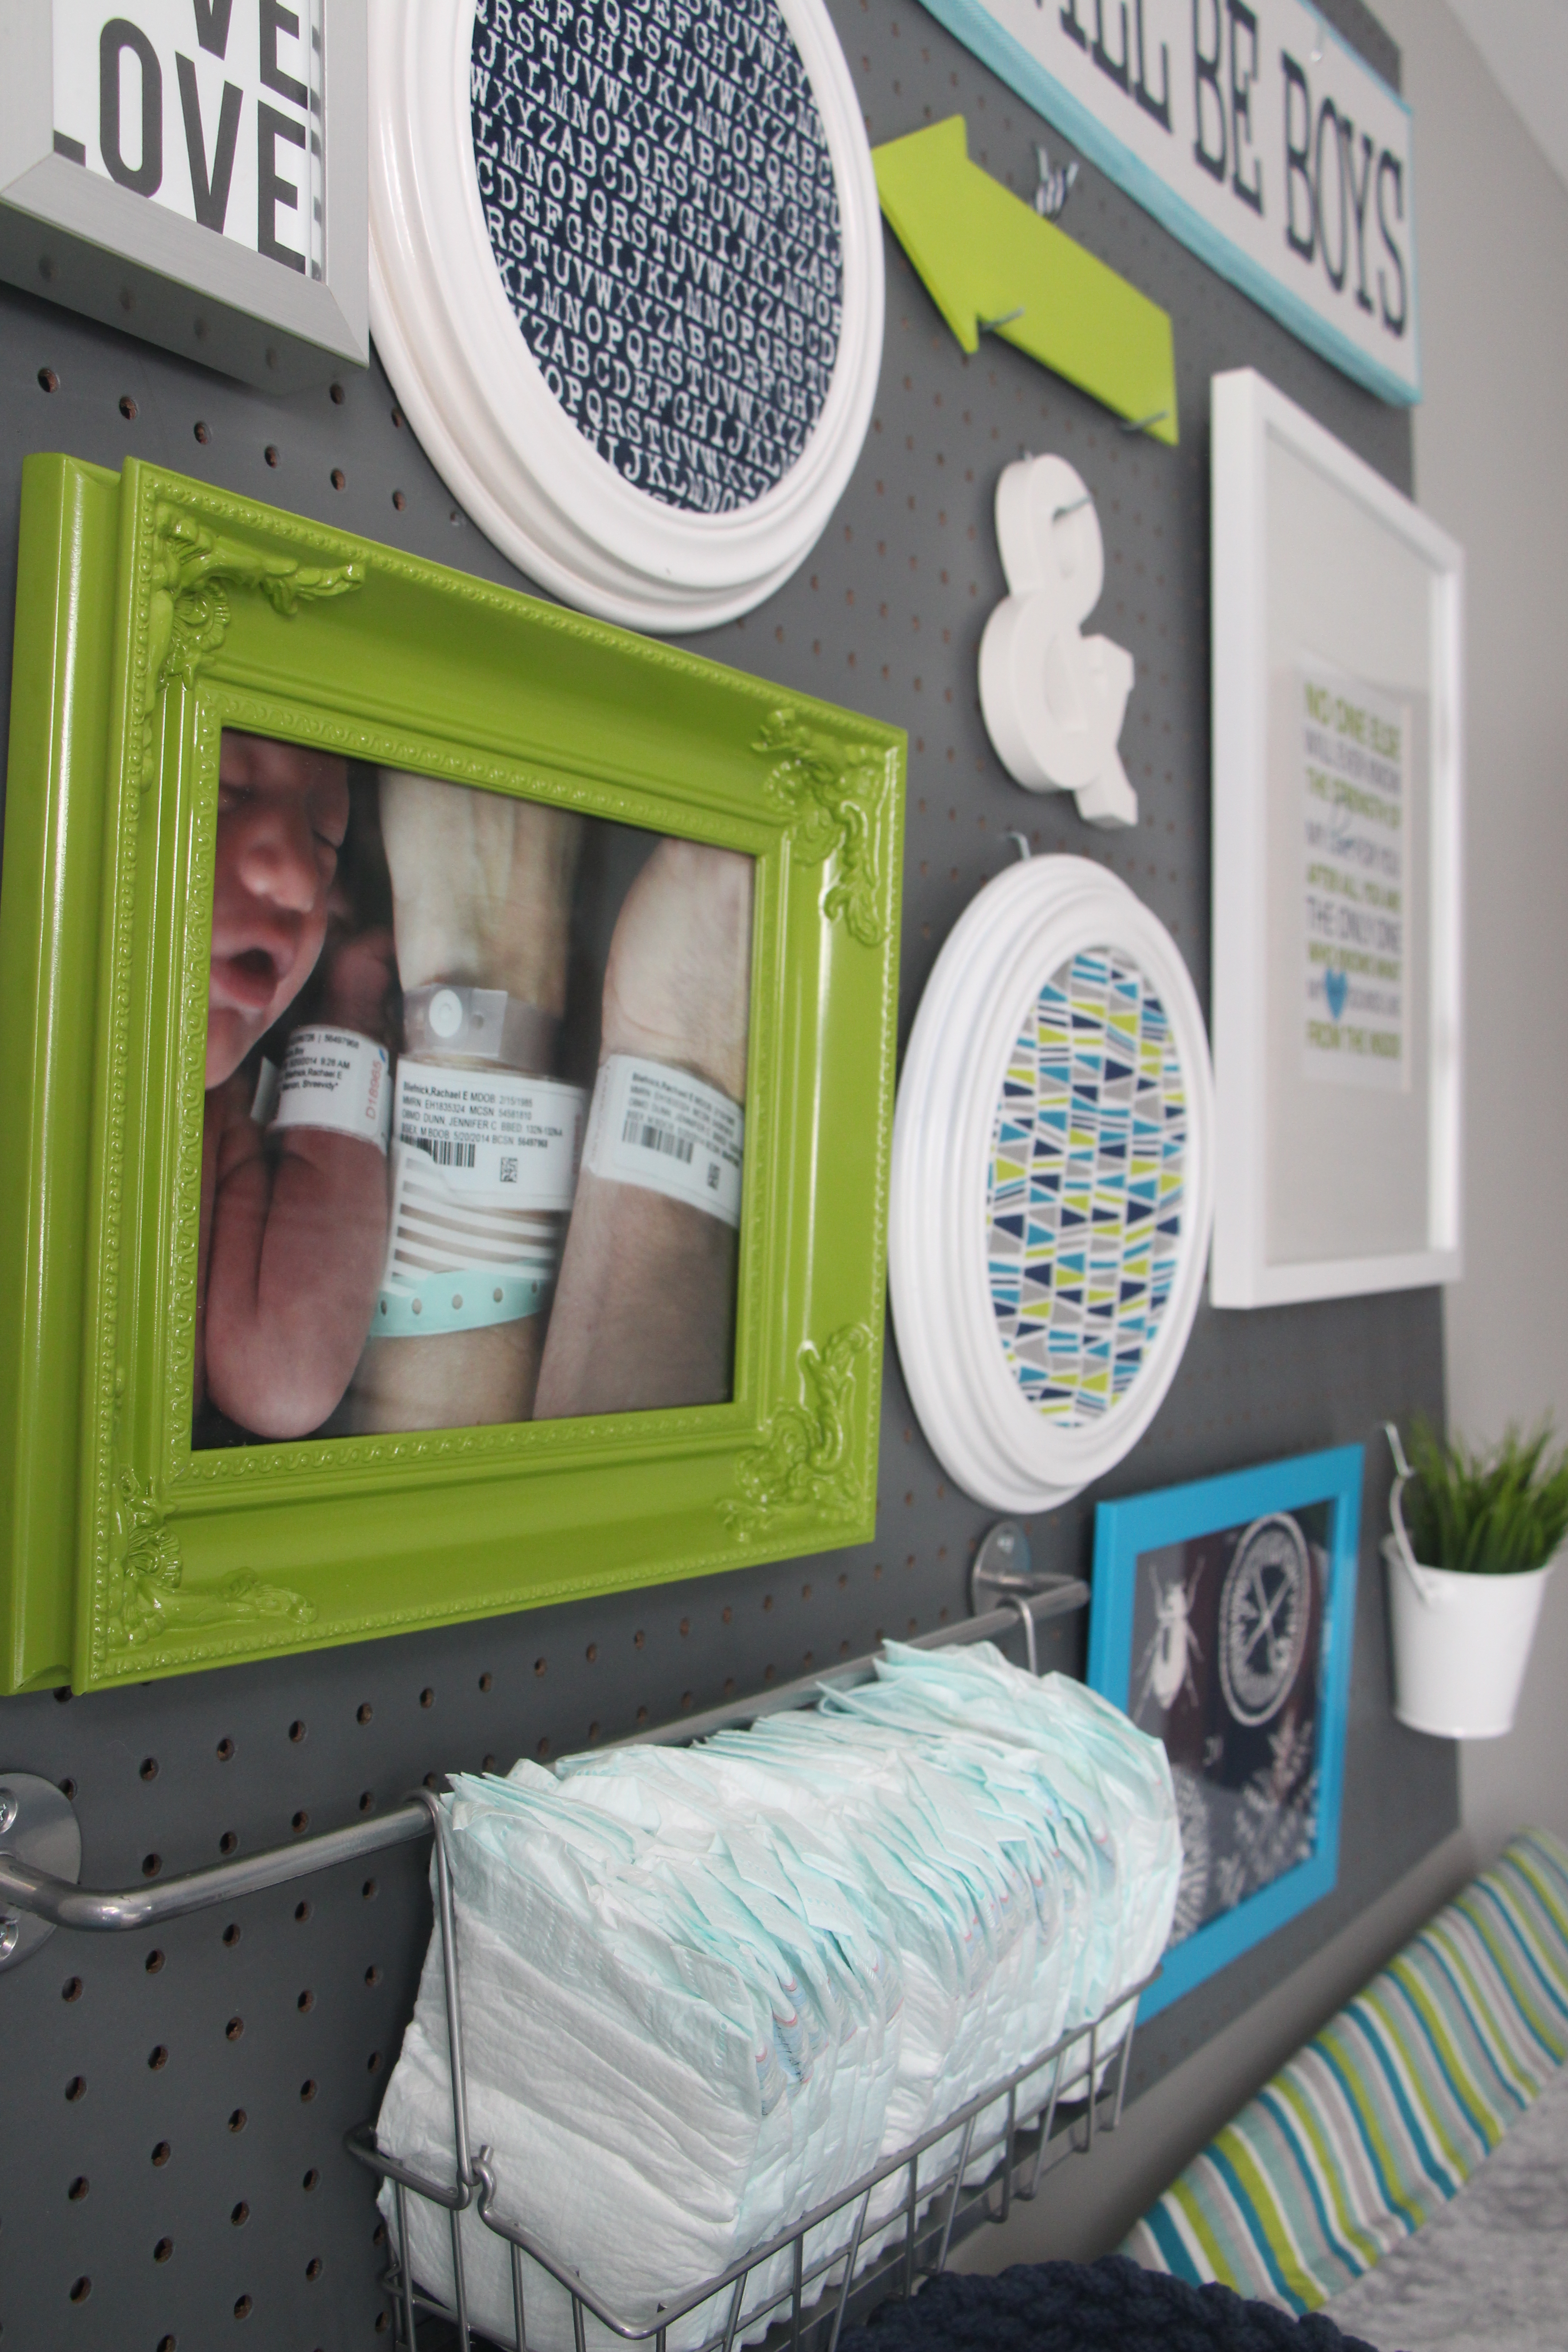
- White round frames ($3 plateholders from Goodwill spraypainted white with fabric secured over the plate & attached to the back)
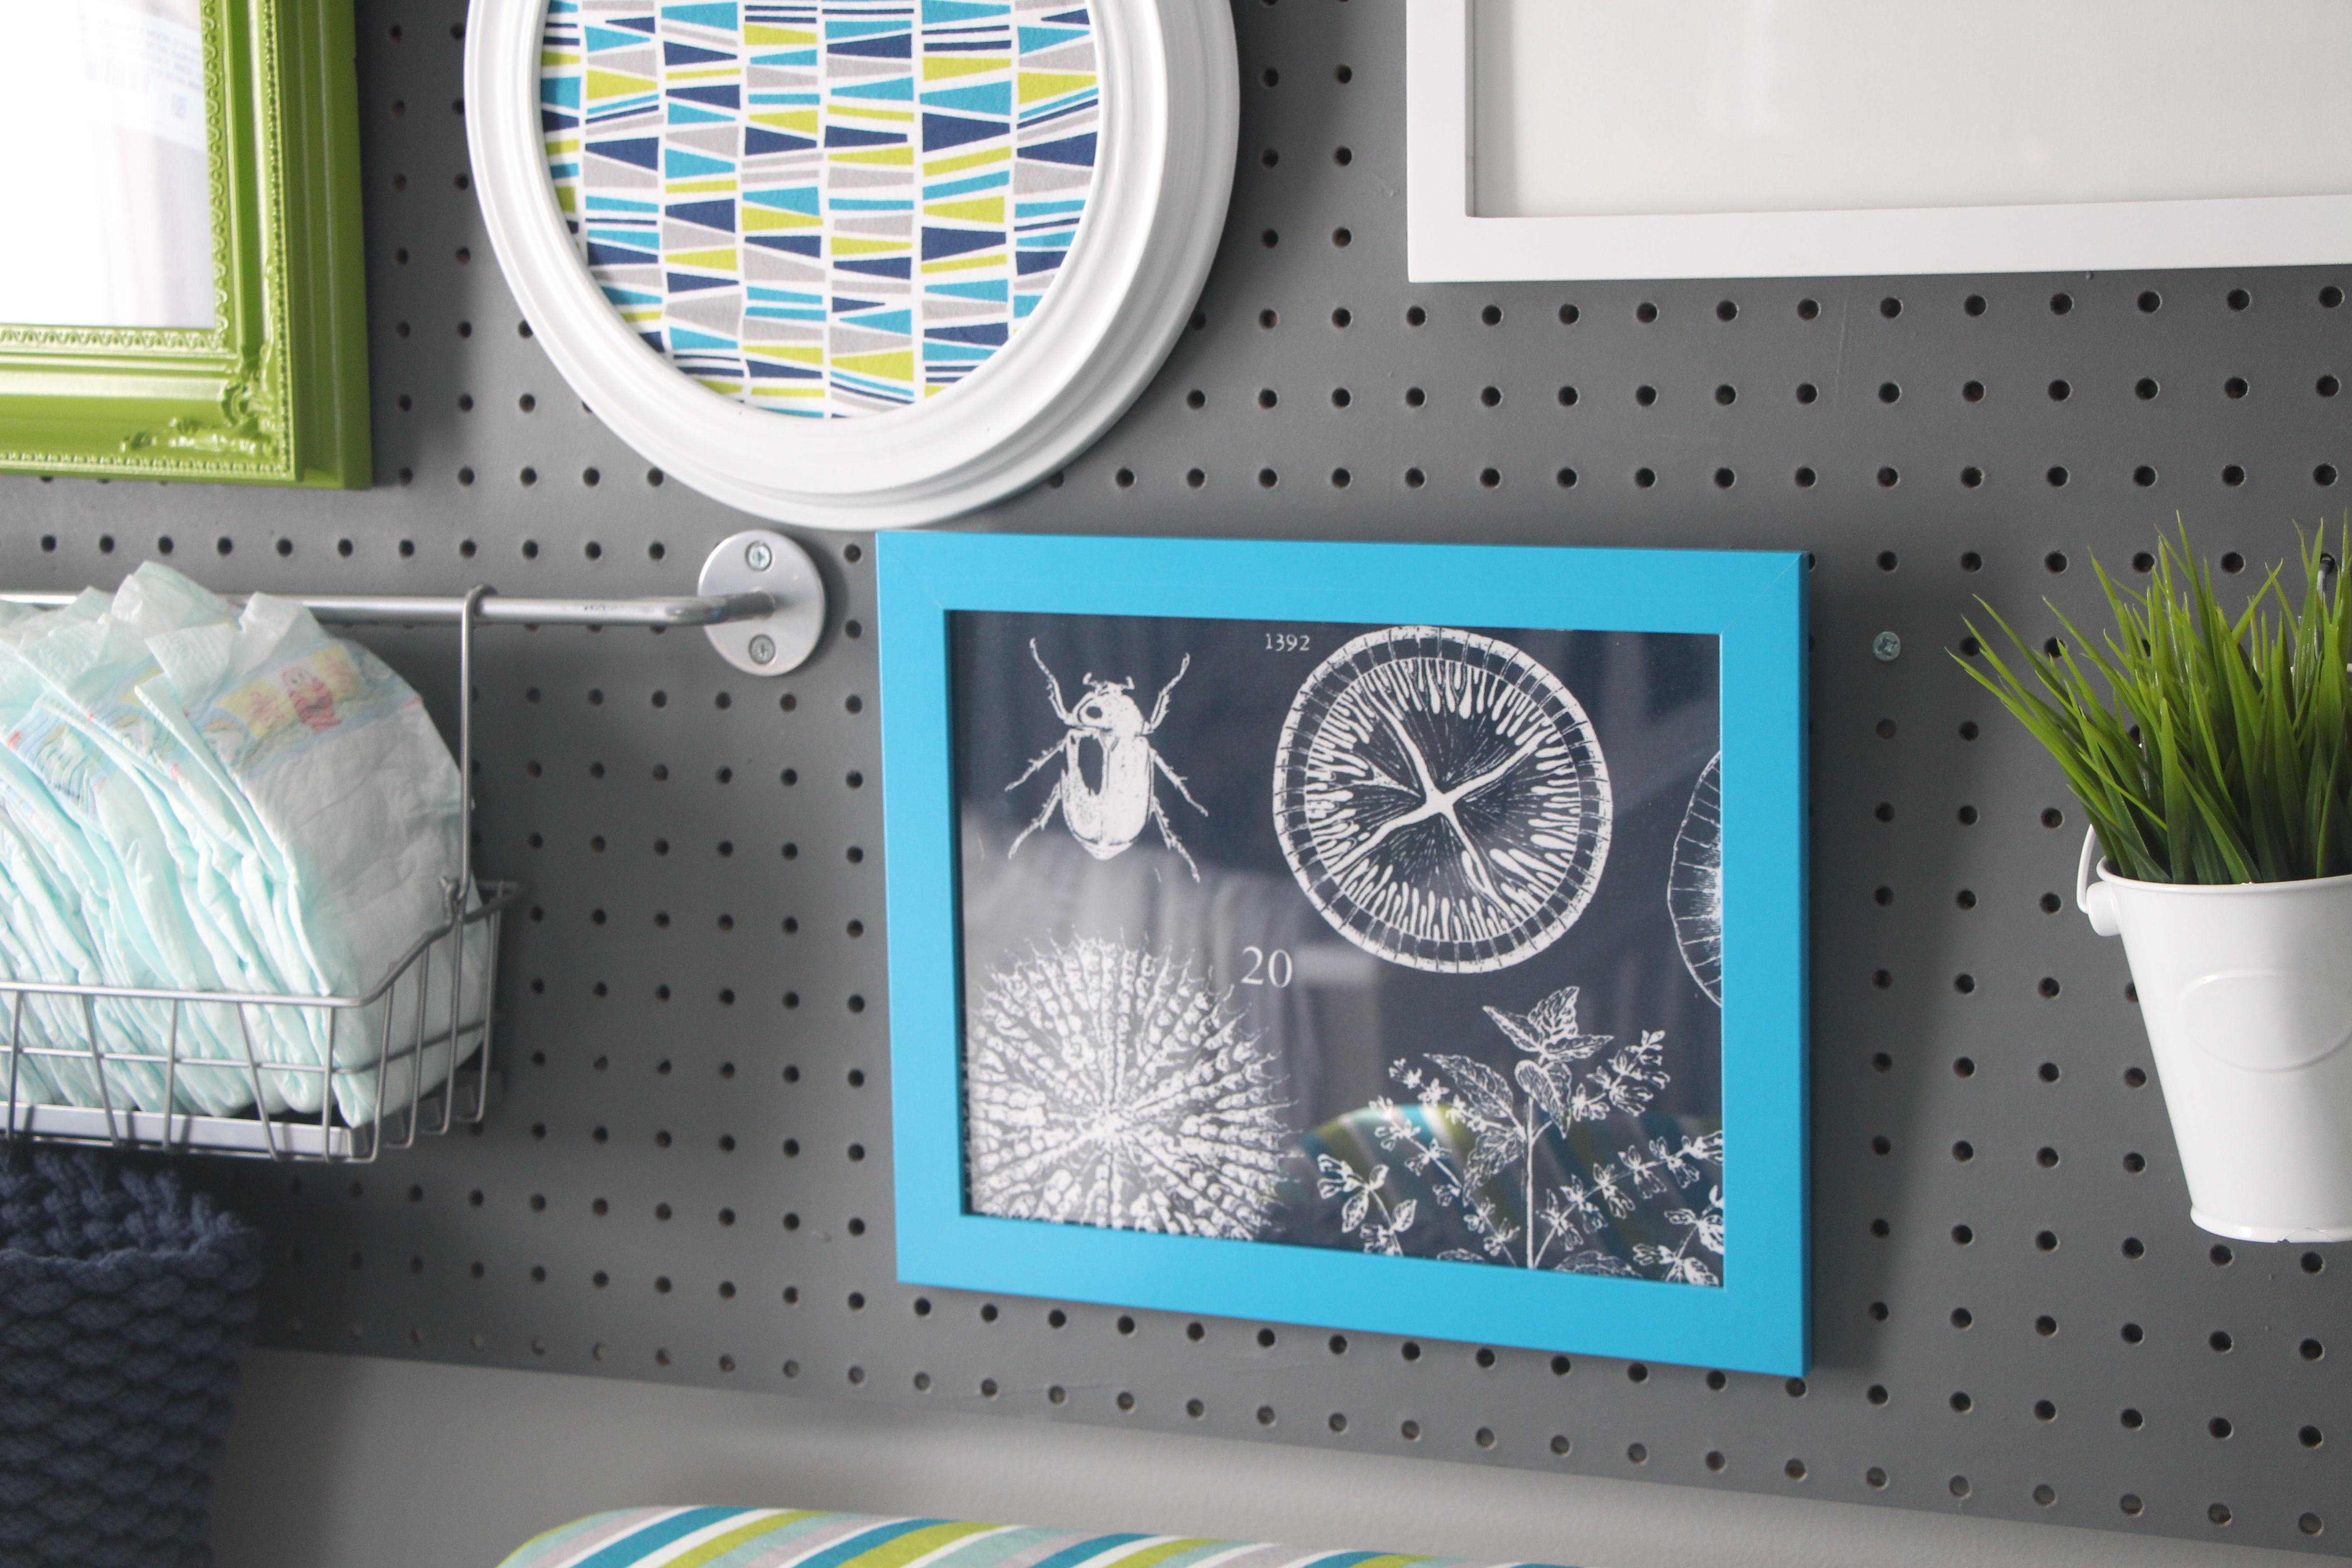
- Blue IKEA frame (navy IKEA fabric inserted into frame)
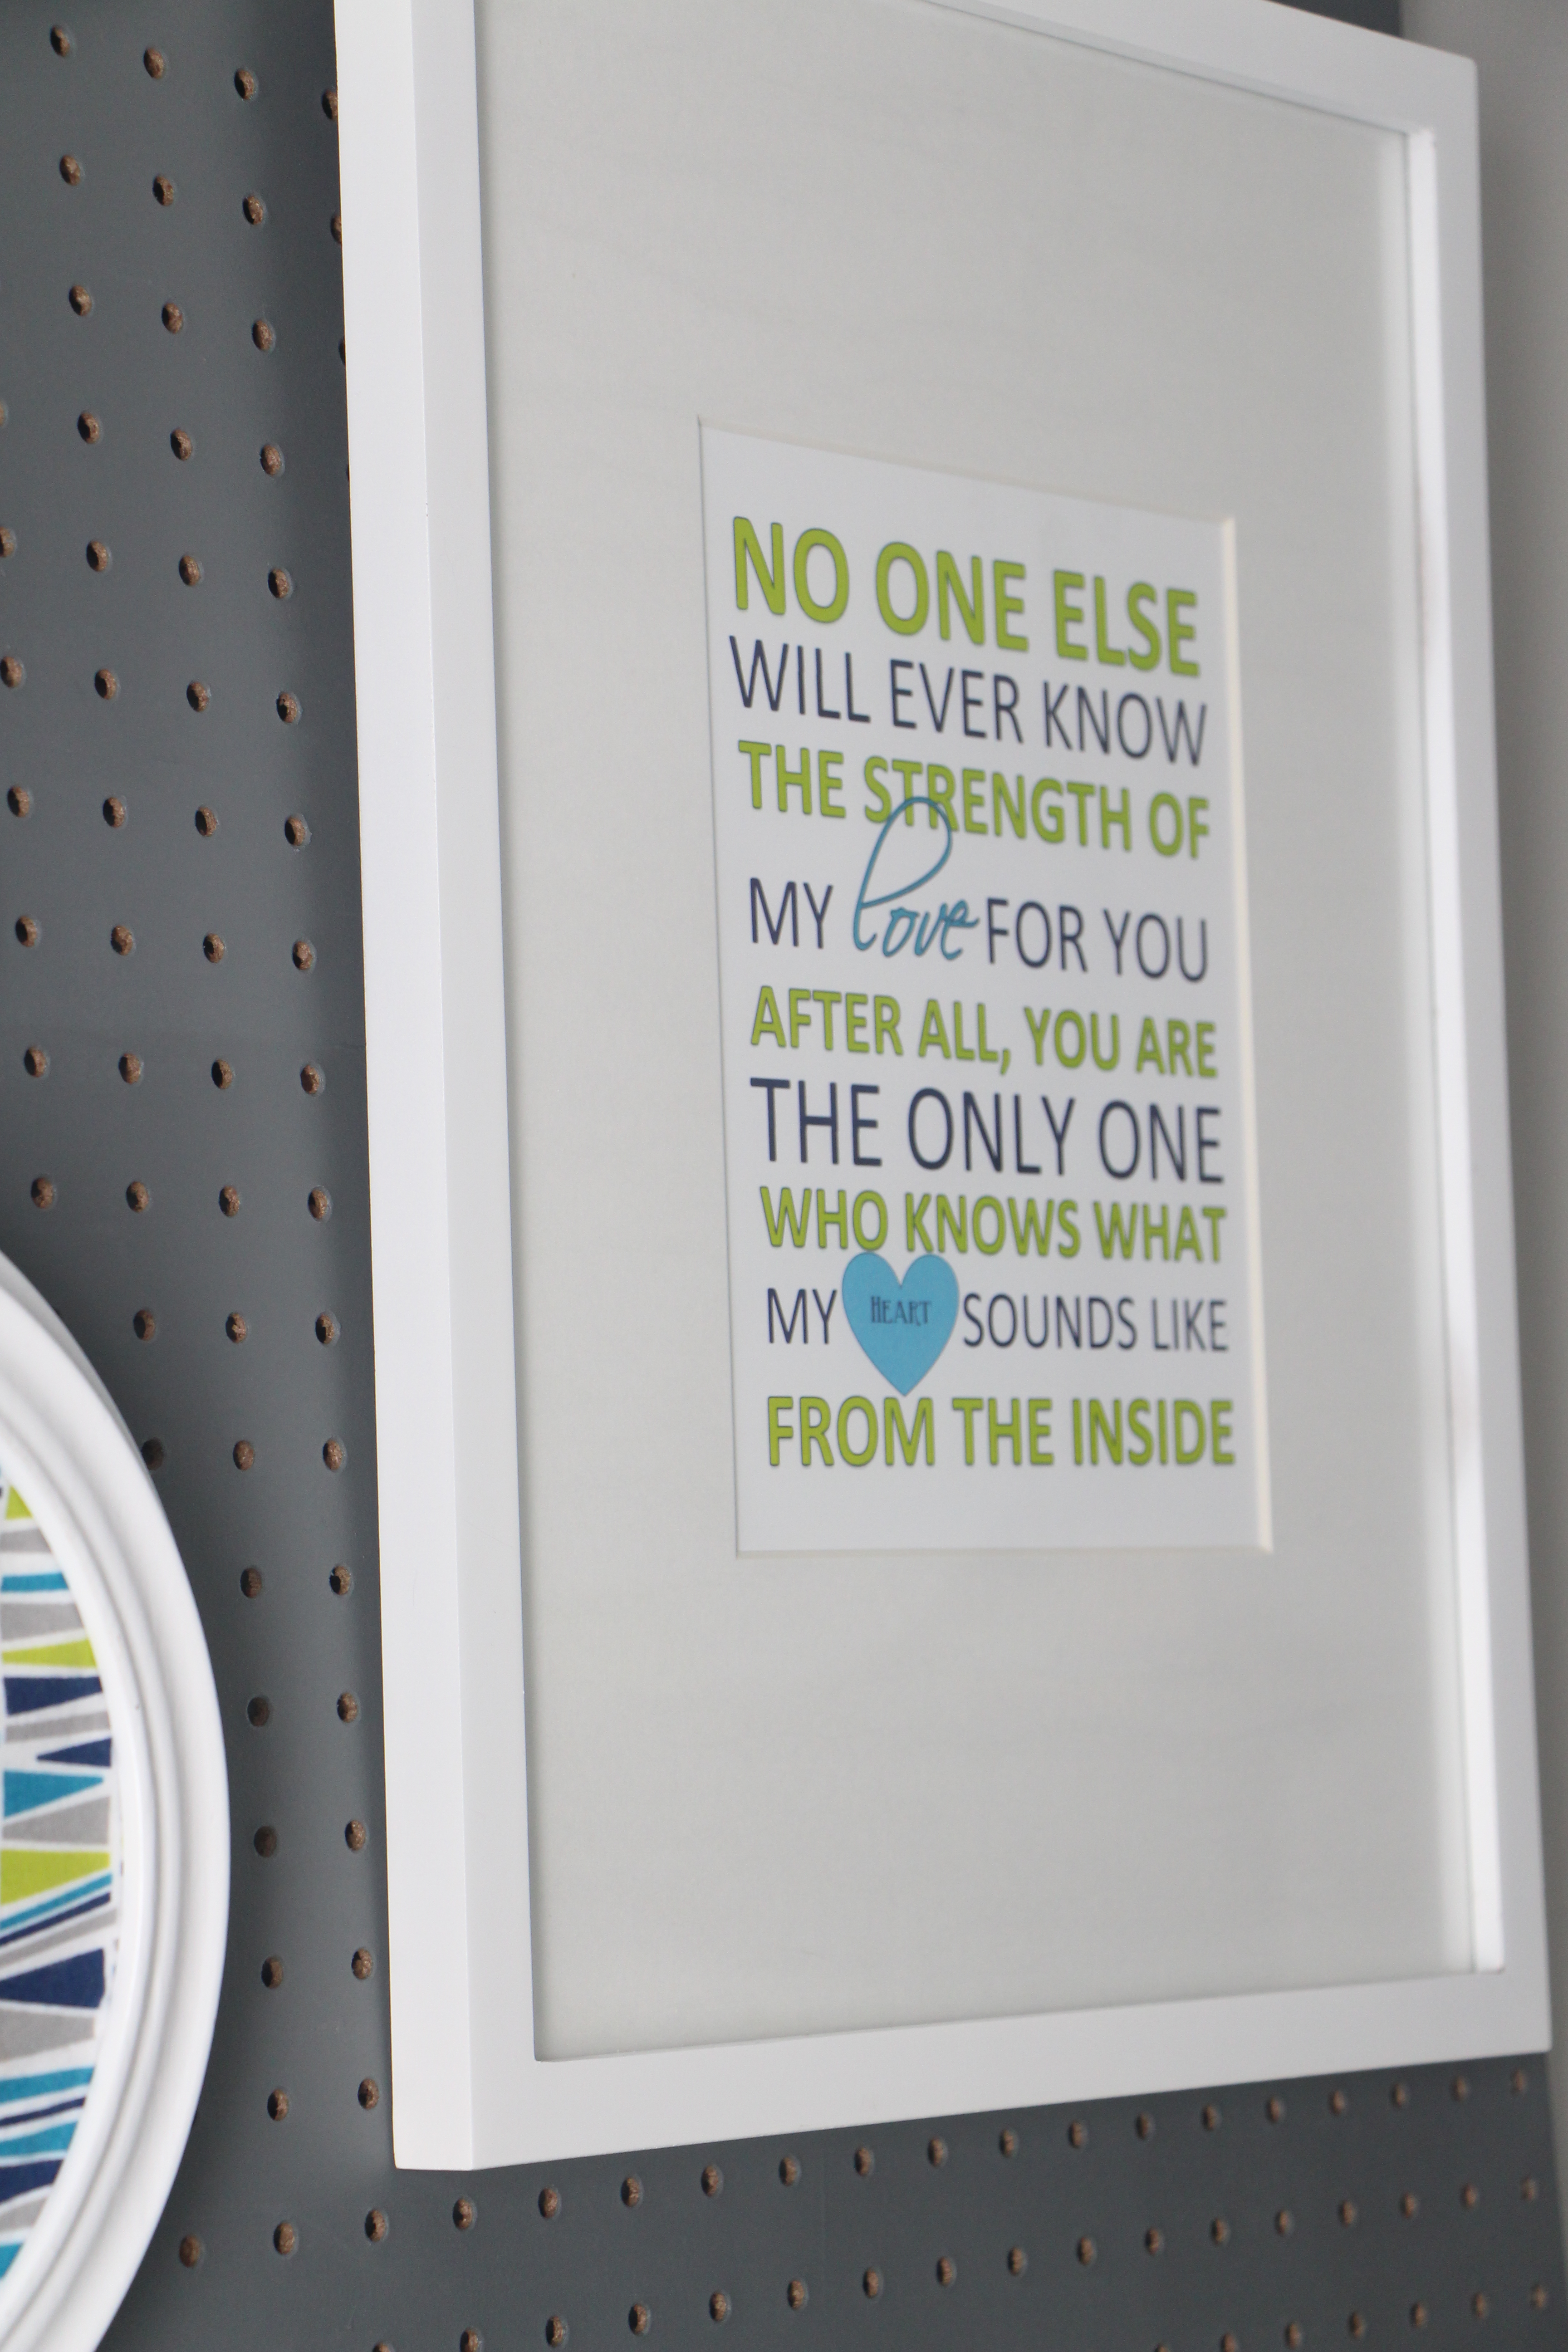
- “No one else will ever know the strength of my love…” Nursery Word Art – DIY Project – get it here!
- White wooden Ampersand – Hobby Lobby
- Wire hanging diaper basket & IKEA Bygel rail
- IKEA Artificial plant & white hanging bucket ($1 spot at Target) – similar here

- Mustache Shadow Box – Tutorial here
- Silver IKEA Ribba frame & “Love, Love, Love” art – part of a Baby greeting card set at Michaels
- All art & photos & frames hung with these Pegboard hooks
Please let me know if you have any questions or want more info on this project! I would love your comments and feedback so please leave me some love (or whatever you are feeling) on this post!
{Linking up at}


Thanks so much!

* Affiliate links were used in this post.


Top 10 Pegboard Organization Ideas - Pinned and Repinned
December 13, 2016 at 9:46 AM[…] Pegboard Gallery Wall by This is Our Bliss. Pegboard doubles as a decorative gallery wall and and diaper changing […]
Cracked Popcorn Ceilings and Plaster Walls #veryoldhouseproblems – Old Fashioned Modern Living
March 22, 2016 at 9:43 AM[…] That’s what we are up to now- the painting part. The tan will be an accent wall, and the white is going on the other walls. It’s a small room, so I did not want all of the walls to be dark. The other colors are being considered for the peg board diaper holder that we are building next! If you haven’t seen one before, check this out! […]
Creative uses for pegboards that will excite you - Craftionary
February 28, 2016 at 10:20 PM[…] Pegboard Gallery Wall […]
Nursery Update – Waiting for Our Little Peanut
February 16, 2016 at 6:07 PM[…] peg board I bought (saw different types of Pinterest but I loved this one the best) to go over the changing table that I bought some baskets and hooks to hang on […]
Tara
December 28, 2015 at 2:42 PMHey random question. I have this same dresser and was wanting to do a pegboard above as well. Was that peg board really 6ft X 6ft? If so that would be longer then the actual dresser (that would be 72 in long) because I believe that dresser is only 63 in. in length says ikea, mines sitting in a box yet to be put together by my husband haha so I’m just checking before I go out and by my pegboard. Thanks!
Rachael @ This is our Bliss
January 3, 2016 at 9:56 AMHi Tara! The pegboard is actually 4′ X 4′! I apologize for the mistake. I bought it that size (48″) and we hung it above the dresser without making any cuts to it. Hope that helps!! Thanks for reading & good luck 🙂
Katie
November 12, 2015 at 10:45 AMI was wondering where did you get your changing pad?
DIY Nursery Art: BOYS WILL BE BOYS sign | This is our Bliss
November 10, 2015 at 5:05 PM[…] The “BOYS WILL BE BOYS” sign on his pegboard gallery wall… […]
Think again Thursday #6 [5 alternative uses for cloth napkins] | This is our Bliss
October 29, 2015 at 11:25 AM[…] on the pegboard gallery wall in Simon’s nursery, I simply framed pieces of fabric (the navy & white alphabet and the […]
sarah
October 28, 2015 at 2:57 PMwow. i love your blog. i can’t believe i haven’t seen it before now. you are so talented
Rachael @ This is our Bliss
October 28, 2015 at 7:43 PMThank you, Sarah! That’s so incredibly sweet of you! I hope you’ll come back & visit again soon!
Krista
October 26, 2015 at 9:22 PMI used pegboard in my son’s room…working on making it look more like I dreamed (like this ) now my sister is do and using the same color scheme as your gorgeous nursery. …wondering where u got the multicolor block fabric in your white frame….she wants this or very similar to tie in all the colors, and I am having no luvk….where did you purchase this fabric?
Rachael @ This is our Bliss
November 11, 2015 at 8:45 PMKrista! I’m so sorry it took me this long to respond! Here is the link to a fabric source I found for you: https://www.fabric.com/buy/0291487/cozy-cotton-flannel-geo-marine
Good luck with the nurseries!! I would love to see photos of what you guys have done! Thanks so much -Rachael
Francesca
October 19, 2015 at 12:55 PMHello,
I really love this idea! It is super cute and creative. I am doing a variation of this board for my sons who share a room. I have questions about the pegboard hooks. Do you think it is important to the use the exact same pegboard hooks that you used? Or will any brand of hooks do? Also, I do not know how to use pegboard hooks. They all look very long and I am not sure how to safely secure the artwork to the board. I don’t want anything to fall off. Do you have any tips or suggestions?
Rachael @ This is our Bliss
October 26, 2015 at 4:37 PMHi Francesca! Thank you! You can absolutely use any brand of pegboard hooks you’d like. The key is to find a variety pack with different shaped and sized hooks. The shorter and smaller ones are good for hanging art because they don’t stick out very far from the pegboard. I guess it’s sort of hard to explain how to use pegboard hooks, but basically you insert the two prongs in the holes of the pegboard and then rest your hanging object on the part of the hook that sticks out from the board… Does That help at all?!!
Think again Thursday #5 [Journal cover art] | This is our Bliss
September 3, 2015 at 11:07 PM[…] just a greeting card. Inside of a small silver Ribba frame, it hangs proudly on a hook on Simon’s Nursery Pegboard Gallery Wall. I found it along with the one below in a set at Michaels last year. This is a shelf on the back […]
I Took the Plunge | New Etsy Shop Adventure | This is our Bliss
August 21, 2015 at 5:11 PM[…] back to last year, I initially created the piece for Simon’s Nursery as a focal point on his pegboard gallery wall. It was just one of those sayings, that I would see and read and get choked up over! I actually […]
>>> Simon’s Nursery Reveal<<< | This is our Bliss
August 21, 2015 at 1:43 PM[…] Pegboard Gallery Wall – more info here | full tutorial here […]
Creative Ways to Get Organized with Pegboard StorageThe Creativity Exchange
June 29, 2015 at 4:16 AM[…] This is our bliss created an adorable (and super functional) storage wall for her son’s nursery: […]
How to Thrift Picture Frames [tips for knowing you’ve found a gem] | This is our Bliss
June 24, 2015 at 11:32 PM[…] you can see the 2 round frames on Simon’s pegboard gallery wall in his nursery. They actually started as wooden plate holders (similar to the one above, but […]
Robyn
April 21, 2015 at 7:20 PMLove this! What size is the finished peg board? I know you bought a 6′ x 6′ piece but what did you cut it down to?
Rachael @ This is our Bliss
April 21, 2015 at 9:36 PMhello! We actually didn’t cut it down at all… We left it 6 x 6!
Nursery Closet Details: Part I [DIY shelves + drawers + rods] | This is our Bliss
March 3, 2015 at 2:45 PM[…] on one year since I revealed Simon’s Nursery, it is still by far, the main attraction. The Pegboard Gallery wall and the nursery closet have created most of the buzz, thanks to Pinterest and a feature at IHeart […]
Linen Closet Makeover Reveal | This is our Bliss
February 5, 2015 at 9:38 PM[…] day yesterday was! If you missed it, hop on over to IHeart Organizing where the little man’s pegboard gallery wall & nursery closet were featured. I am still on cloud 9. Thanks again, […]
Reader Space: Sweet Baby Storage | Rosalie Rodney
February 5, 2015 at 10:37 AM[…] entire pegboard wall was one big DIY project, along with many other aspects of the room. The pegboard was my little playground for designing […]
This is our Bliss @ IHeart Organizing | This is our Bliss
February 4, 2015 at 3:39 PM[…] DIY Silver Dinosaurs DIY Curtains from bedsheets A to Z Bookends DIY Lampshade Nursery Mobile Pegboard Gallery Wall Free Nursery Word Art Printable Mustache Shadowbox “S” Marquee Nursery Closet […]
2014 Highlights | This is our Bliss
January 9, 2015 at 4:01 PM[…] Simon’s Nursery Reveal |2| How to: DIY Ribbon Back-tab Curtains from Bed Sheets |3| DIY Nursery Project: Pegboard Gallery Wall |4| Paint & Fabric Choices (for the nursery) |5| Nursery Closet […]
WOW, Pinners! Thank you! | This is our Bliss
November 10, 2014 at 5:36 PM[…] just hit 1,000 repins over the weekend. When I wrote the pegboard post, I was excited to be nearing 100. So incredible! […]
Gallery Wall Love. | This is our Bliss
October 6, 2014 at 1:37 PM[…] Pegboard Gallery wall […]
Do What Makes You Oh So Happy | This is our Bliss
September 24, 2014 at 3:46 PM[…] Reveal, showcasing several design and diy elements, has started to gain some attention. The Pegboard Gallery wall has grown a bit of buzz on Pinterest and was featured here. And just this Monday, the room was […]
Hit Me with Your Best Shot #36 - Just a Girl and Her Blog
September 16, 2014 at 6:01 PM[…] wow adorable is this peg board gallery wall by This Is Our Bliss?! Lucky, lucky baby […]
FREE Nursery Word Art Printable! | This is our Bliss
September 3, 2014 at 9:08 PM[…] ← Nursery Project: Pegboard Gallery Wall […]
Liz
August 29, 2014 at 1:04 PMLove your decorating style!
rbliefnick
August 29, 2014 at 5:41 PMThanks, Liz! I appreciate you stopping by to read! Please come back again!! ~ Rachael
Lynn
August 27, 2014 at 3:22 PMRachael. I love to see your creativity on this blog! You do an awesome job with this. Love design, colors, organization with each one. Keep posting …Love it!! Lynn
rbliefnick
August 27, 2014 at 3:37 PMThank you, Lynn! I really appreciate you reading & taking the time to comment! I’m having a lot of fun with it so far 🙂