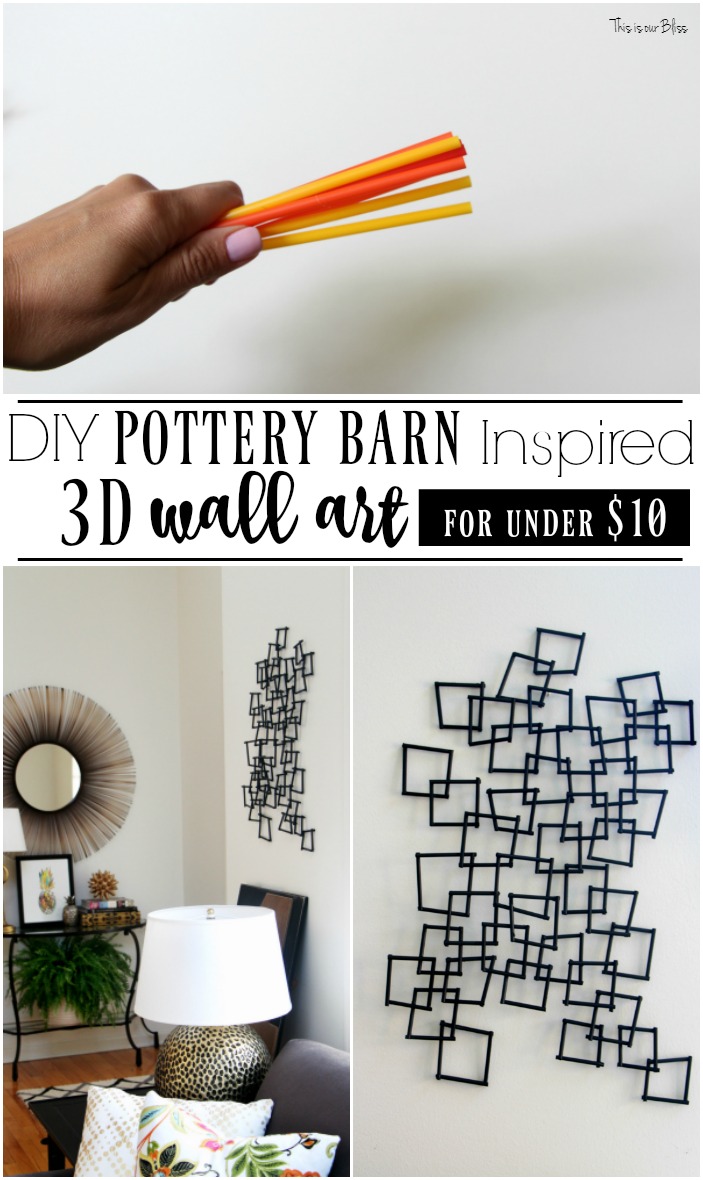
Hi there! It feels so amazing to be able to jump back into our monthly Inspired by DIY challenge each 3rd Thursday of the month after sitting out from last month’s Urban Outfitters challenge. For this month’s Pottery Barn Inspired Challenge, I create this Pottery Barn Knock-off 3D Wall Art.
If you haven’t been by the blog since since May’s Eddie Ross challenge, then I can tell you a lot has happened! I announced the move, then we actually did it and now I’m working to turn the once empty house into a home. If you’re anything like me, the standard picture frame or framed piece of art, can feel overused in a space, so I’m always looking for new and different types of things to hang on the wall.
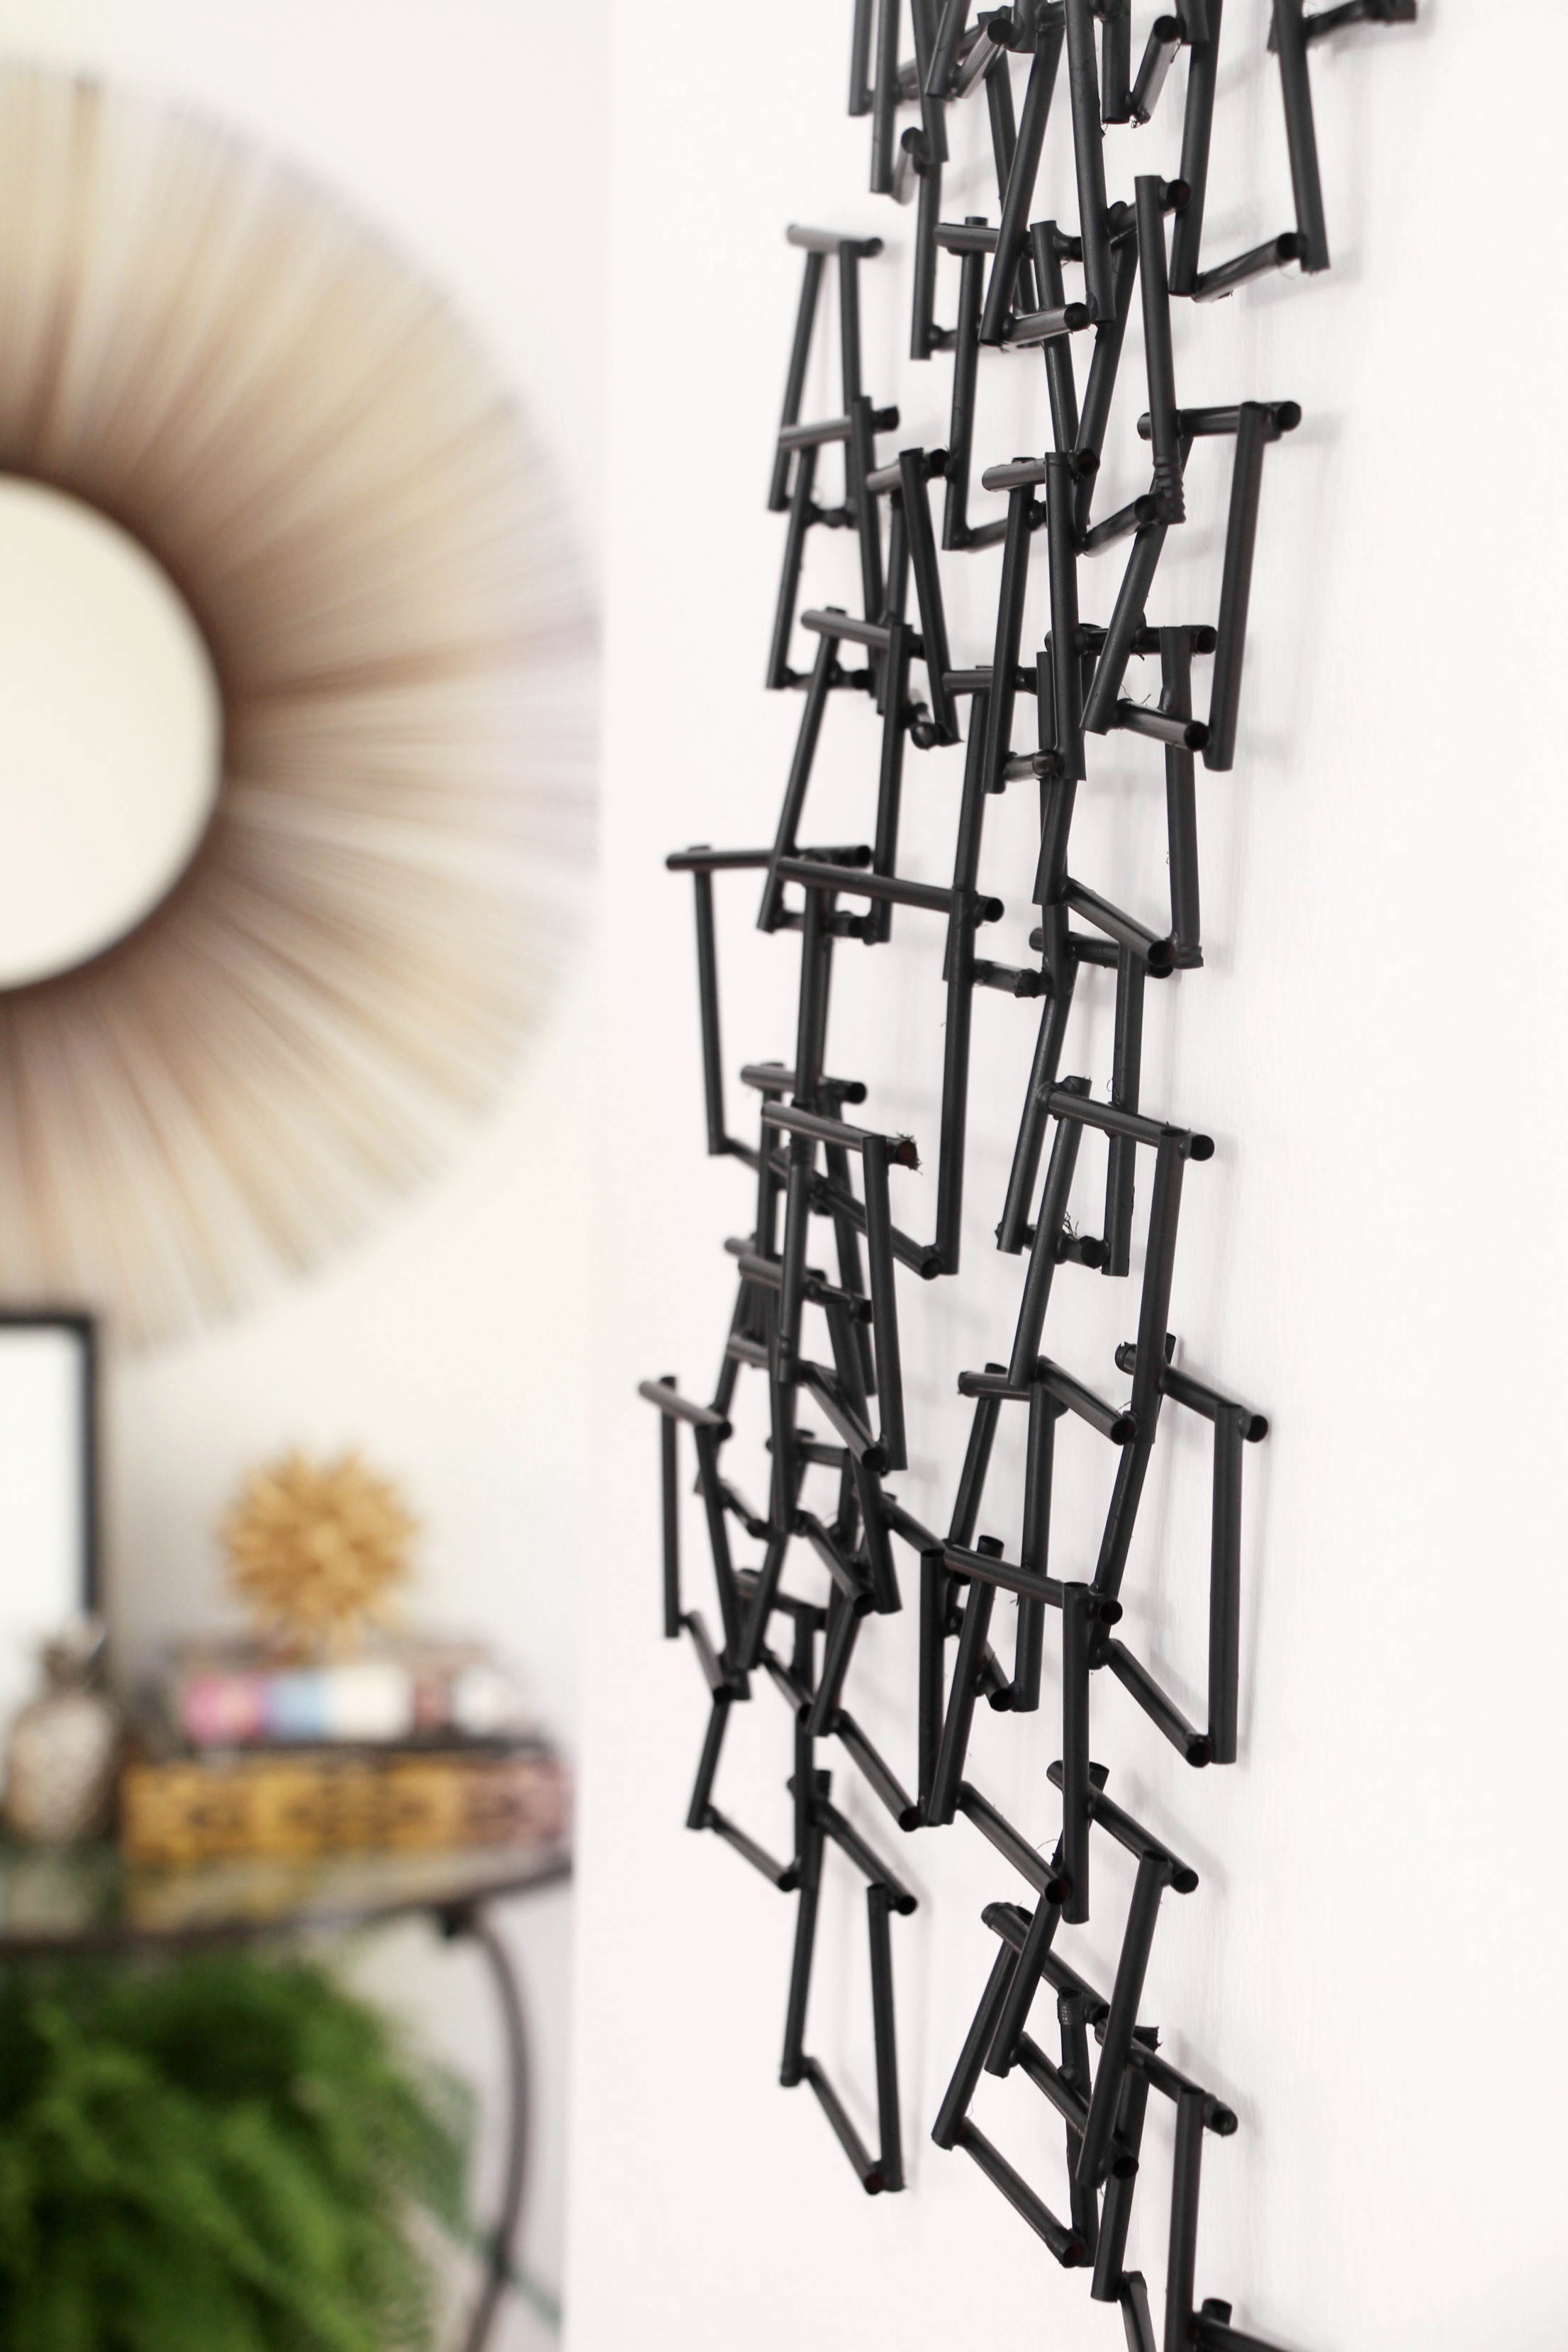
Don’t get me wrong, I still love a gallery wall, but when I spotted this Forged Metal Sculpture, an idea for a DIY popped into my head. So, I went at it!
I DIY’d my own version of Pottery Barn’s piece at a fraction of the cost. In comparison, it’s actually like pennies!
Today, I’m going to show you how I created my own 3D wall art inspired by Pottery Barn…and you can do it too, for less than $10! Mine was practically free because I had everything on hand already. Love it when that happens.
POTTERY BARN INSPIRED 3D WALL ART SUPPLIES:
[*Affiliate links are used below.]
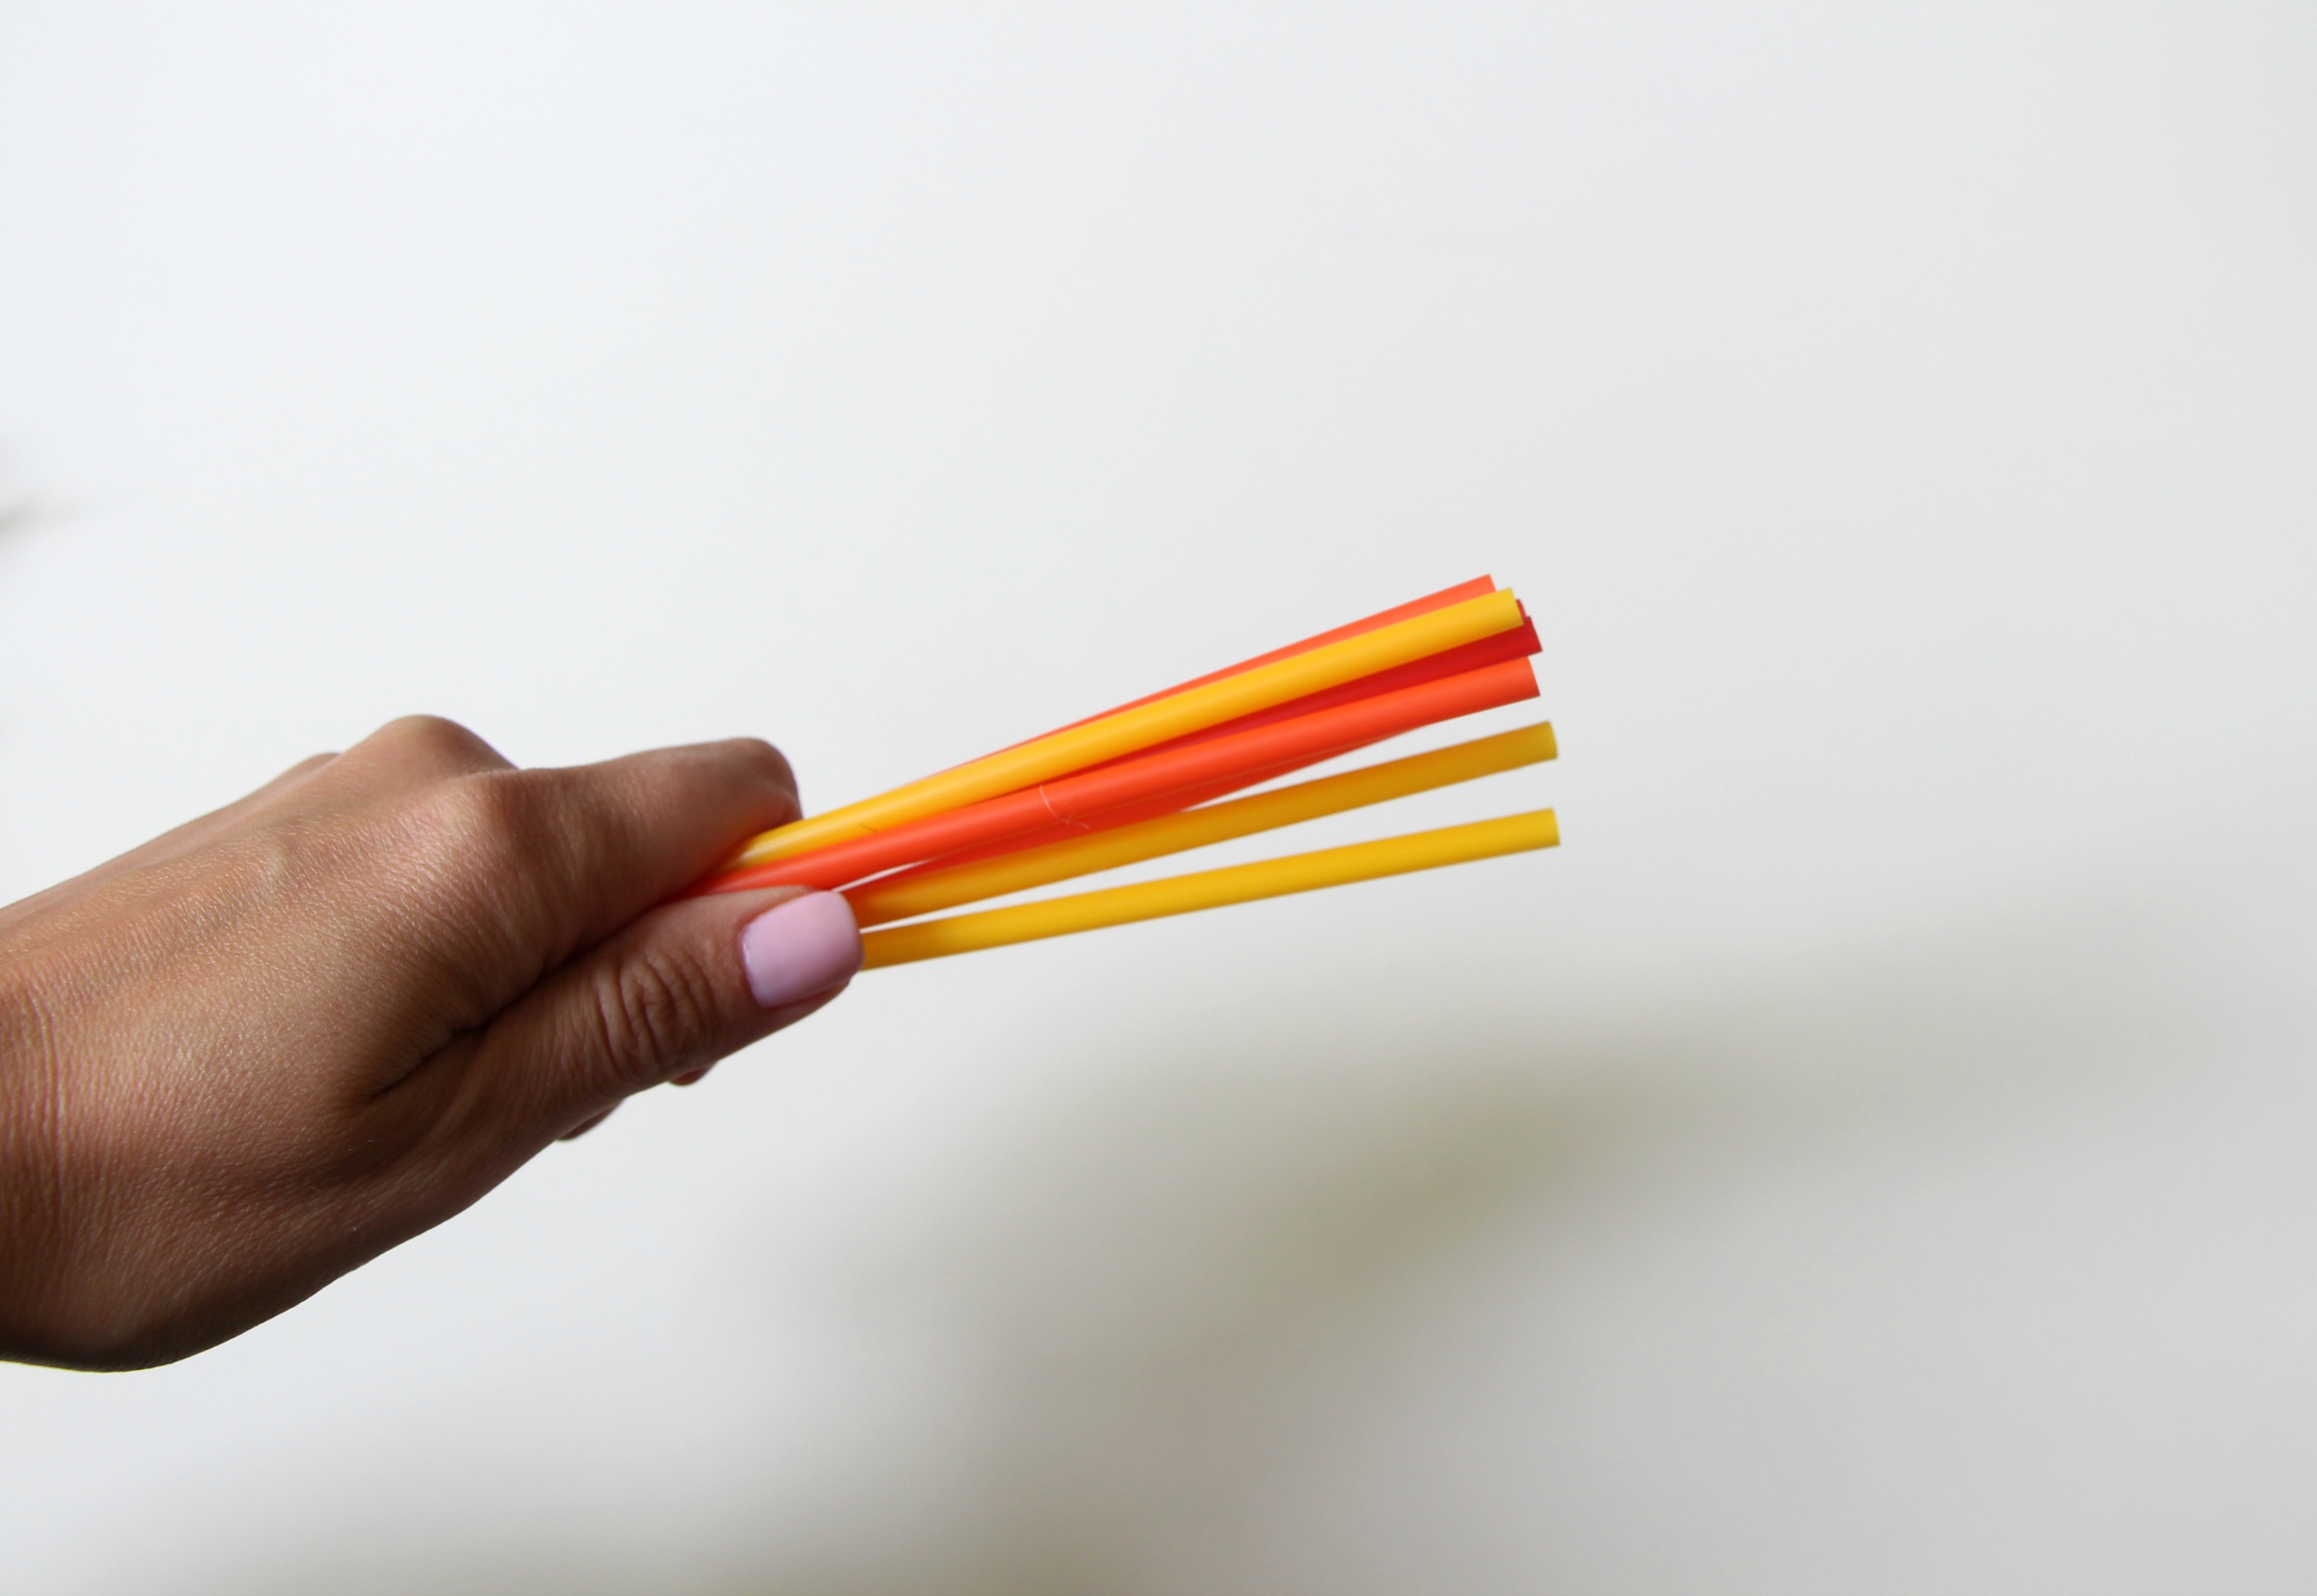
- drinking straws [any length or width work work. I actually used something similar to this, but these straws might be fantastic because there’s no bendy part!]
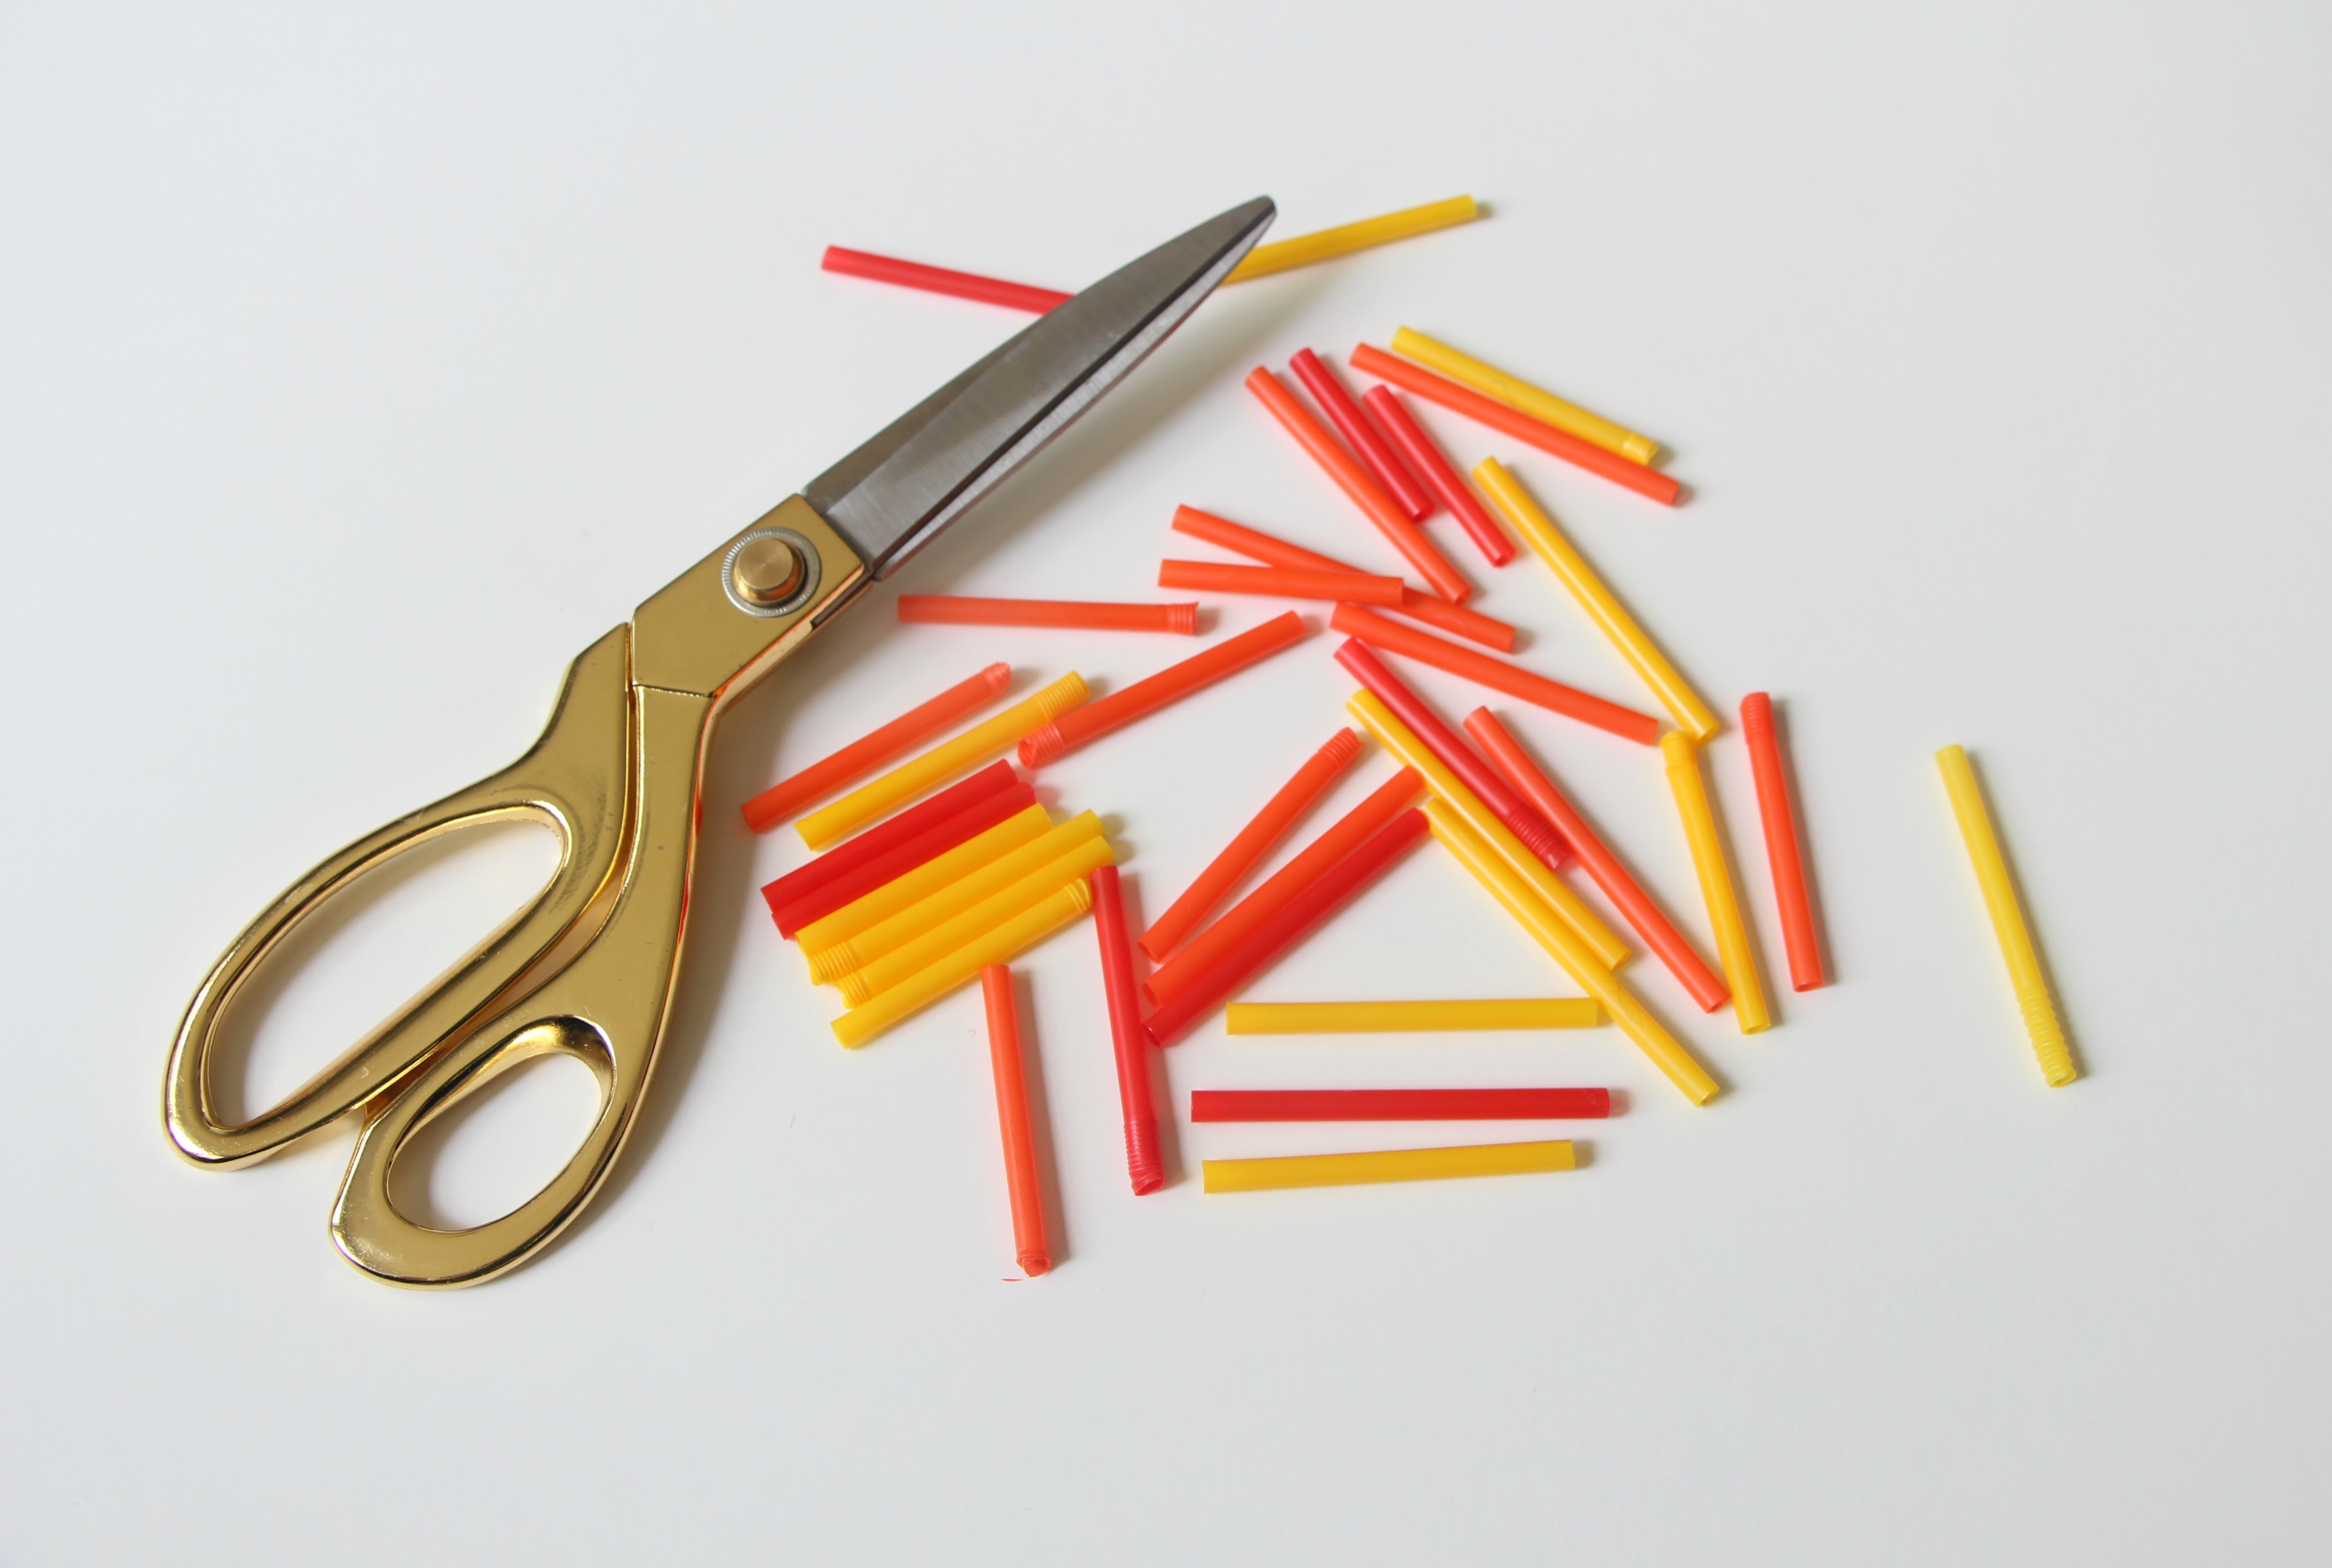
- scissors [these are my faves!]
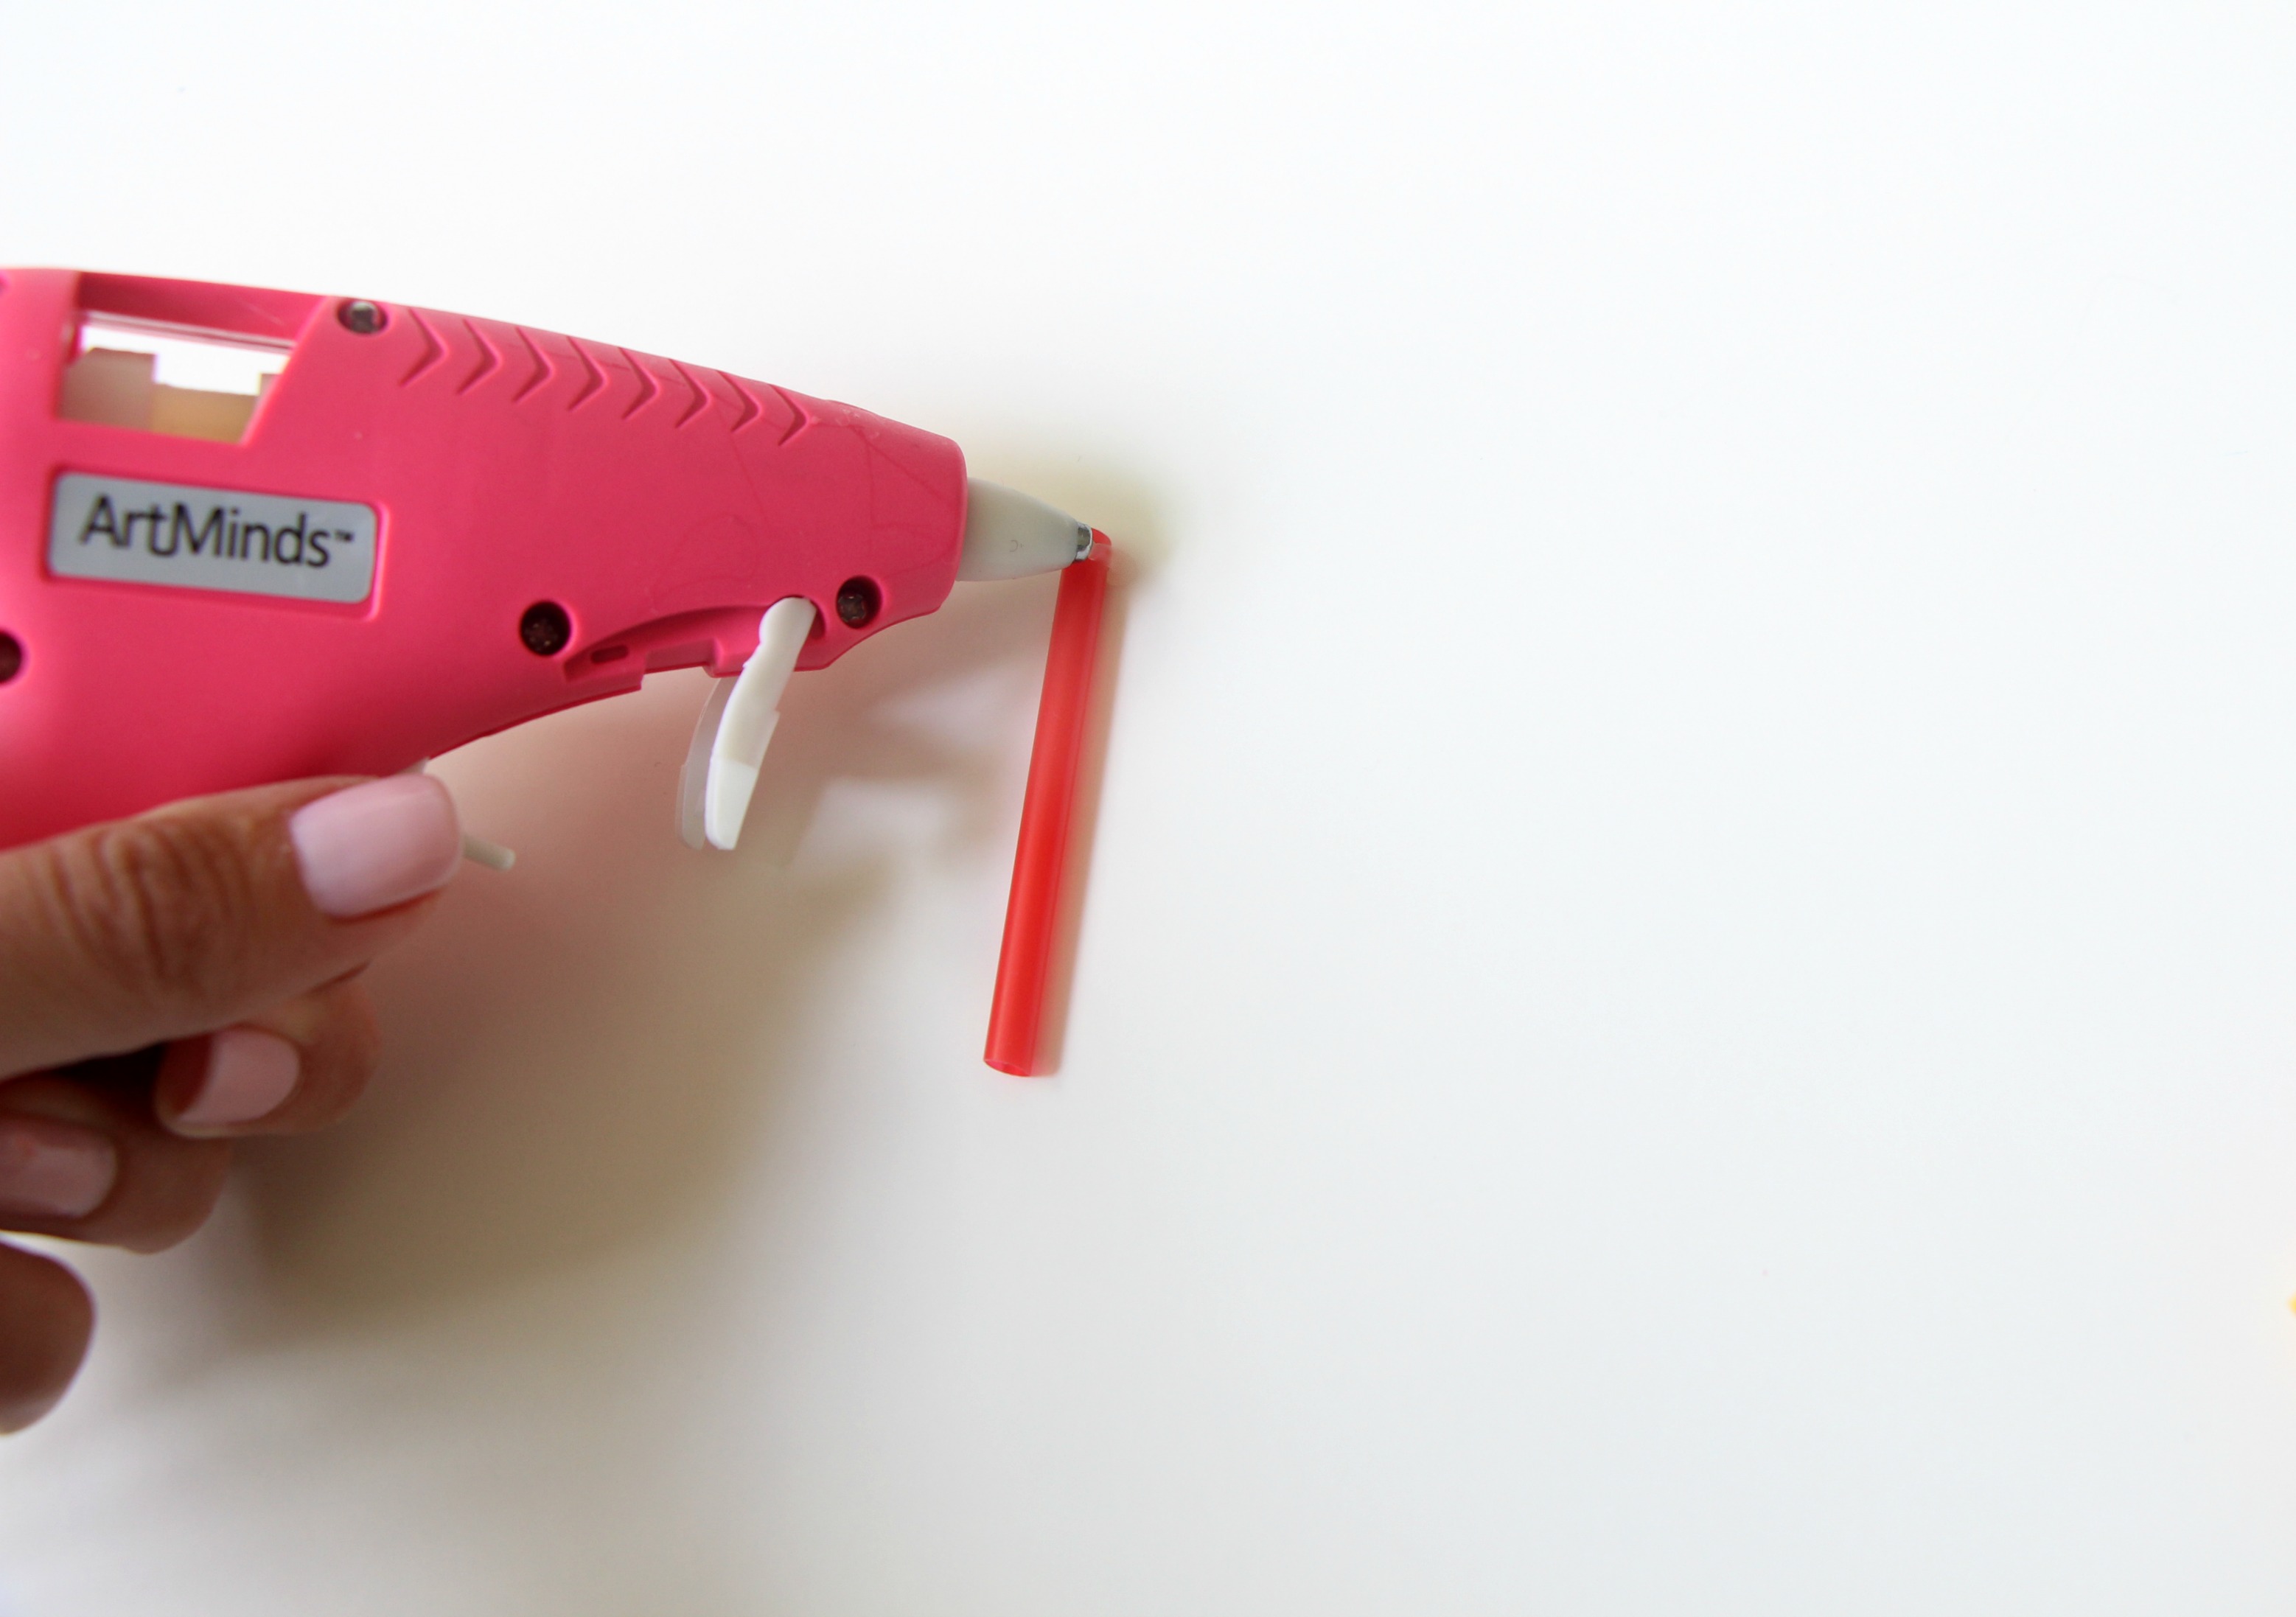
- hot glue gun
- black spray paint
POTTERY BARN INSPIRED 3D WALL ART DIRECTIONS:

1 | Cut your straws down to size.
They don’t have to be exactly the same size. In fact, if they are slightly different sizes, it creates a cool, nonuniform look. I think it gives it a little funk! I ended up getting about 3 – 4 pieces out of each straw. Each cut piece was about 2 inches long.
 *Note: I did use a few pieces that had the flex part of the straw on the end, but tried to avoid those ones. After all, I didn’t want it to scream, “Hey! I’m made out of straws!”
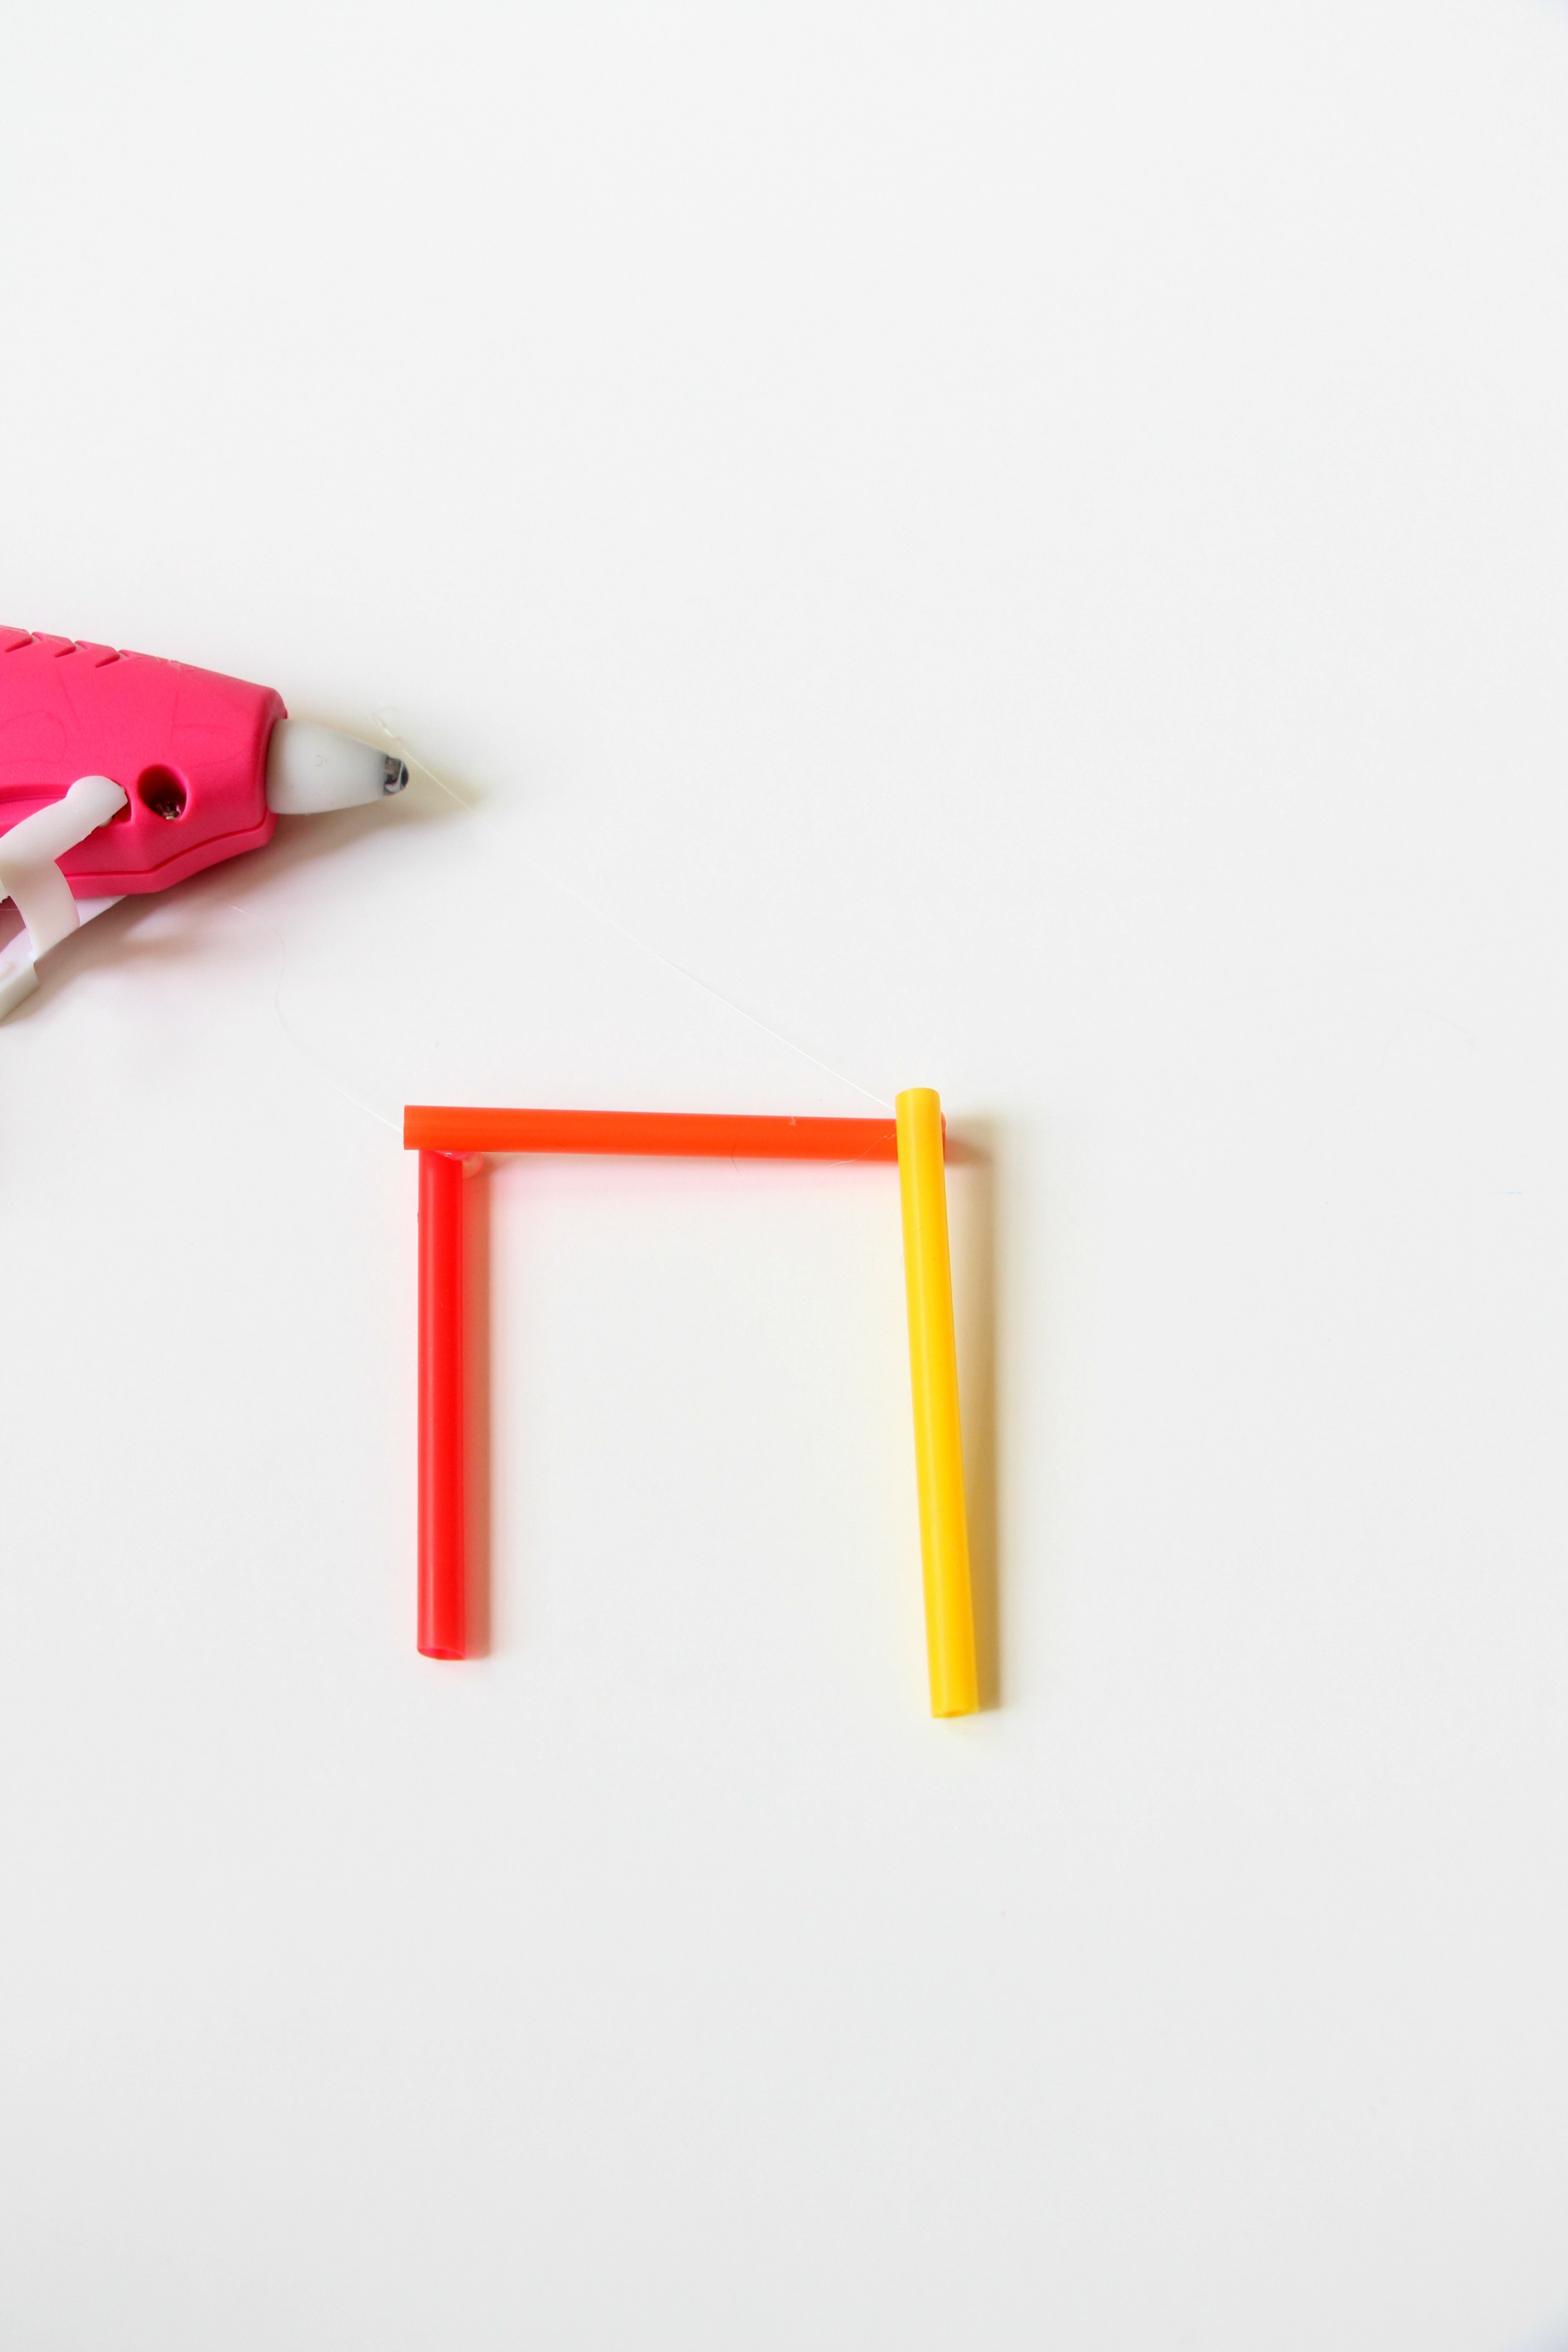
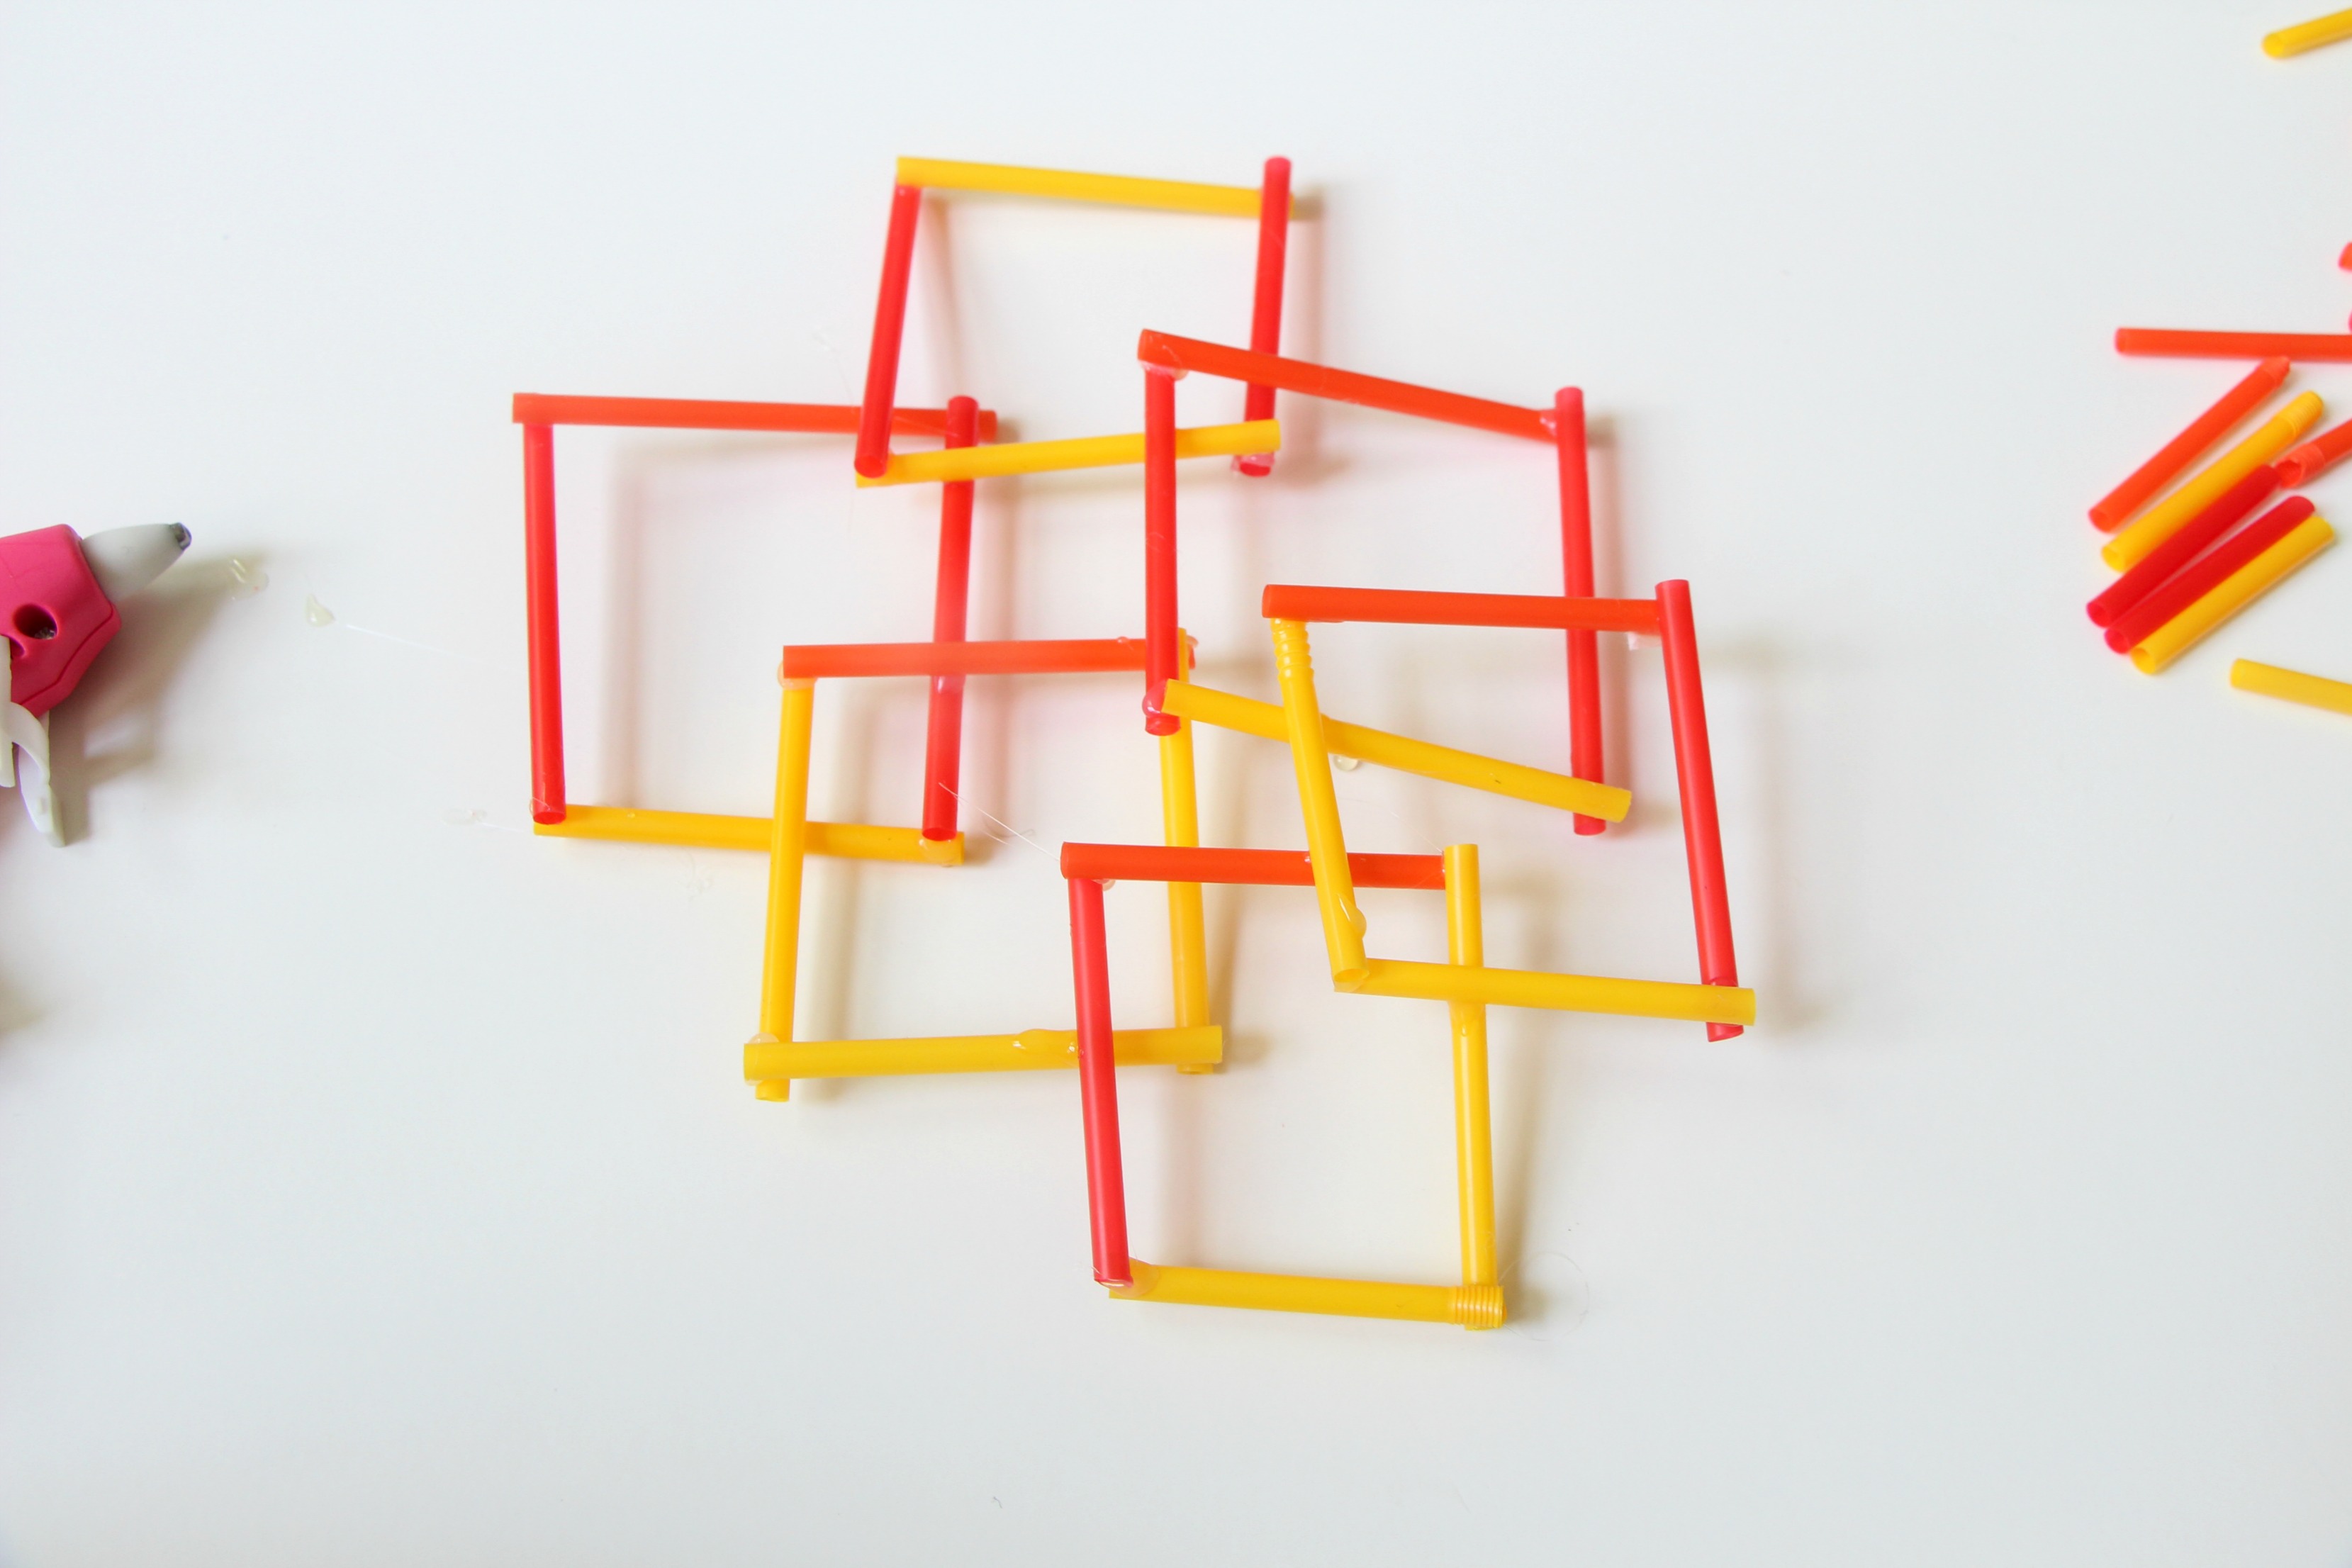
2 | Start with one piece and add a tiny dot of hot glue on one end.
Place a 2nd straw on top creating an L shape.
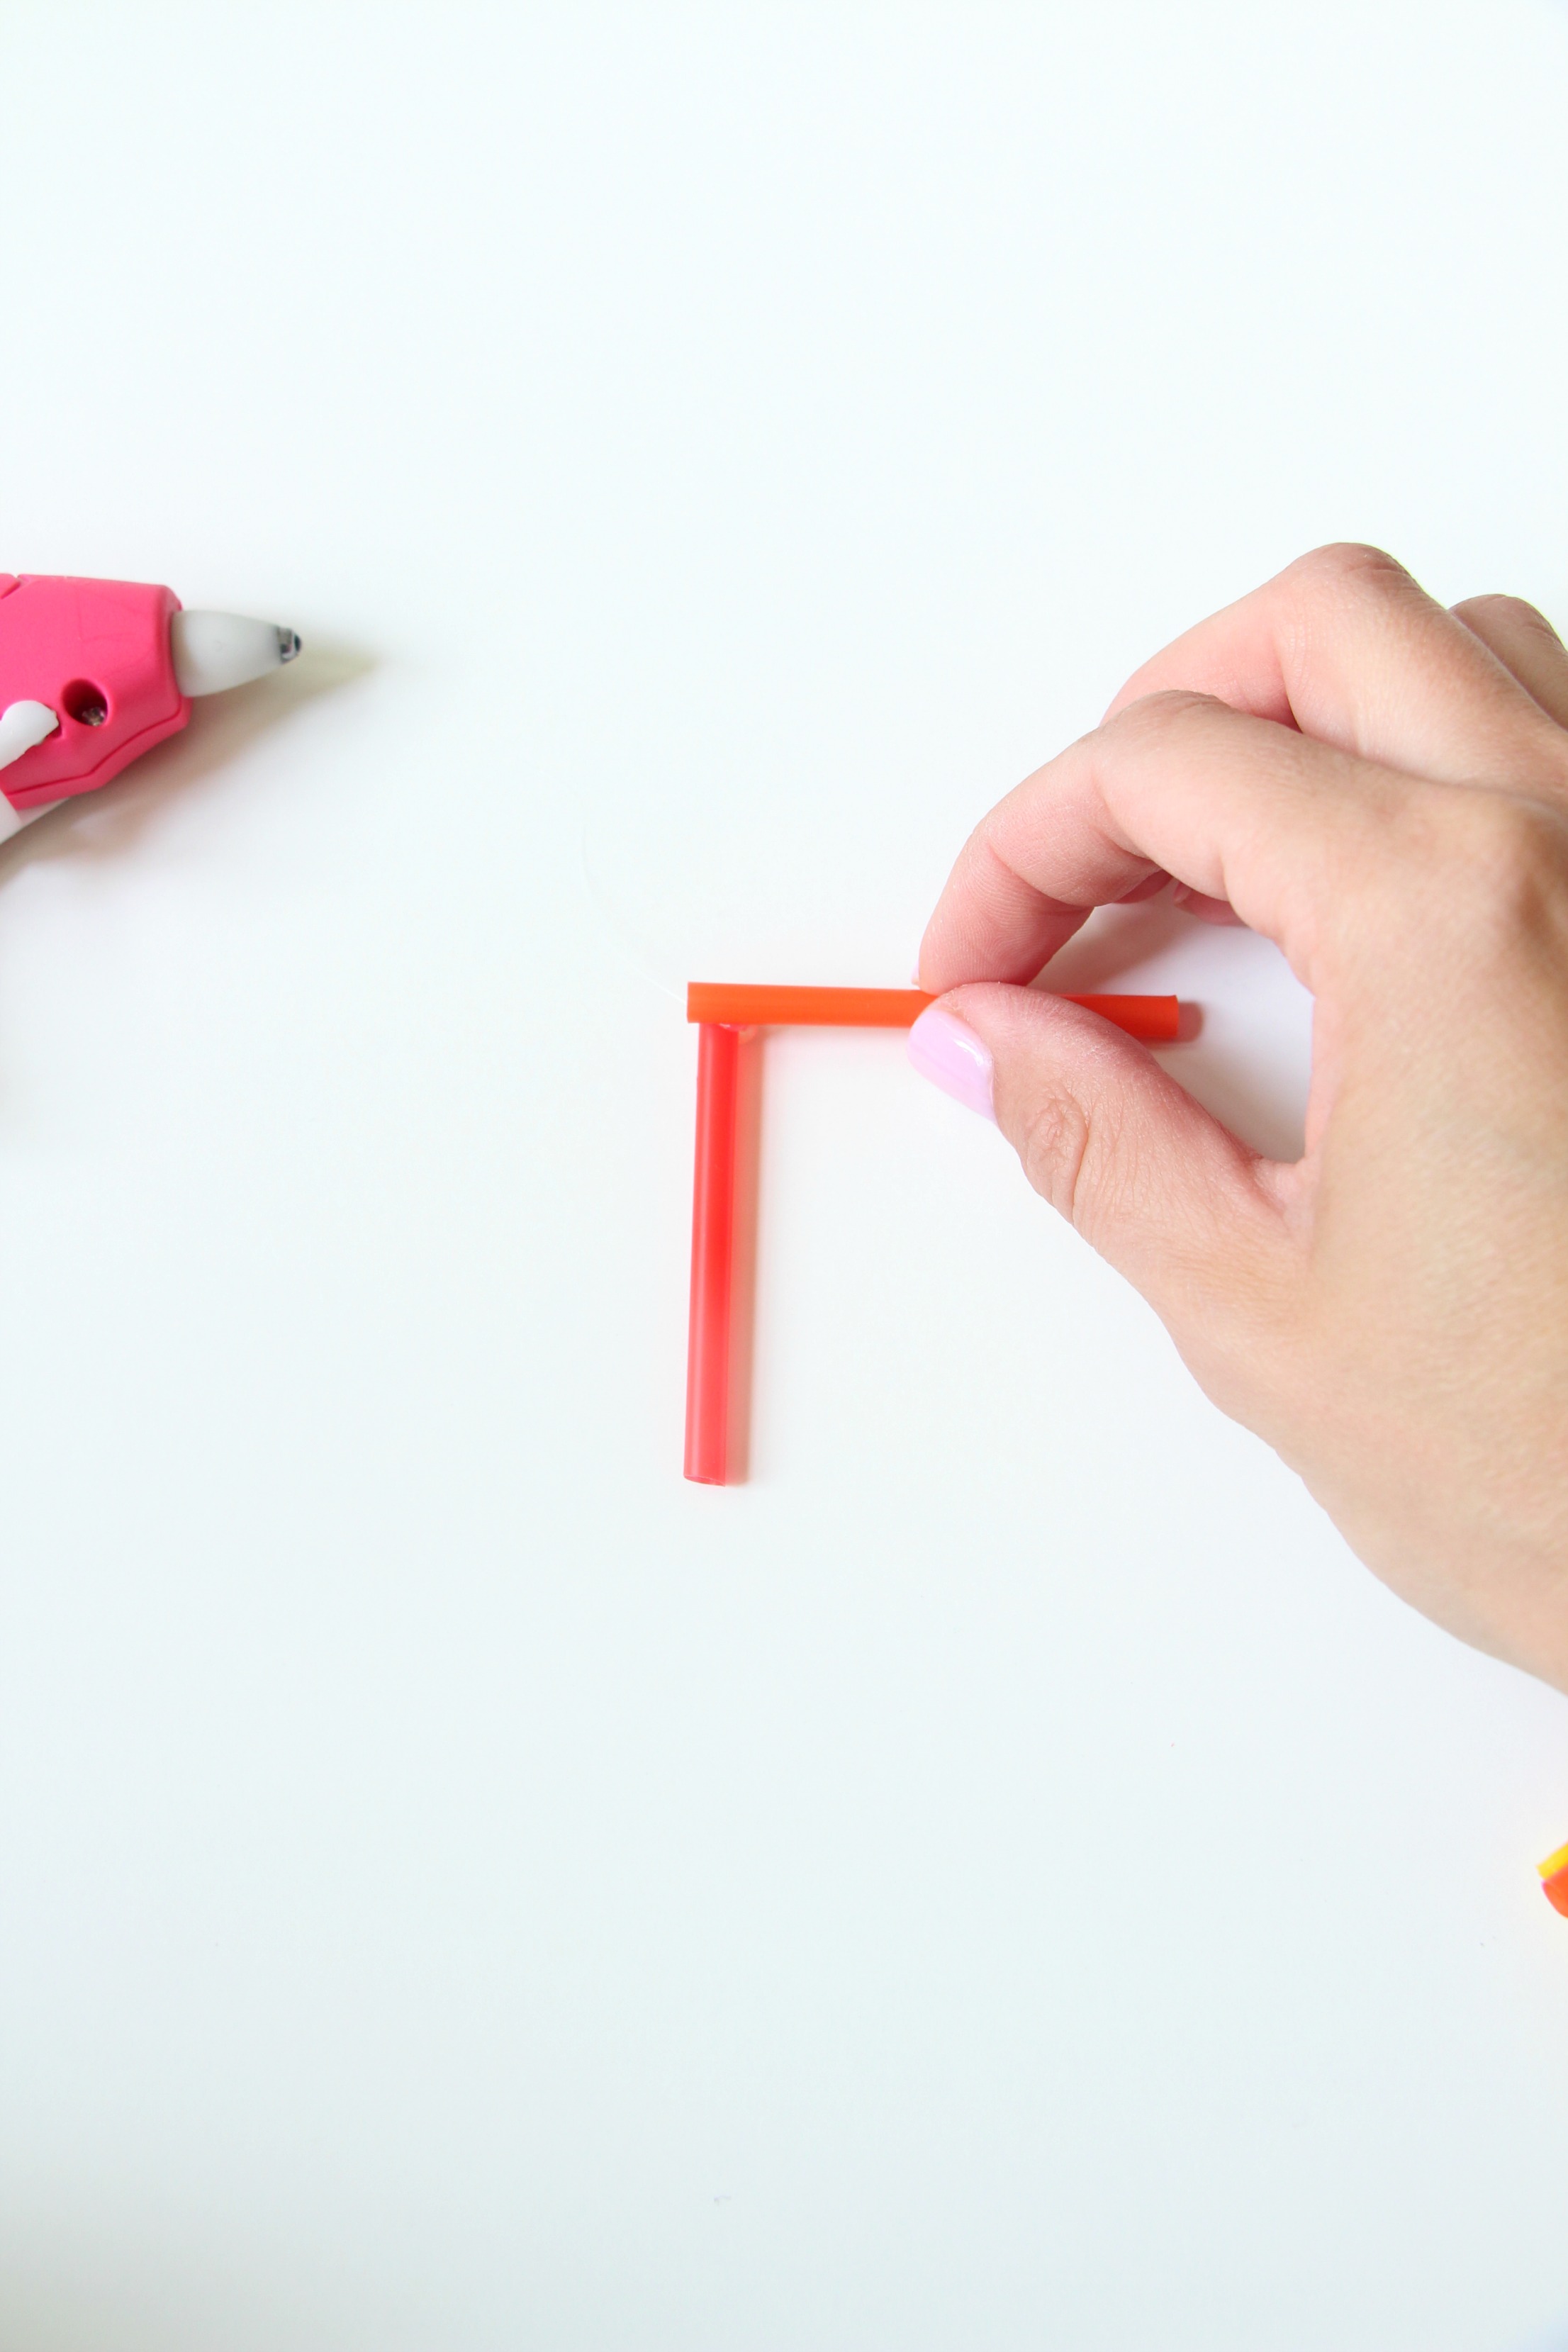
You actually want to place the straw on top of the one before it, not just butting up the ends. This help creates the 3-dimensional aspect. Repeat this until you have 4 pieces connected, always placing the next straw piece on top of the end with glue.
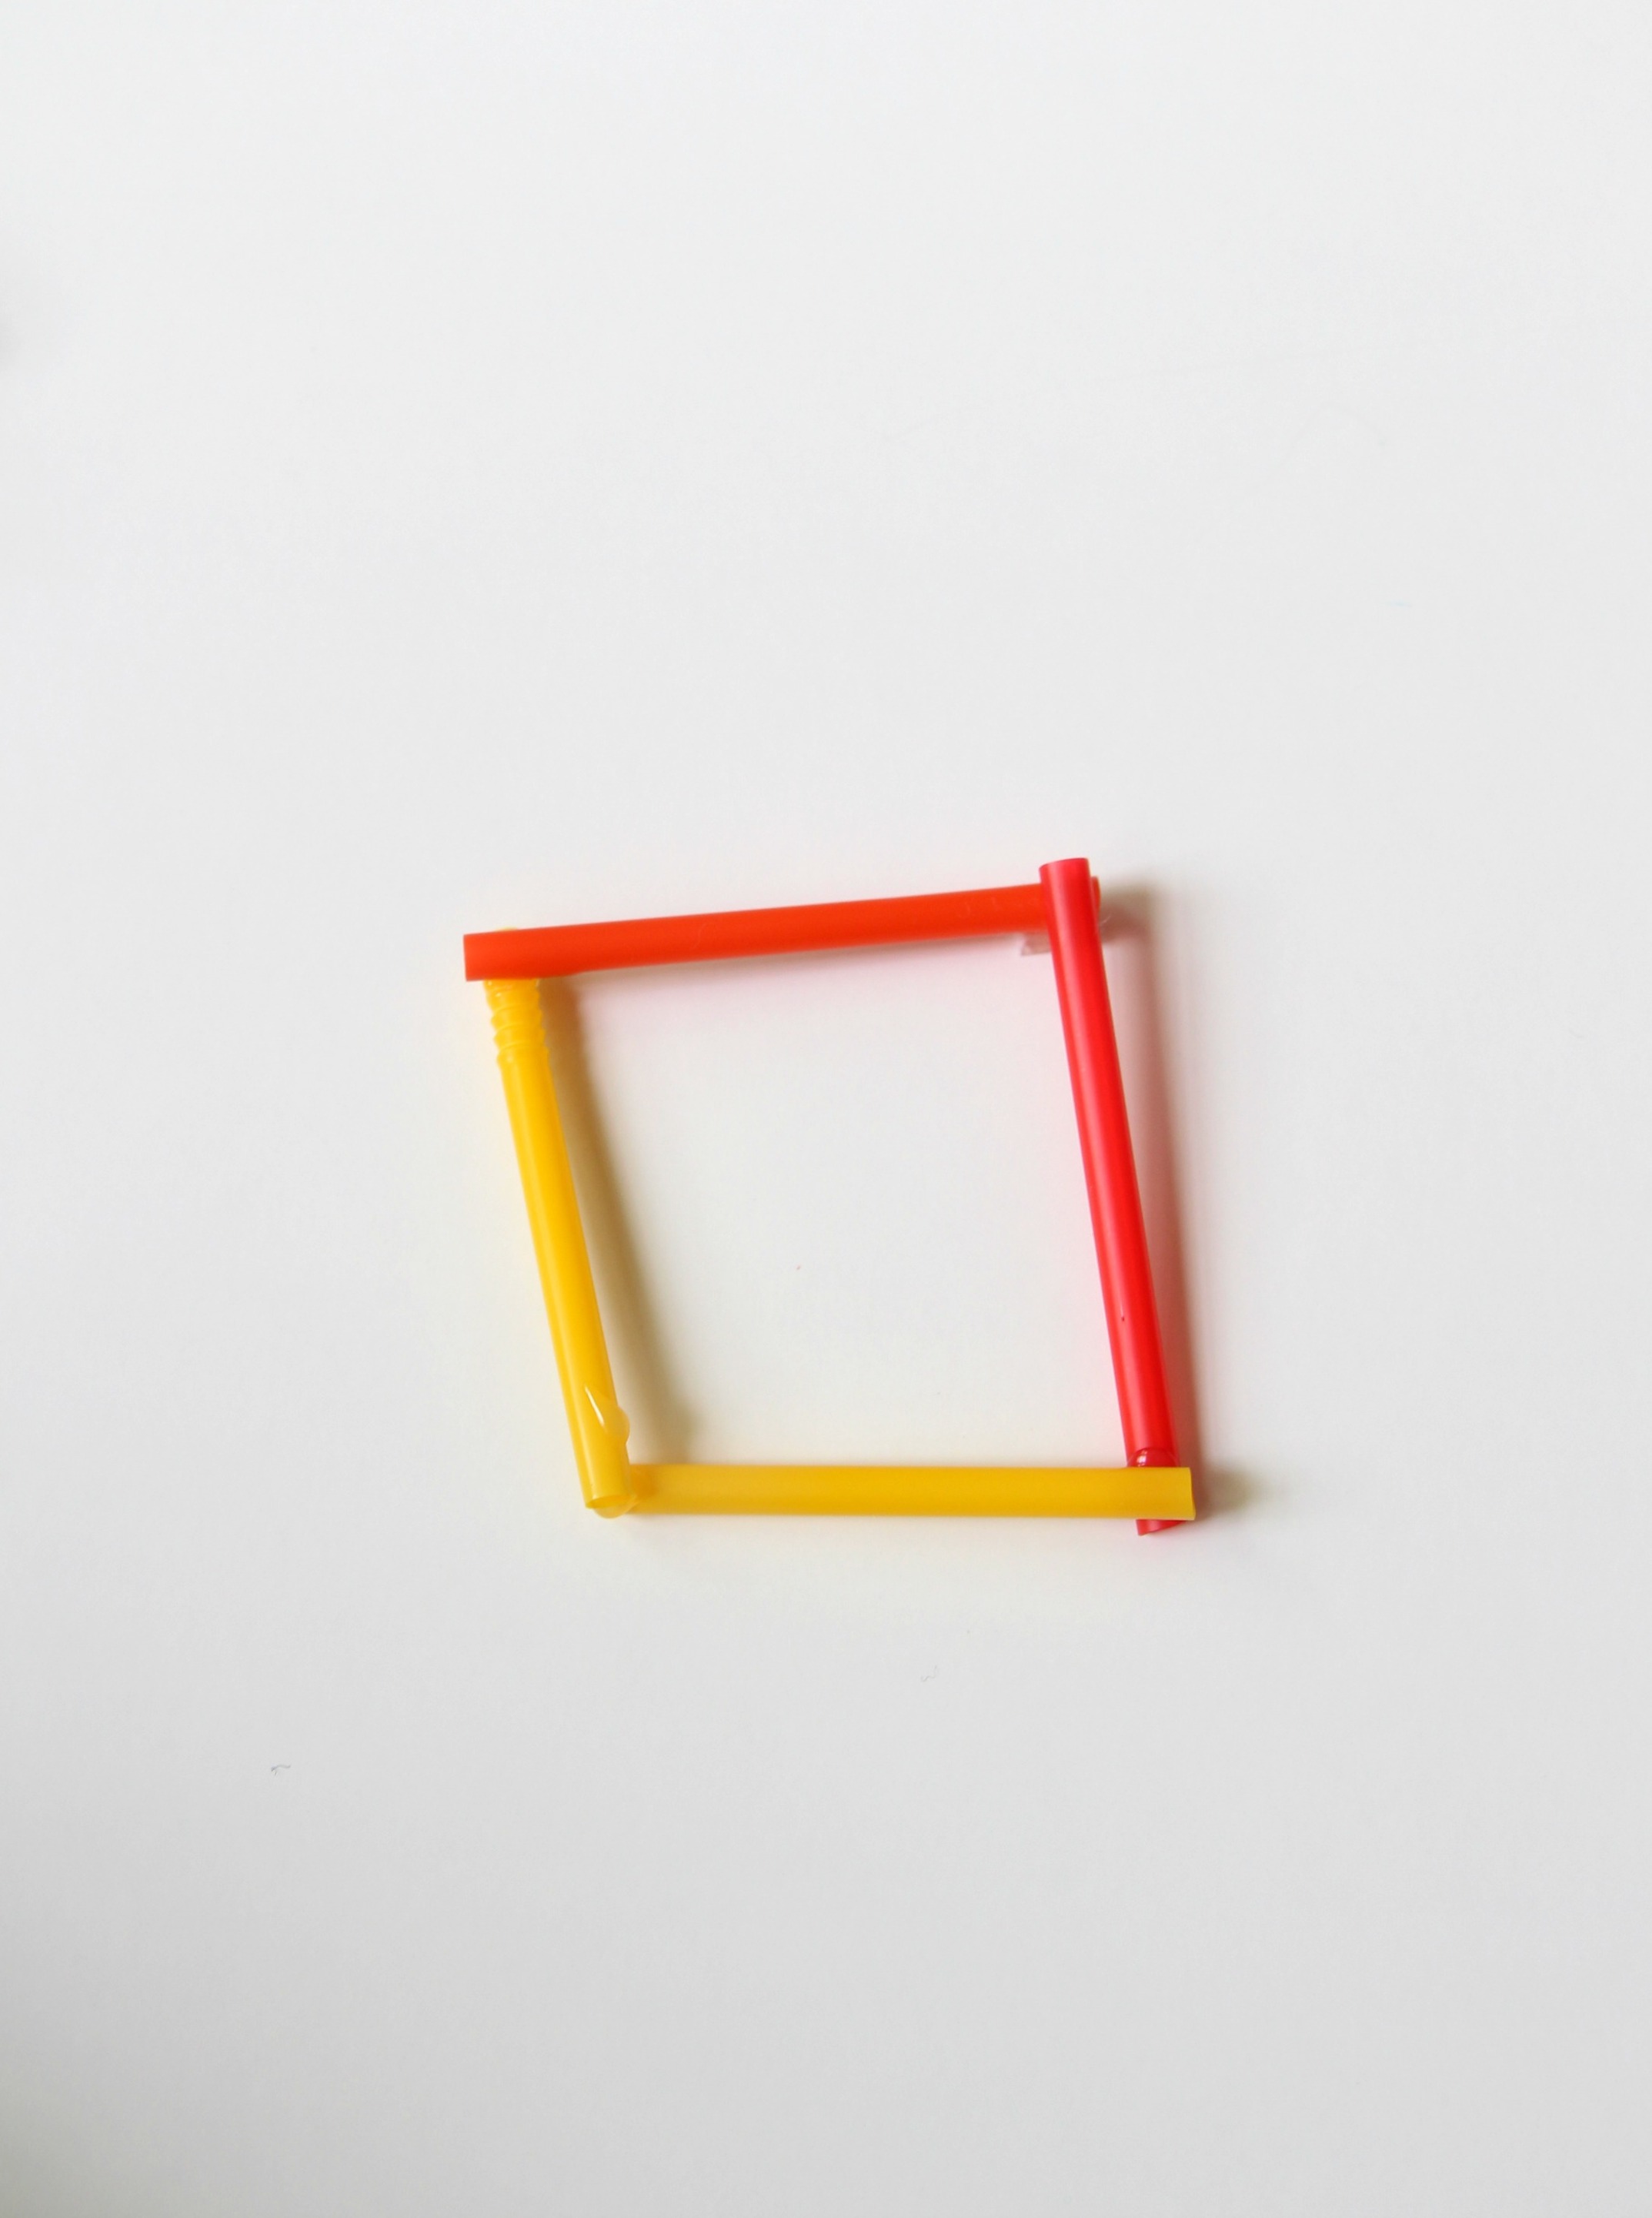
3 | After you have created enough “squares” or 4-sided pieces, it’s time to start connecting them together.
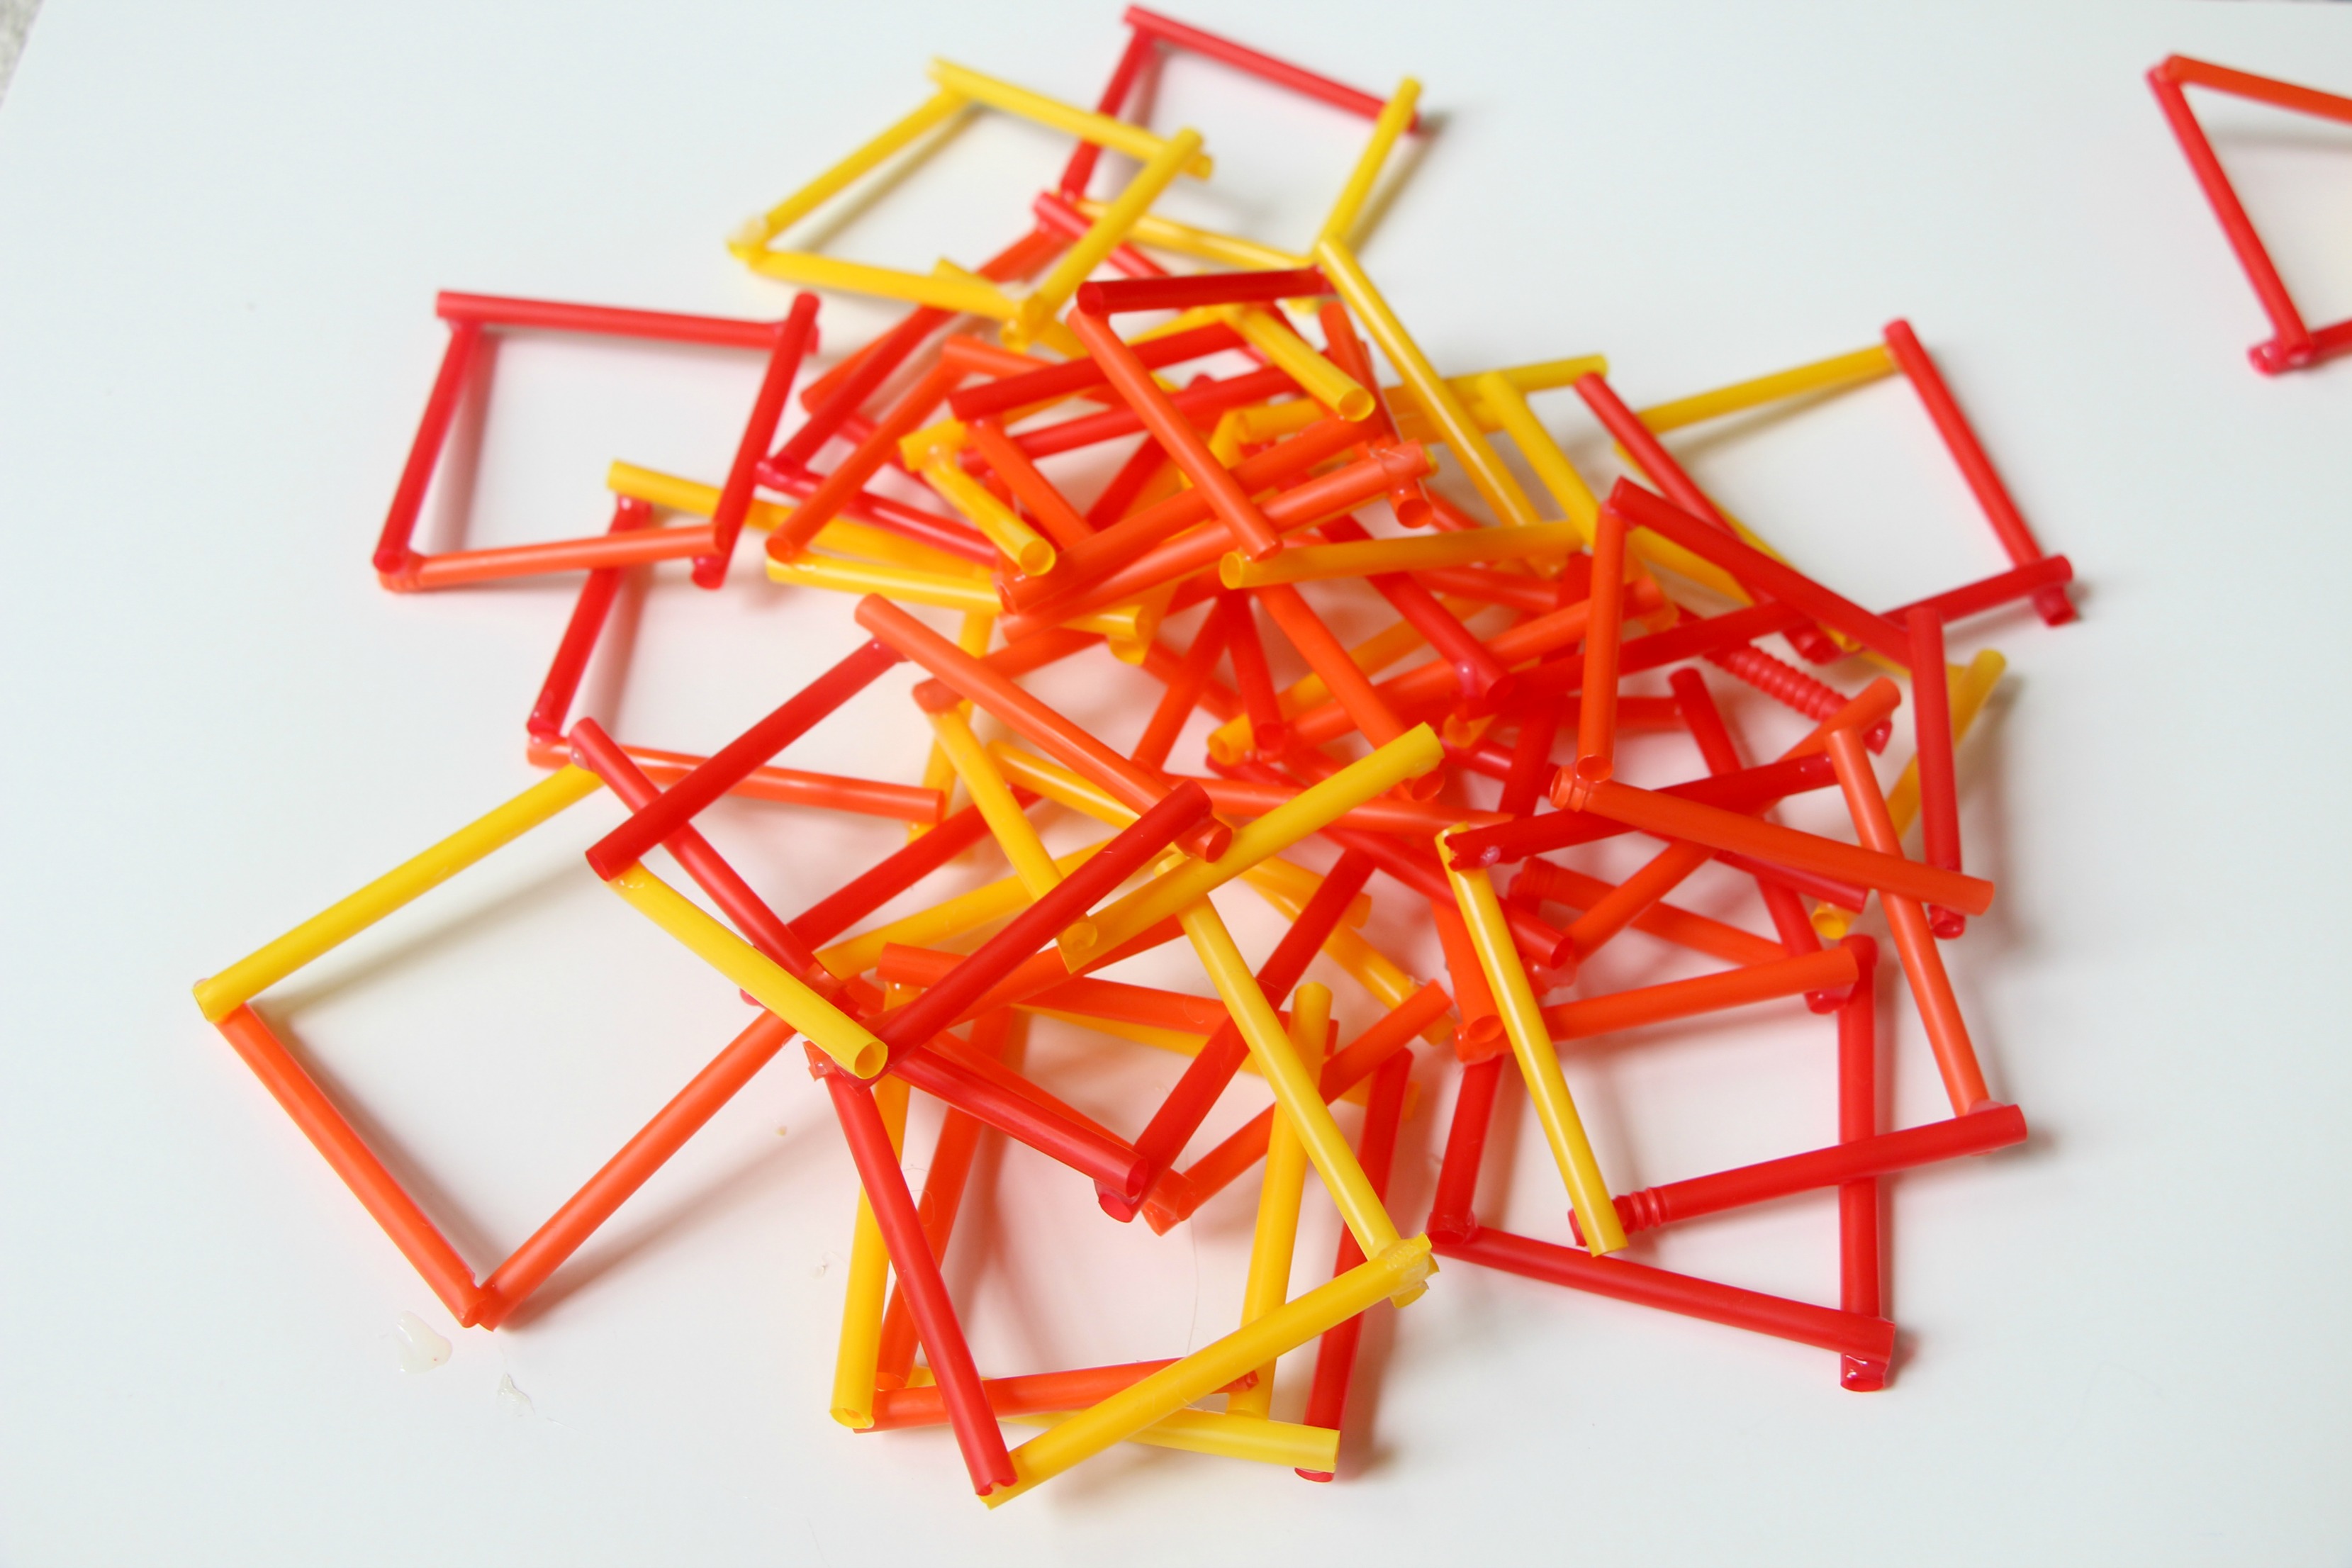
Think of creating layers. I made about 3 or 4 “layers” by gluing some pieces underneath and some pieces on top and then building out and around.

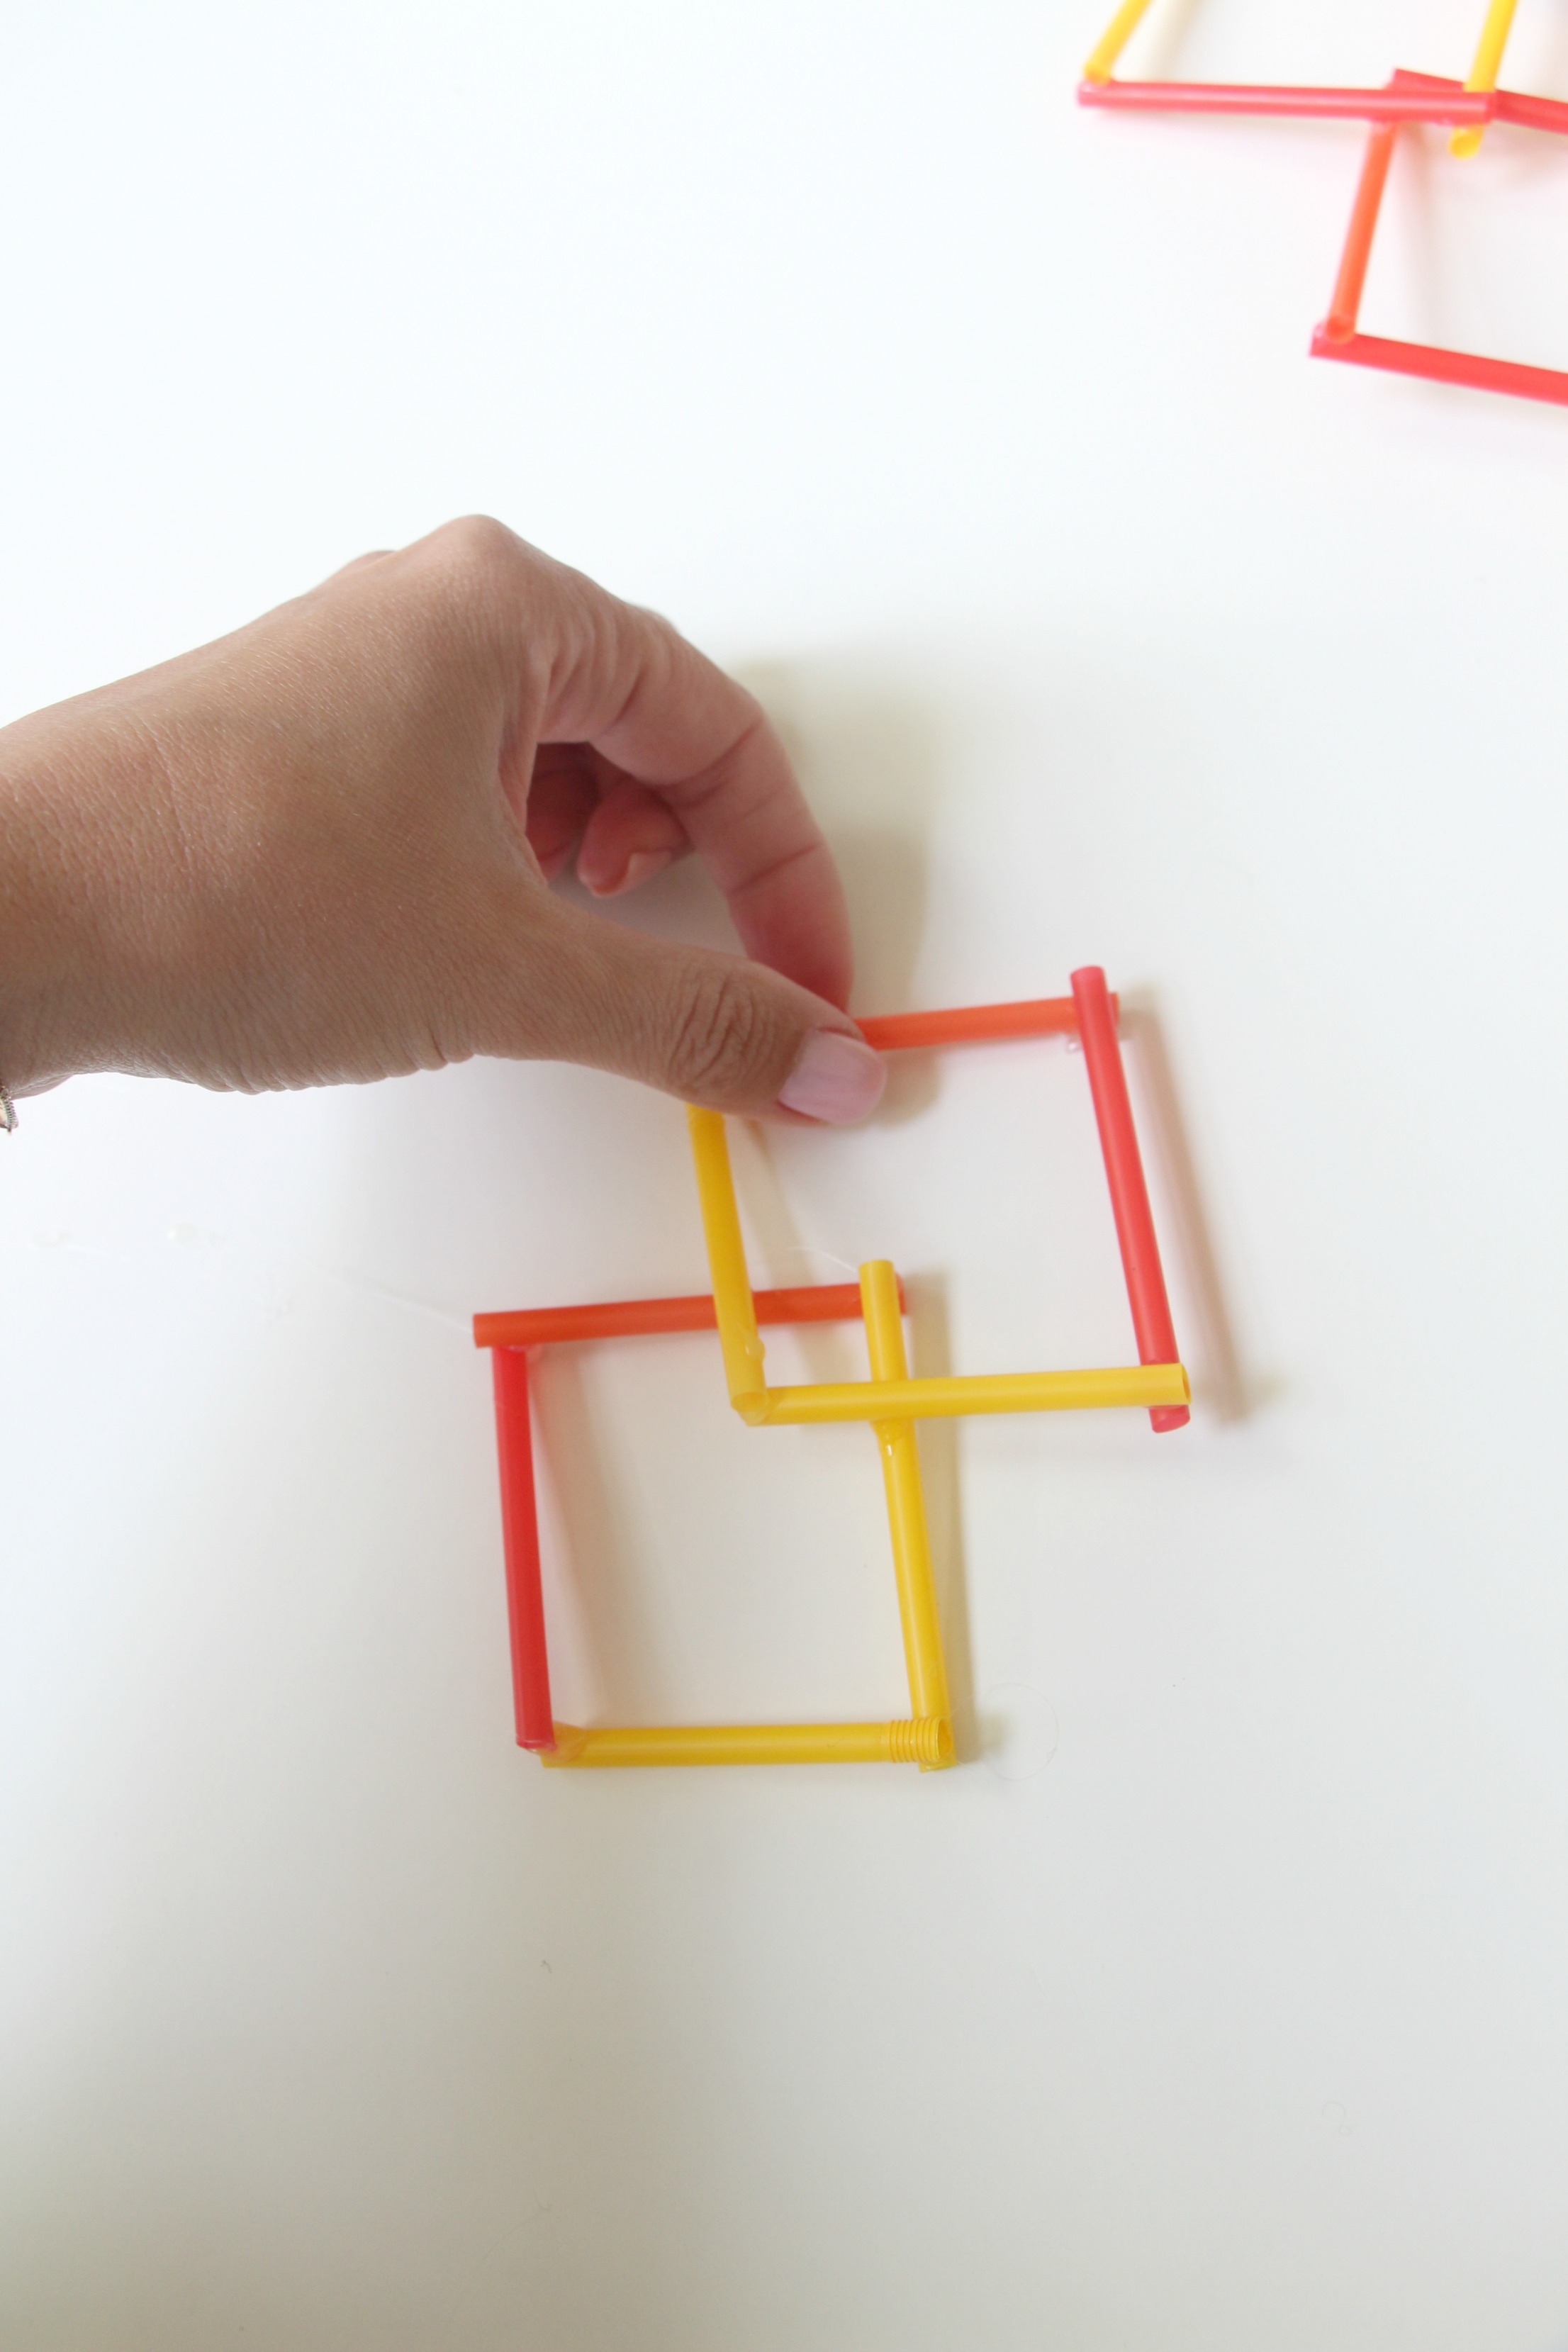
4 | Keep adding to it until you’ve reached your desired size and configuration.
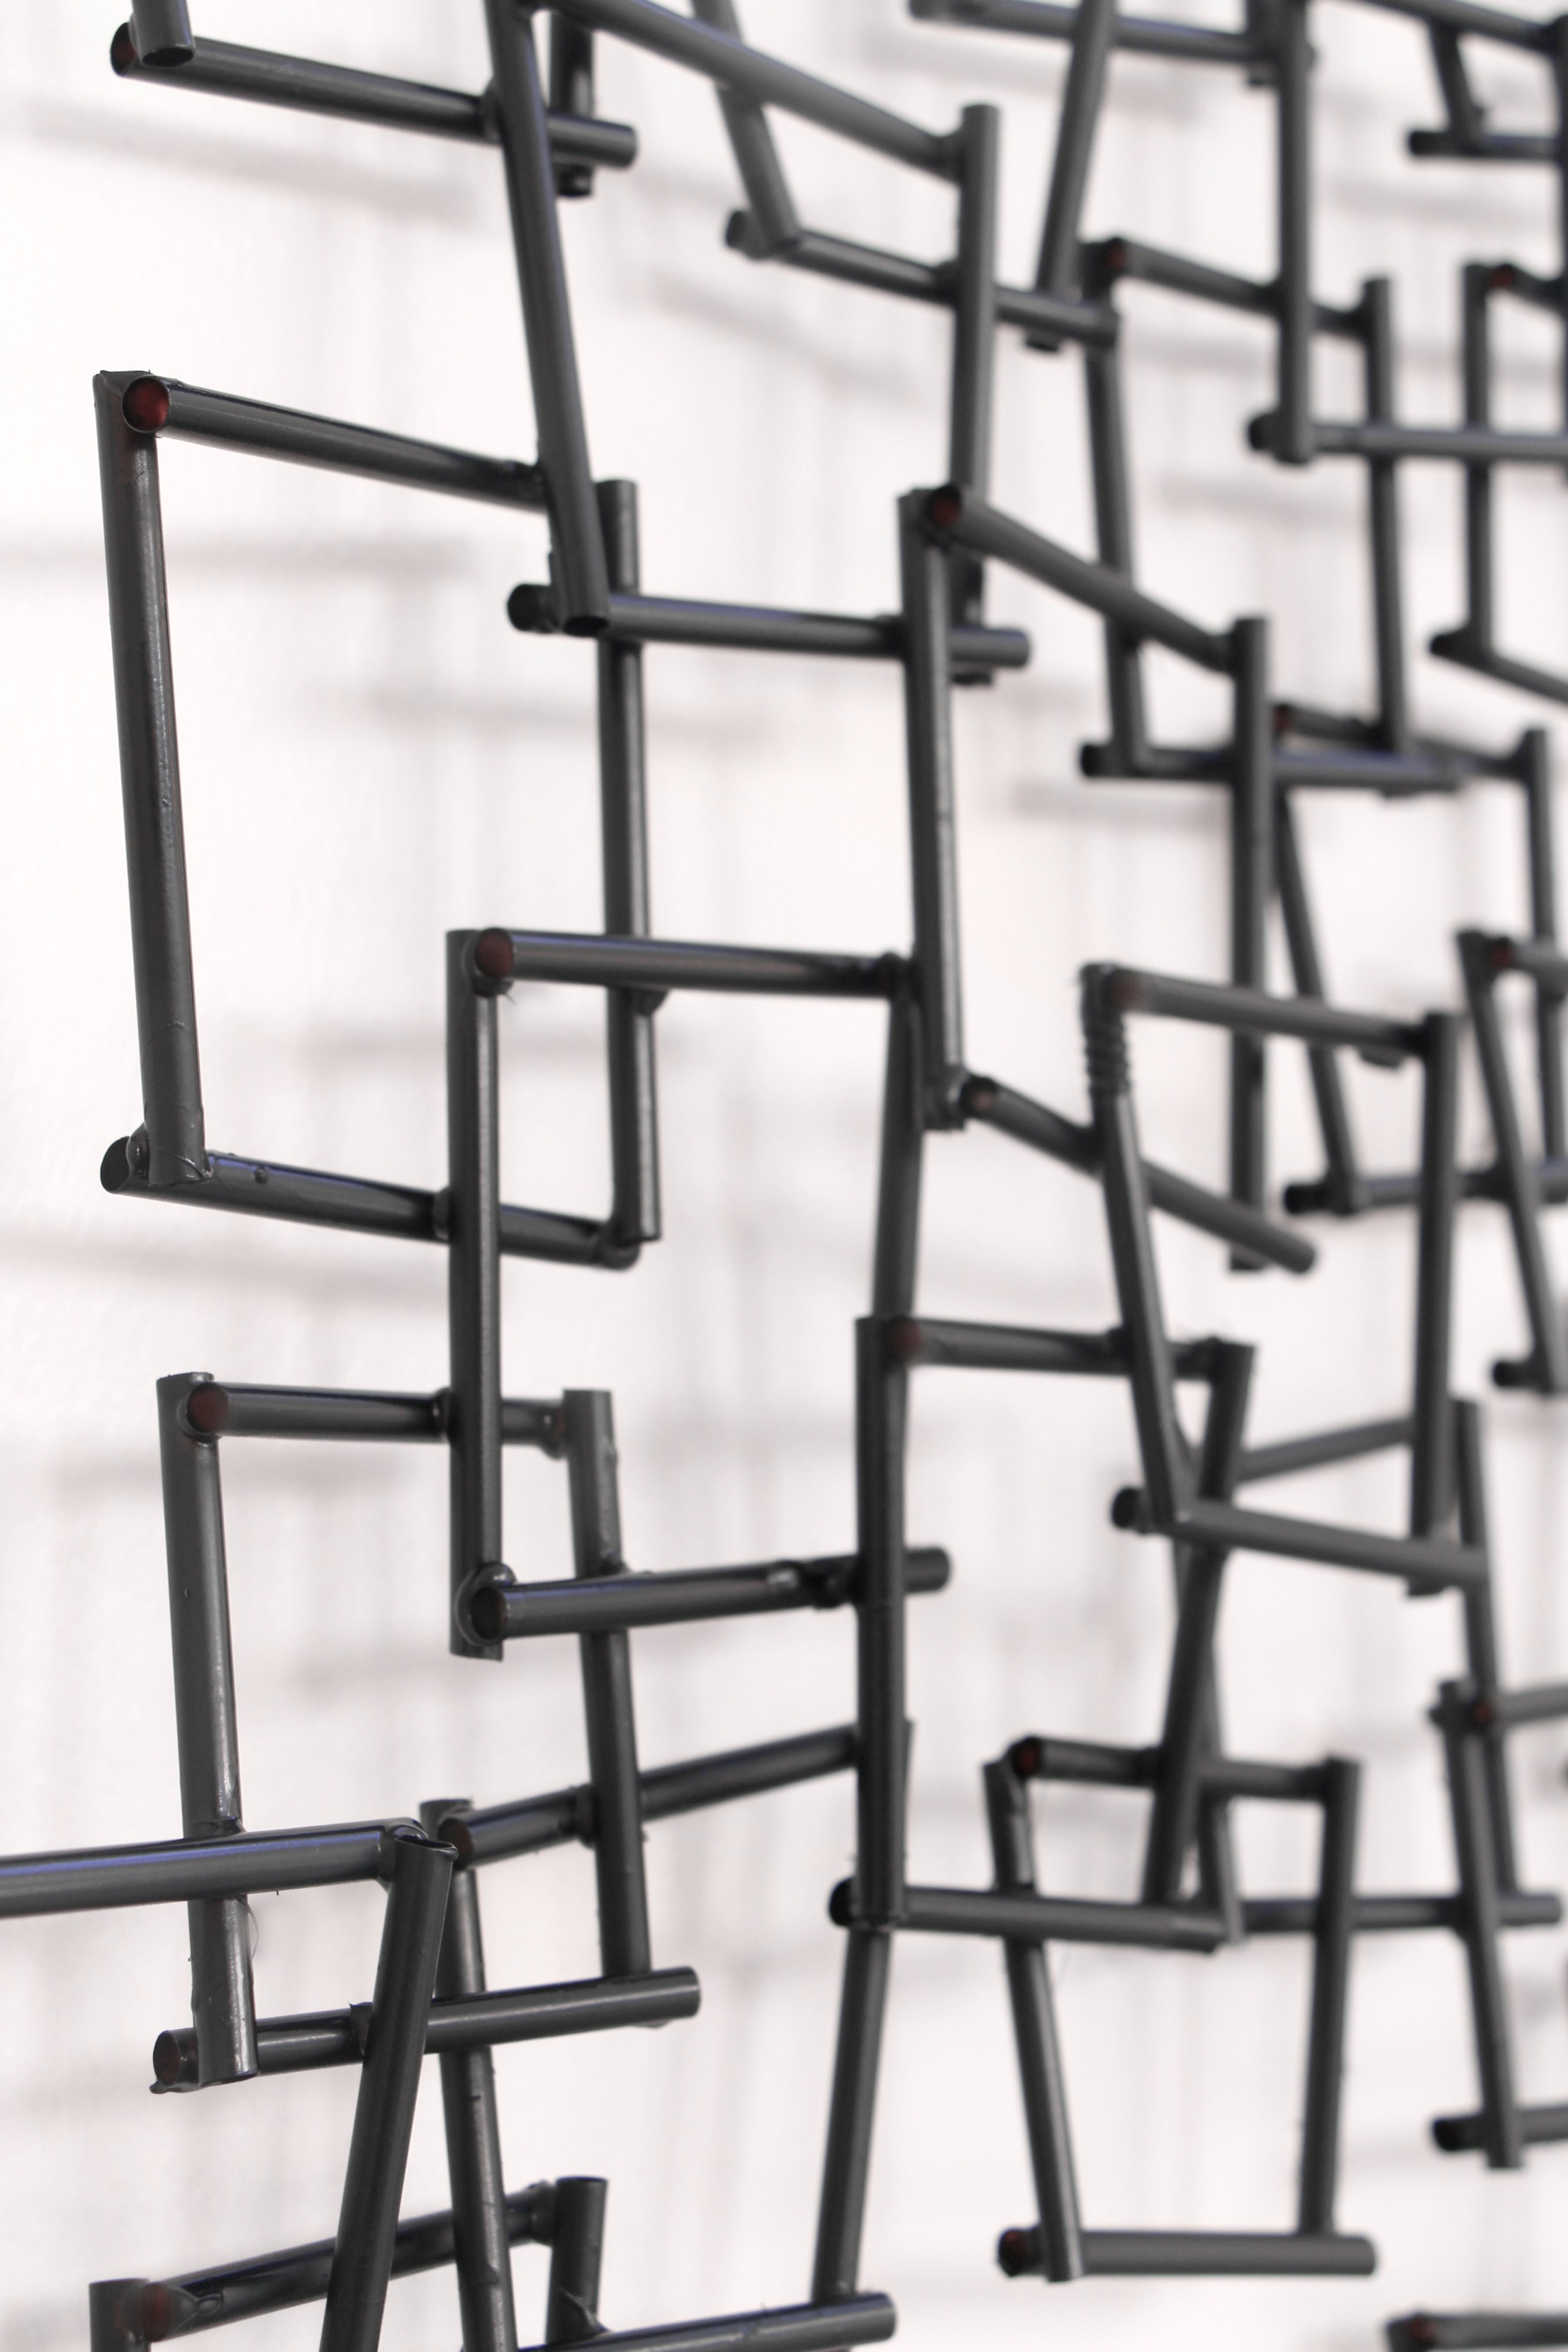
I left my edges a little jagged and uneven to create some visual interest.
Doesn’t it look cool with very little symmetry?
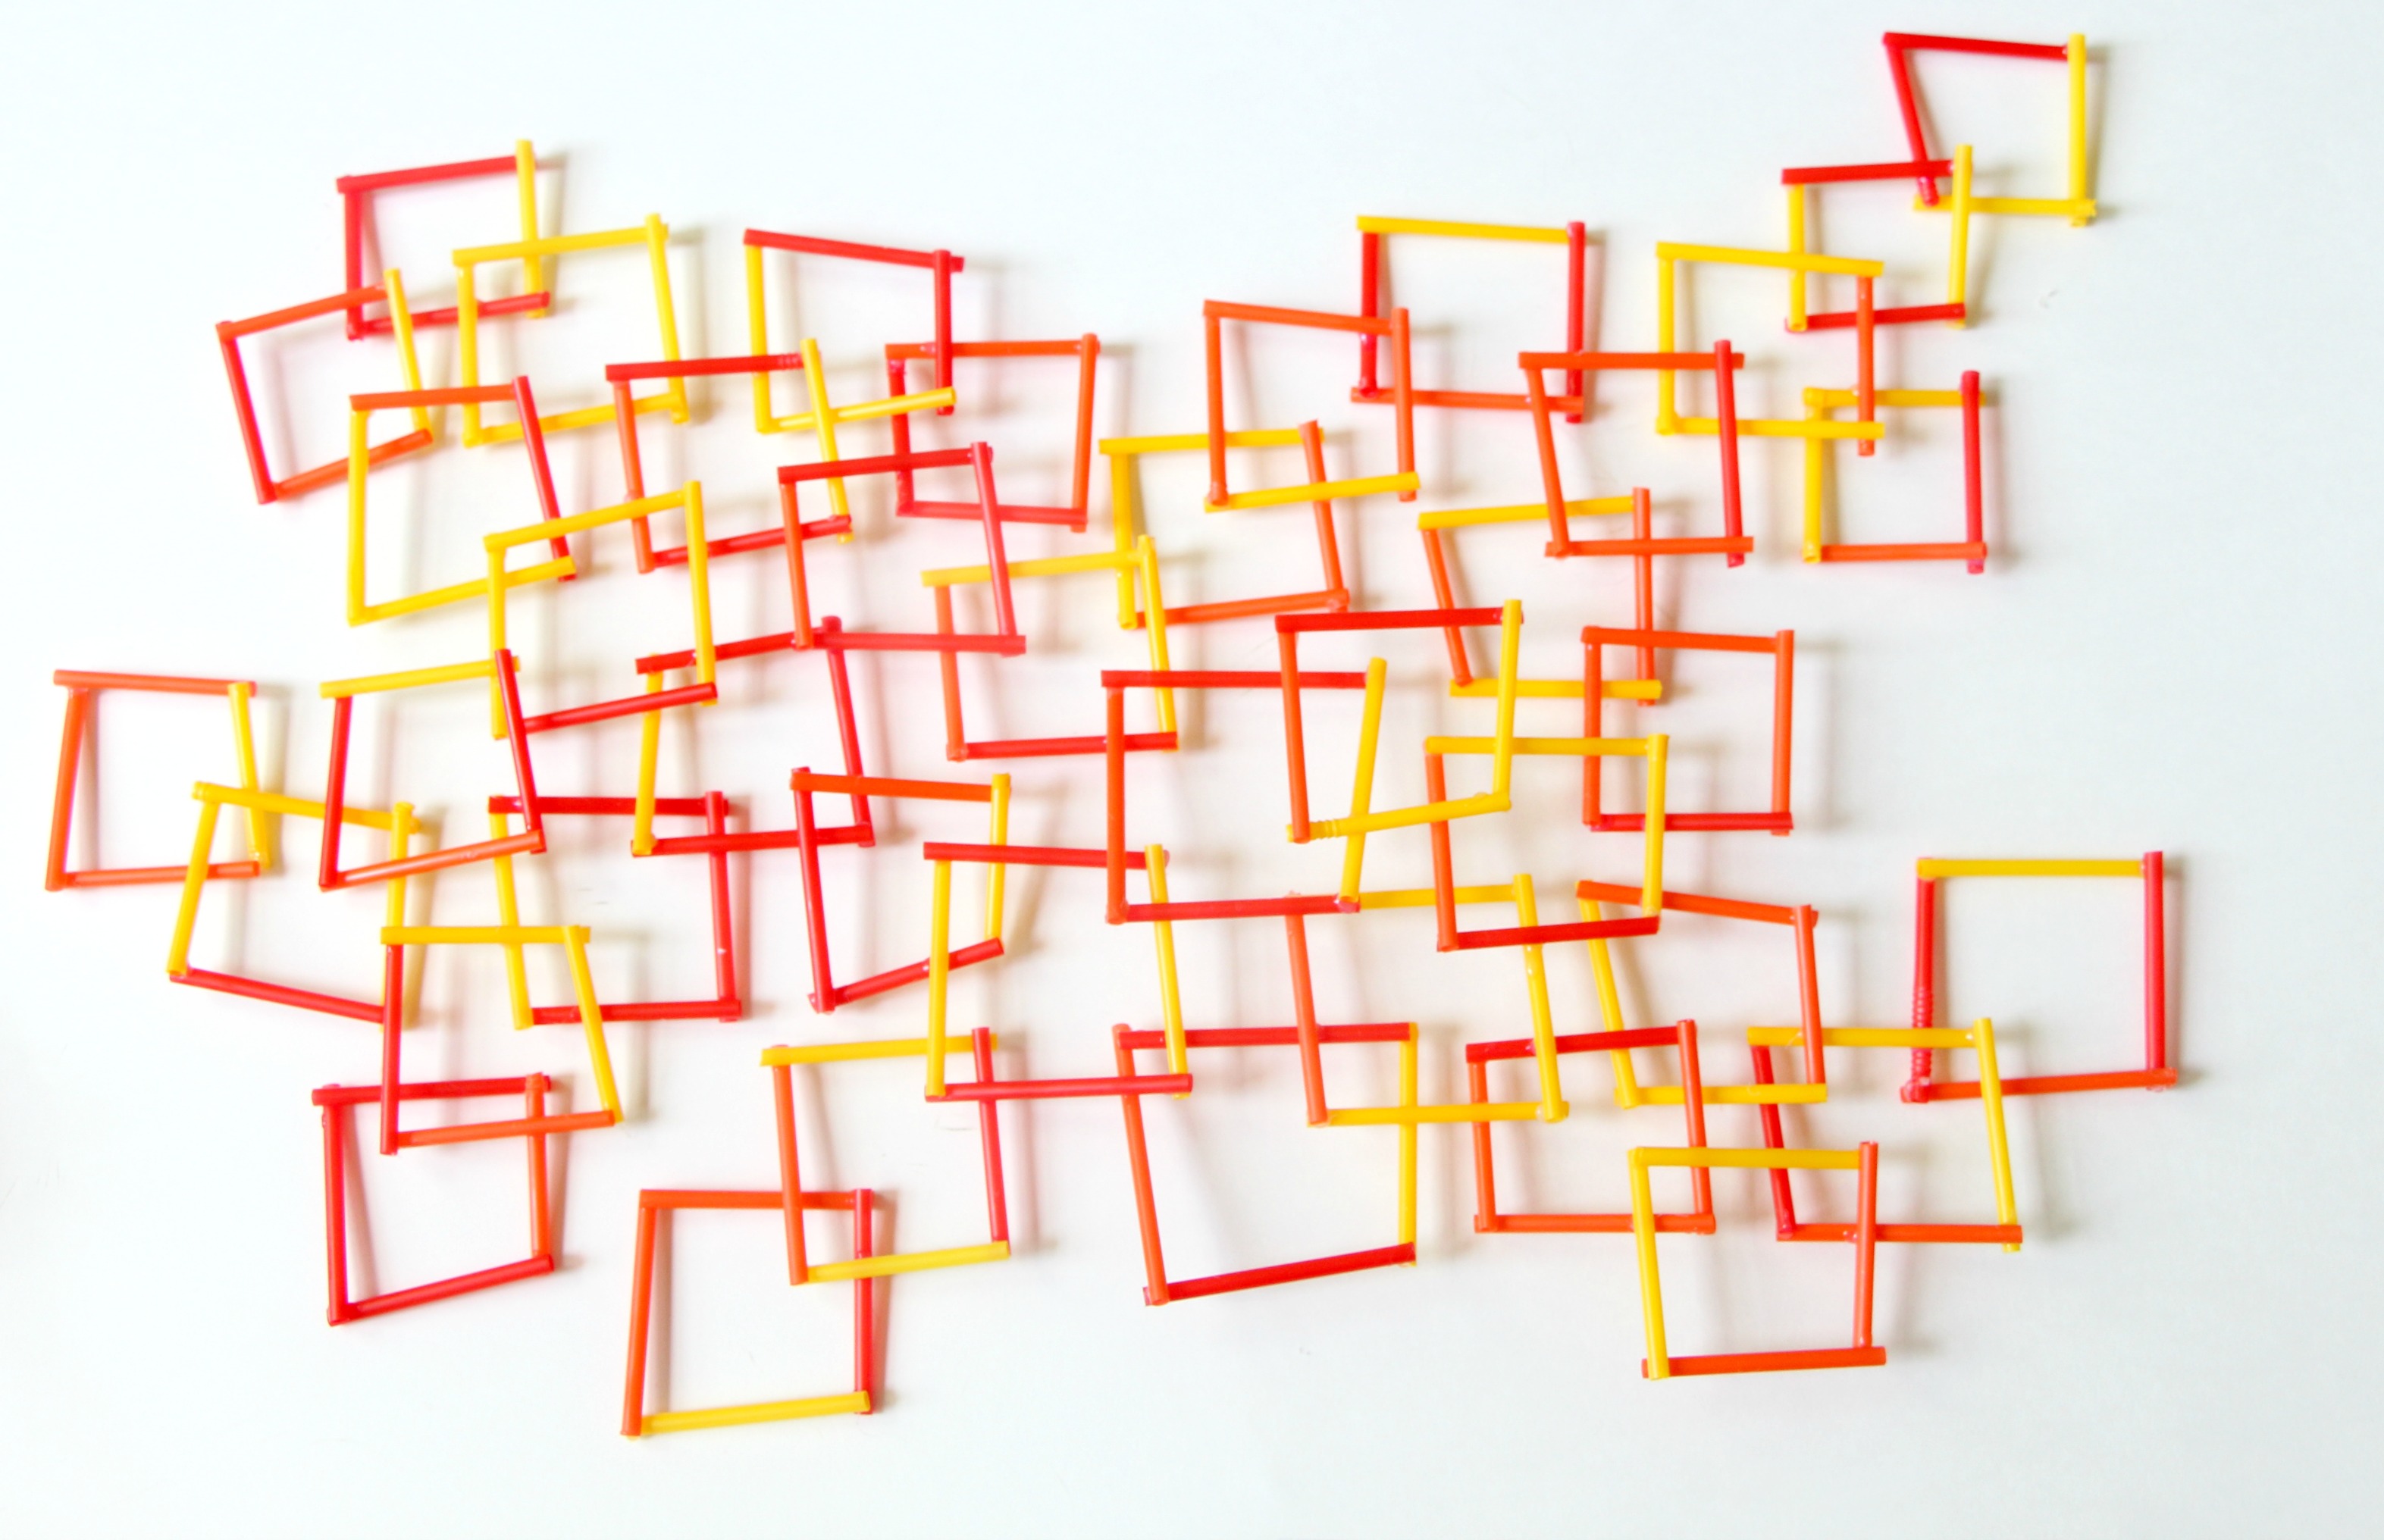
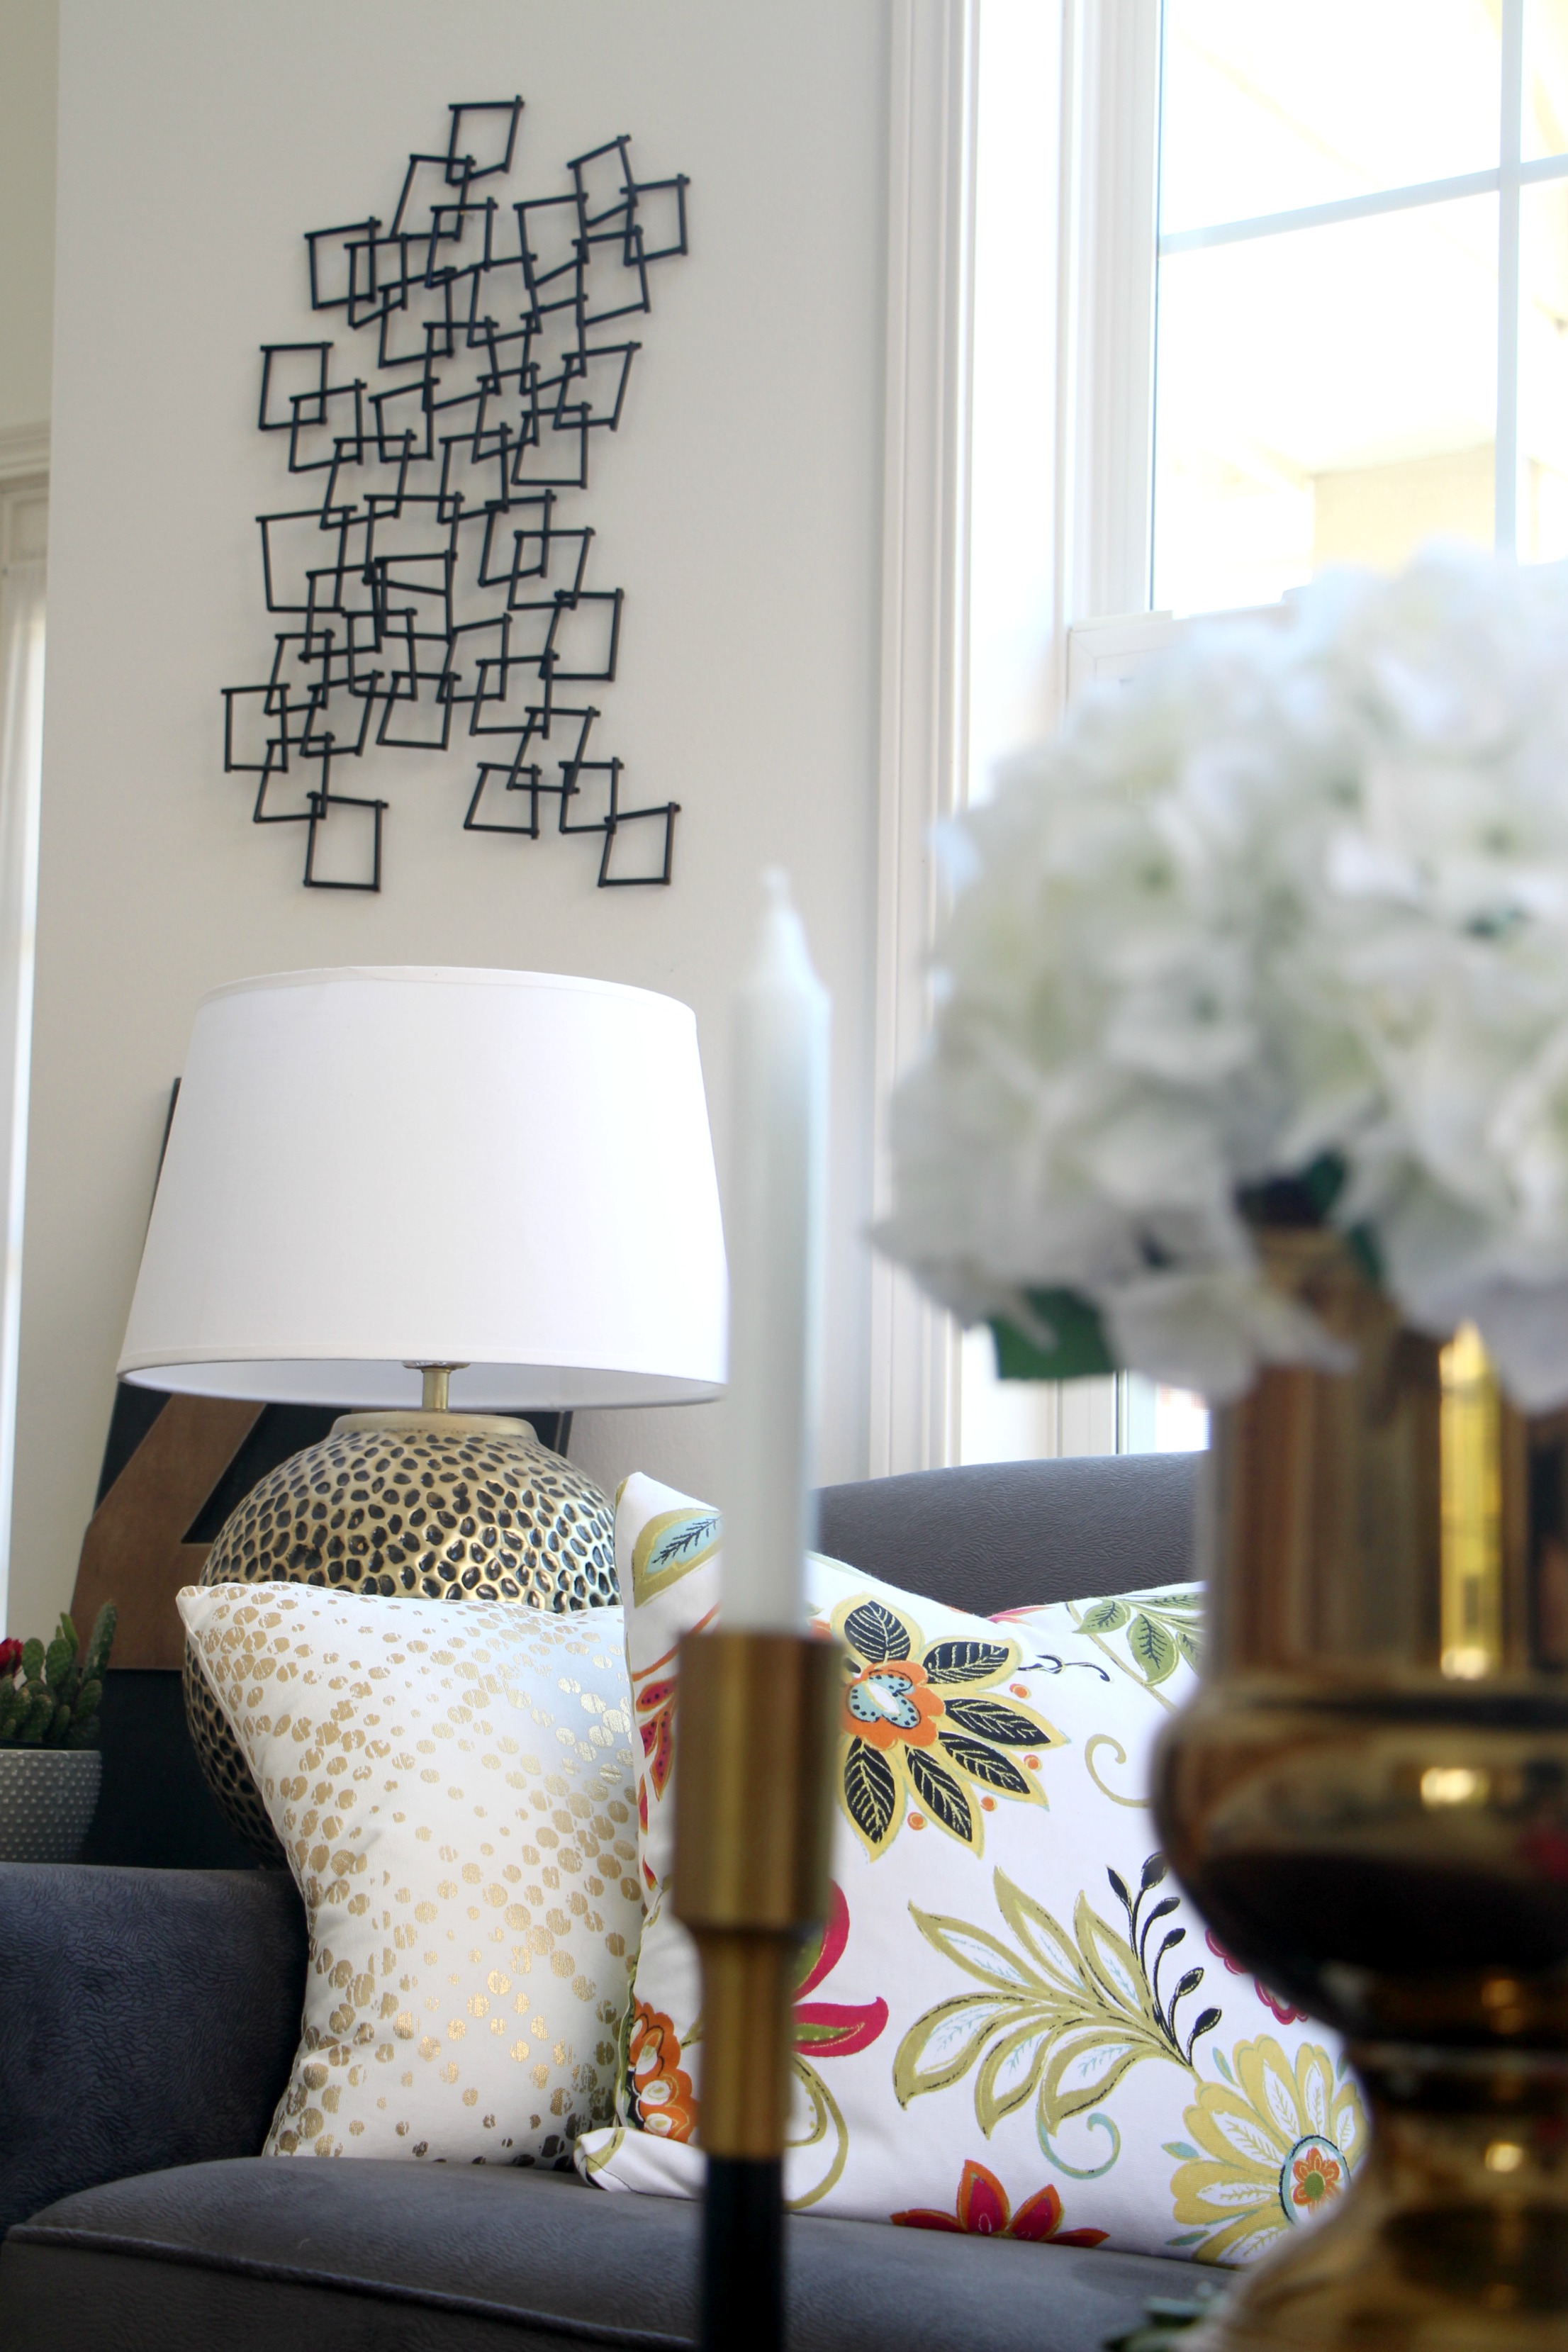
I connected about 45 “squares” together to create this layout.
*Note: My piece is much smaller than the Pottery Barn version. I probably would have made it slightly bigger, but I ran out of straws and I also wasn’t sure how sturdy a larger piece would be given it is just straws and glue.
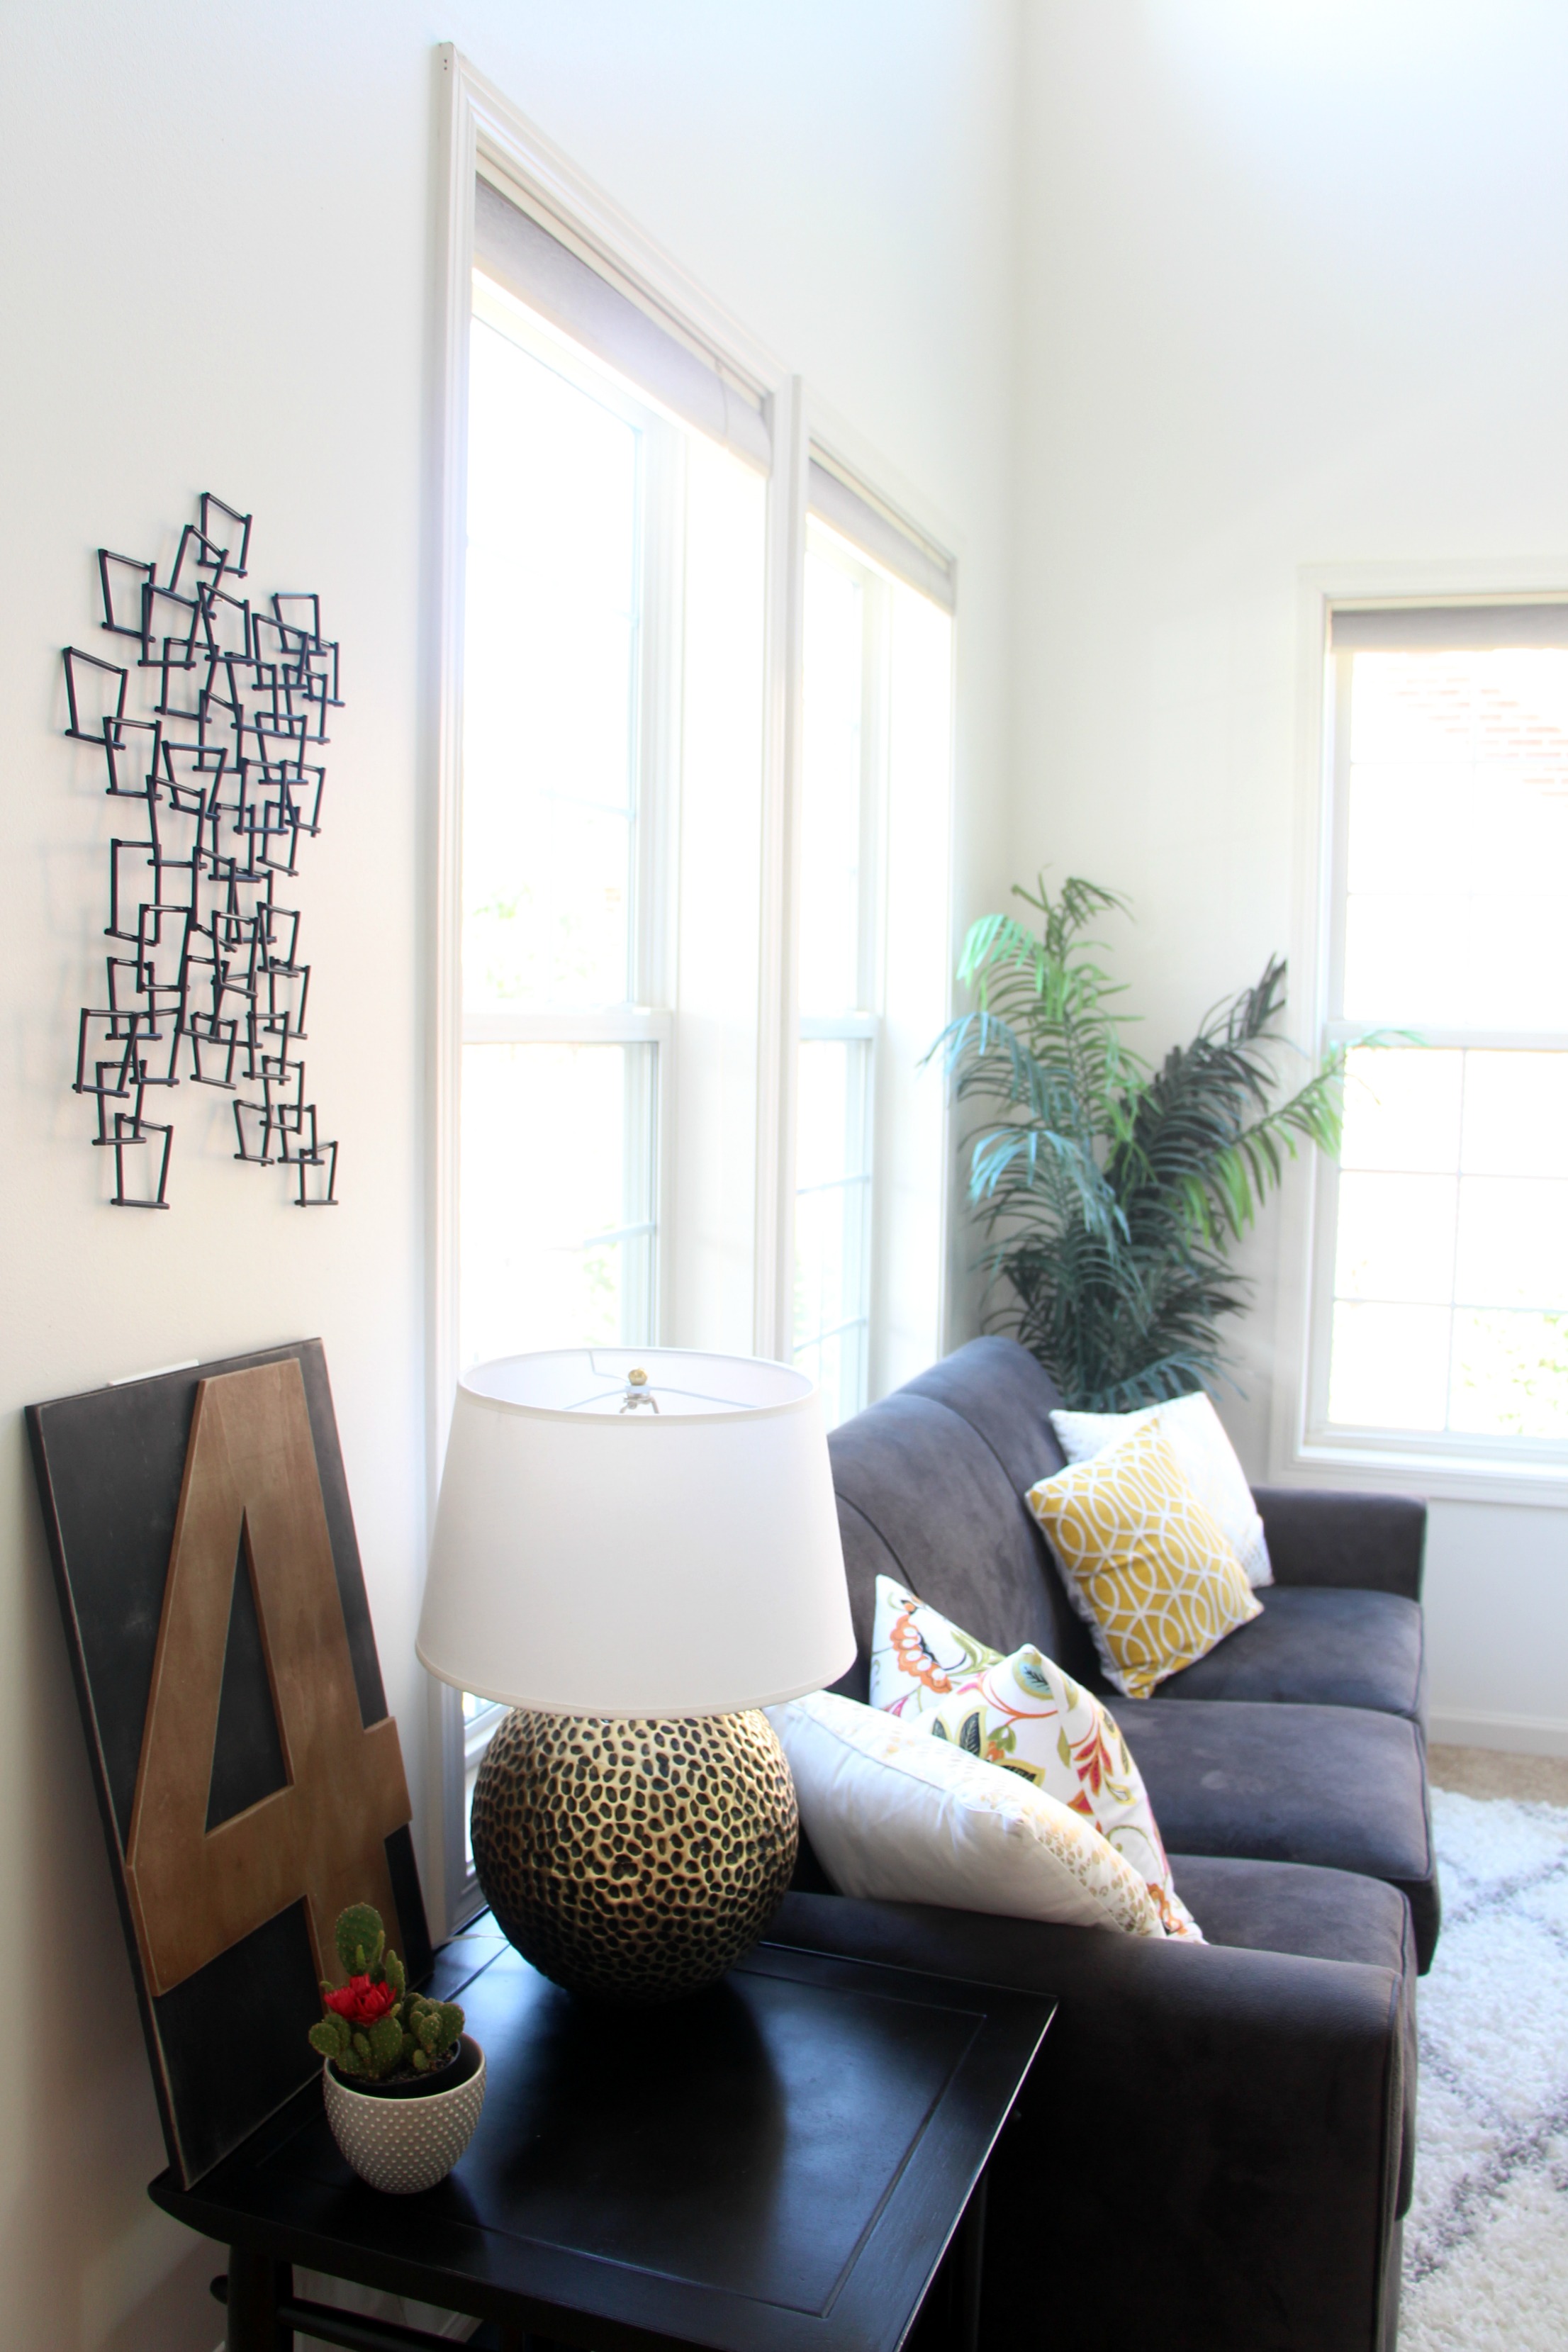
And this project did take me the larger part of an afternoon just cutting down the straws and gluing them together (plus waiting time in between coats of spray paint), but I am so happy with the size I ended up with because it was the perfect fit for one of my skinny little walls.
5 | The next step is to paint, but before you do, make sure to pull off as many of the hot glue strings as possible.
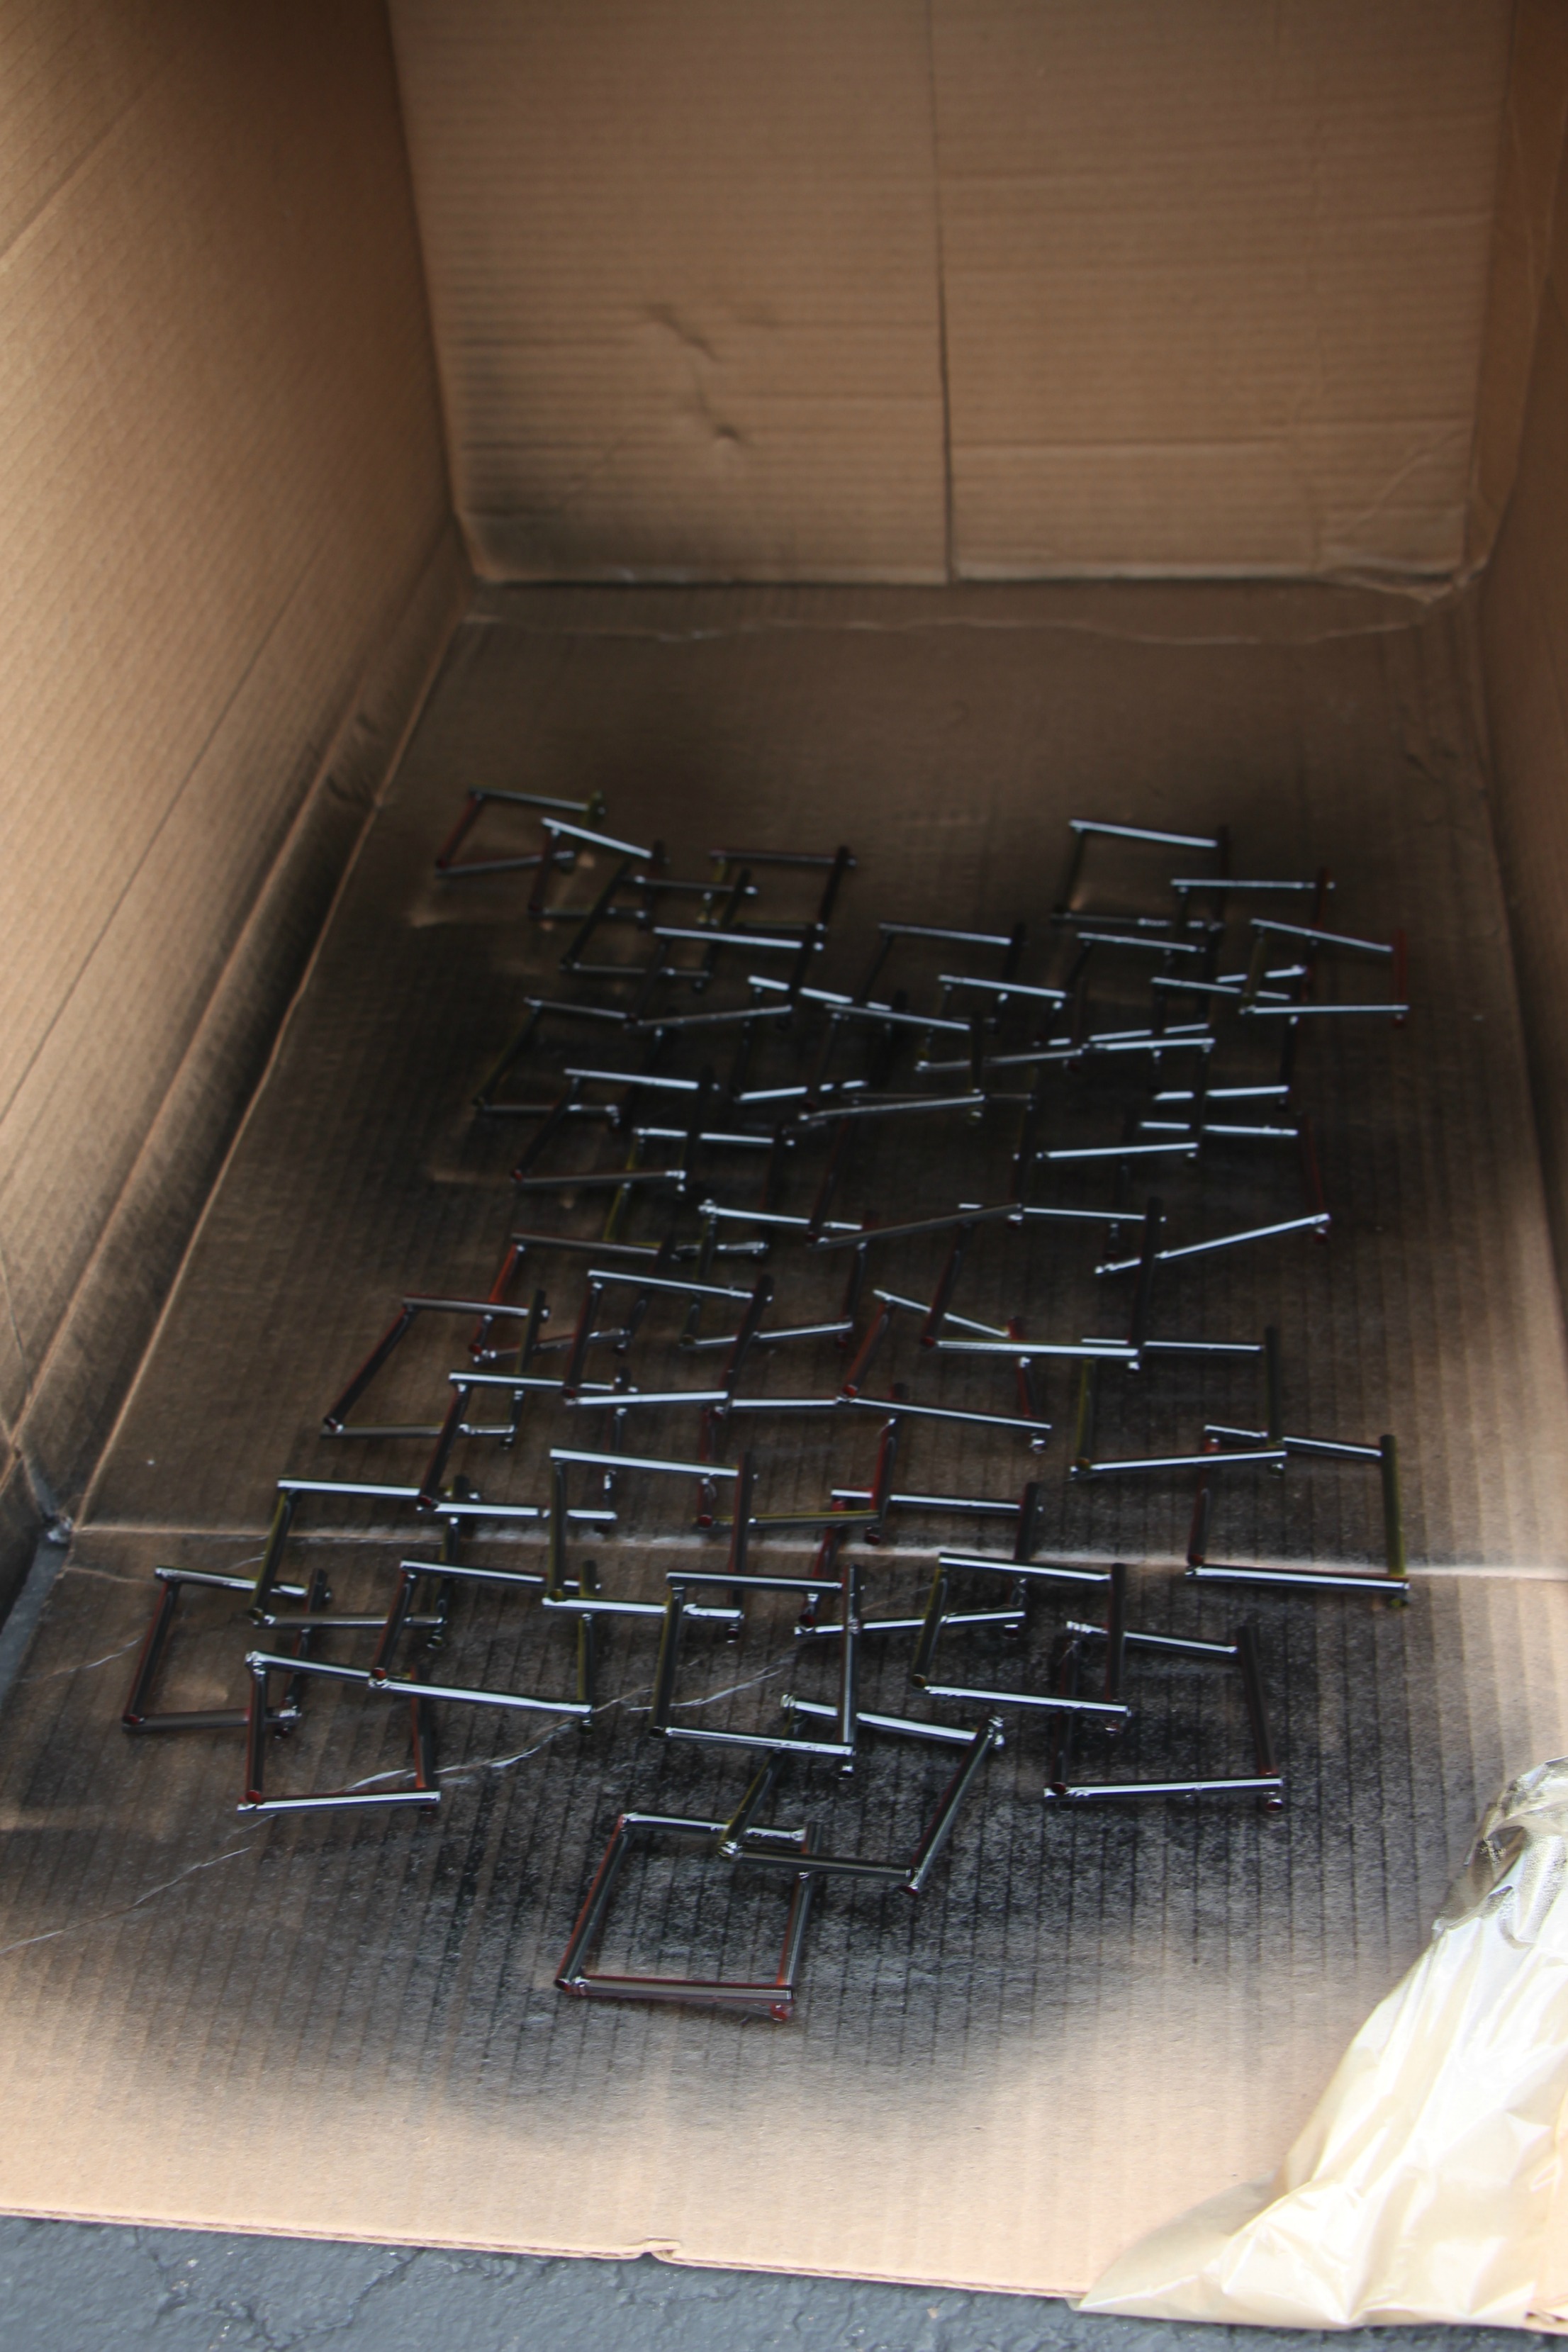
They will get sprayed with the rest of it creating black stringy things on all the corners. After you get those picked off, take the piece outside to spraypaint. I placed mine on a cut-open cardboard box and sprayed a generous coat all over, then let it dry for about 30 minutes before flipping it over to spray the back. I waited an hour before I came back to spray the front, making sure I got the sides of the straws good, so you wouldn’t see anyone neon orange peeking out from inside the straw!
6 | Let sit another 30-60 minutes to dry, pull off any remaining hot glue strings and bring inside and put in place.
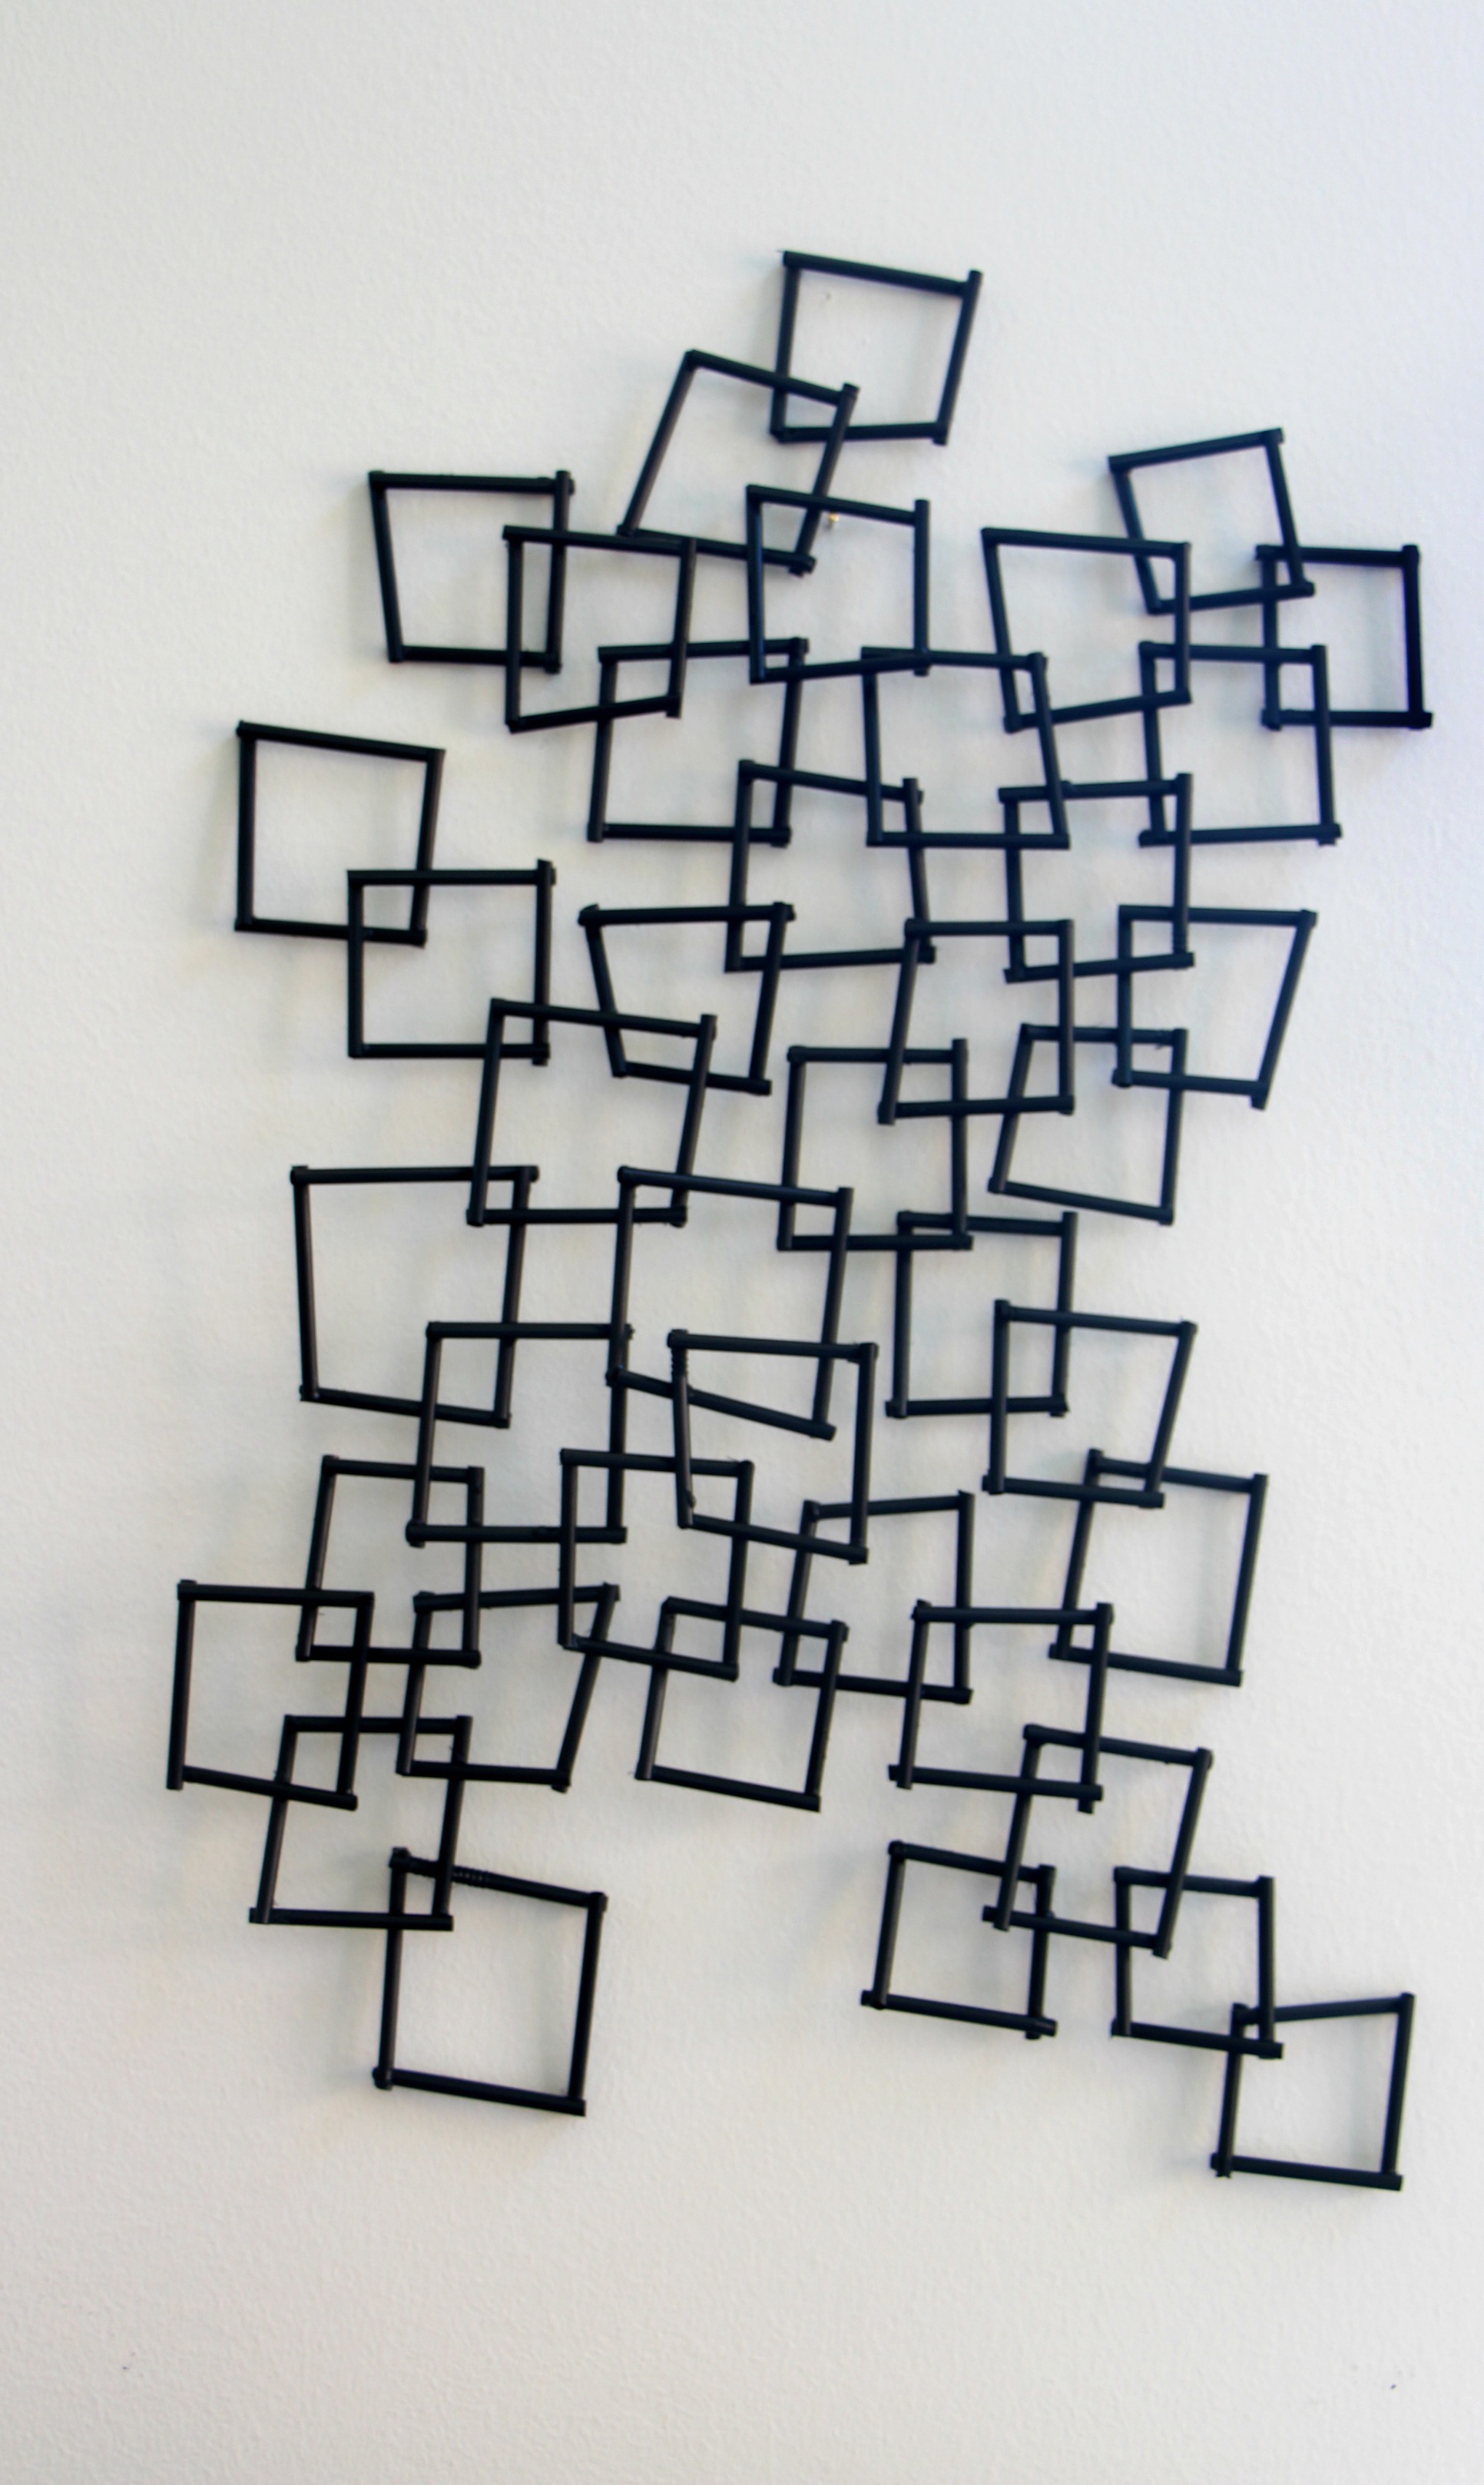
I love, love how this looks on the wall, especially against my freshly painted walls.

I’ll be sharing more on the wall situation soon!
 There was a nail already in place, but since this piece weighs next to nothing, you could totally get away with hanging it with one of these guys!
So, what do you think? Can you tell I made it with straws?!
Be honest! I actually can’t tell and T seems to be super impressed with this particular project. Either that or he knows how long it took me to make it and felt sorry for me ha!!
I love the look so much, I would do it again and make a bigger one, but I would do it over a span of a couple of days.
Wouldn’t it make a pretty cool piece to hang over a mantel or bed?!
Don’t forget to pin for later!
Now, the fun really begins when you get to swing over to see the other 7 Pottery Barn Inspired DIY Projects at my friends’ links below. There are some ah-mazingly inspiring ideas you won’t want to miss!
MORE POTTERY BARN INSPIRED DIY PROJECTS

Pretty Practical Home | PMQ for Two | Iris Nacole | Suburban B*tches | This is Our Bliss | Up To Date Interiors | Monica Wants It | Maggie Overby Studios
A big thanks to Jess from Domicile 37 for hosting such a wonderful DIY series. I already can’t wait for next month. This new house needs some DIY DECOR!
Have a great day, guys!

[Affiliate links were used in this post, which means that by clicking some of the links, I will earn a small commission at no additional cost to you. Thanks for helping to support This is our Bliss.]


Free (& Nearly Free) Wall Decor - Lemons, Lavender, & Laundry
December 9, 2016 at 1:29 PM[…] Drinking Straws Artwork (Instead of spending $300 at Pottery Barn, Rachael made this with drinking straws! What?) via This Is Our Bliss […]
Nan Pleggenkuhle
August 28, 2016 at 6:47 PMLove this project! Tried it myself! I have gotten lots of compliments! Thanks thisisourbliss!
ashley@biggerthanthethreeofus
July 22, 2016 at 4:05 PMThis turned out really well! Love it where you have it within the room as well.
Rachael @ This is our Bliss
July 27, 2016 at 12:47 PMThank you, Ashley!! I think it will be staying there for awhile 😉
Brynne | The Gathered Home
July 21, 2016 at 9:13 AMOh my goodness, no, I would not have guessed straws! Just brilliant!
Rachael @ This is our Bliss
July 27, 2016 at 12:47 PMThanks, Brynne! I fooled everyone then, I guess ha! I’m so happy with the end result!!
monica20039
July 20, 2016 at 8:54 PMThis is AMAZING! Such ingenuity- I would have never guessed it was made from drinking straws. It looks like a high end piece of art.
Rachael @ This is our Bliss
July 27, 2016 at 12:46 PMWOW! Thanks, Monica! I was hoping it would turn out well, but I didn’t think I’d like it as much as I do. I’m so so happy with it!
jessica
July 19, 2016 at 7:54 PMI honestly thought you made this with metal. I am amazed and shocked that you used straws. You certainly had me fooled! It looks great in your space and is super cool!
Rachael @ This is our Bliss
July 27, 2016 at 12:45 PMThank you! I wish I knew how to work with metal!! Maybe someday…for now…I’ll stick with my straws ha!!
prettypracticalhome
July 19, 2016 at 7:26 PMHoly wow, I love this! Can’t believe you made it with straws! It looks like a million bucks–well-done.
Rachael @ This is our Bliss
July 27, 2016 at 12:45 PMThanks, Sharon!! We can’t ever underestimate the power of straws and embroidery hoops!
Stephanie @ Casa Watkins Living
July 19, 2016 at 3:17 PMSo cool!!!!!! I can’t believe this is made from straws! You are so creative!!!!
Rachael @ This is our Bliss
July 27, 2016 at 12:44 PMAww thanks girl!! It totally doesn’t look like straws in person either. I’m so tricky!!!
Maggie Overby
July 19, 2016 at 3:15 PMI was wondering how this was done, youl’d never know those were straws in the finished product. So cool!
Rachael @ This is our Bliss
July 27, 2016 at 12:43 PMThanks, Maggie!! It was such a simple concept…I had no idea it would look this good in the end!
Ariel
July 19, 2016 at 7:12 AMThis is a great idea!!! I might have to do this myself actually!
Rachael @ This is our Bliss
July 27, 2016 at 12:43 PMThank you! Yes – you totally should! I’ve had several readers try it already. I sort of think its fail-proof ha!