I know, far too well, how easy it is to start a project and then not finish the last 10%. You lose steam or in some cases, you figure no one else will see this so it doesn’t really matter. Sound familiar? I get stuck in that trap all the time! After committing to updating the boys’ bathroom, I knew I needed to not only tackle updating the exterior of the vanity, but also the inside of it. Today, I’m going to share How to Get an Organized Bathroom Vanity in 5 Simple Steps.
For some reason, it was a daunting task, but after 20 minutes one afternoon, it was completely transformed.
Clean, cute and functional for the kids!
For the longest time I figured it wasn’t a priority because no one else would see it. Well, hello! Only I had to see it every single day while in the bathroom helping the boys with their morning and nightly routines.


Why is it that we don’t tackle the things right in front of our faces? Instead, we see it, get annoyed and frustrated, but instead allow it to get worse and worse before we just can’t take it anymore!
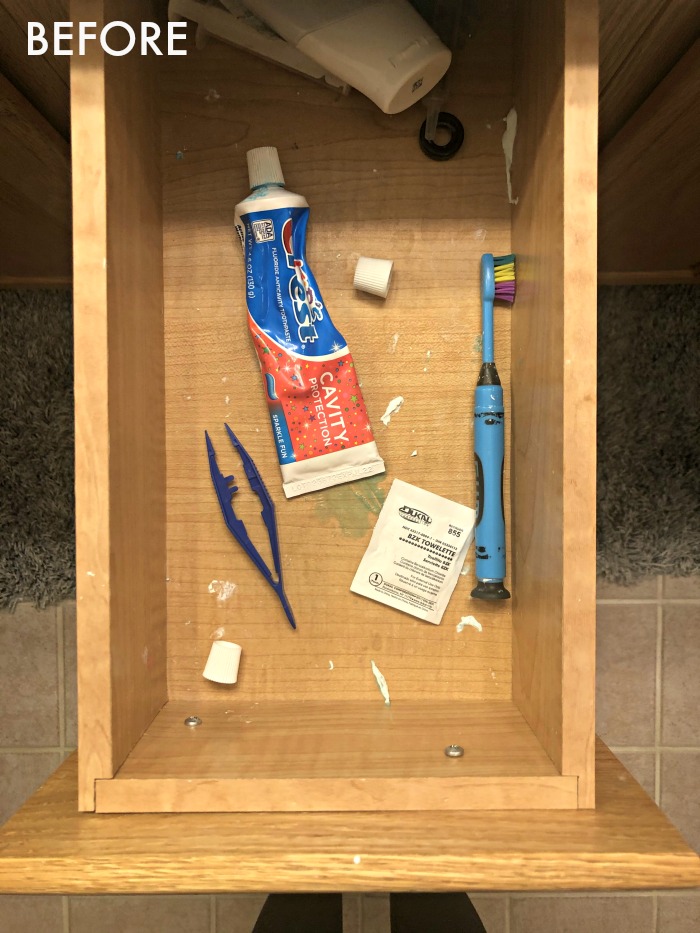
[Ahhh Please tell me I’m not the only one with kid’s bathroom drawers that look like this inside!!]
Then suddenly one day, no matter what we’re in the middle of, it becomes the #1 priority on the to-do list in that very moment!
Well I’m here to tell you that it’s really not that bad to just get in the bathroom and get the vanity all cleared out and put back together in a more functional and [visually appealing ;)] manner! You just have to commit to DOING IT!
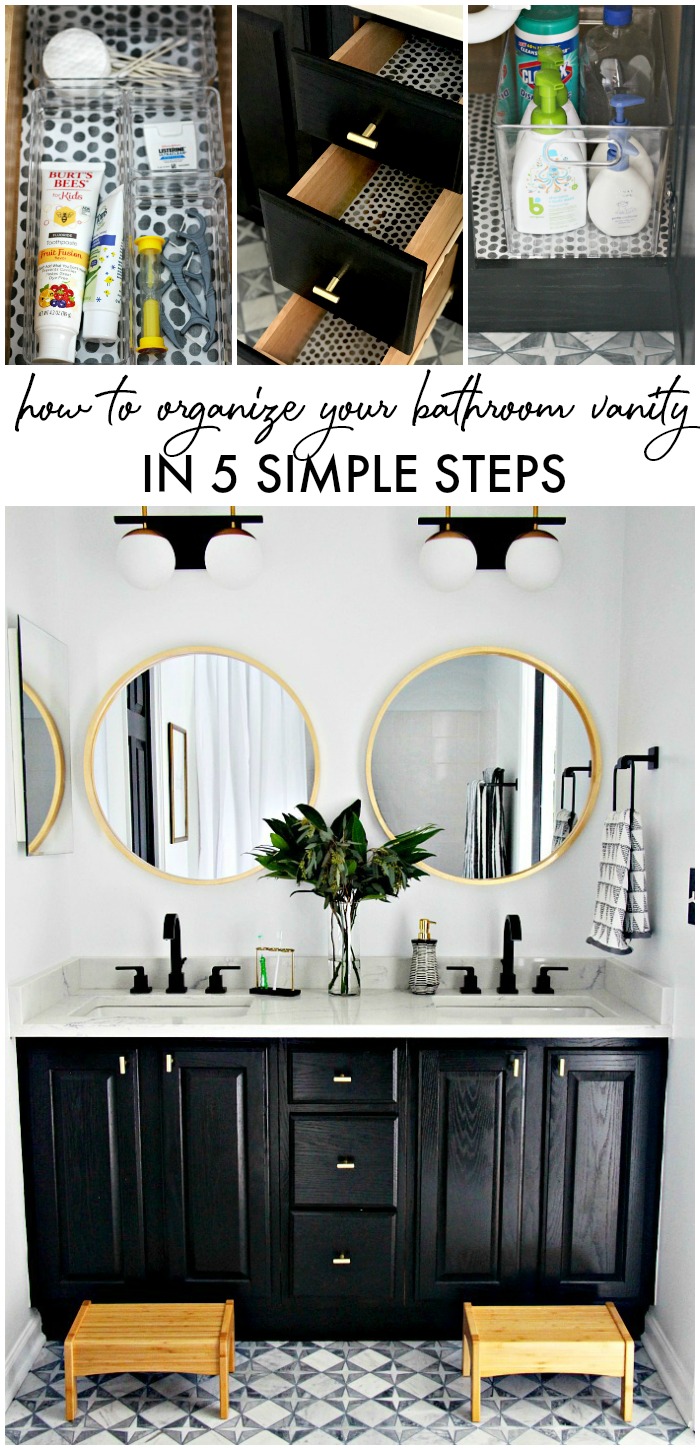
How to Get an Organized Bathroom Vanity in 5 Simple Steps
STEP 1 || EMPTY YOUR VANITY DRAWERS AND CABINETS.
Completely empty it. I’ve been down the path where I only pull out a few obvious things – like the empty tubes or expired items. But you really need to pull every single thing out to determine what is going to go back in and what doesn’t truly belong in there anymore.
Next up is creating your categories of like things! And cleaning it out! You can’t really get in there and get after it if there’s still stuff inside!
STEP 2 || EDIT YOUR DRAWER’S CONTENTS & MAKE PILES OF SIMILAR ITEMS.
Everything that comes out doesn’t go back in. We know that already! If it’s not going back in, figure out where it goes. Here is a list of possible ideas:
- garbage
- recycle
- donation pile
- relocate to another area of your bathroom or home
- back in the vanity
STEP 3 || WIPE IT DOWN.
Get all that toothpaste gunk out! Clean the inside of your drawers and floor of your cabinets with a damp cloth and a sanitizing wipe.
STEP 4 || ADD A STYLISH DRAWER LINER.
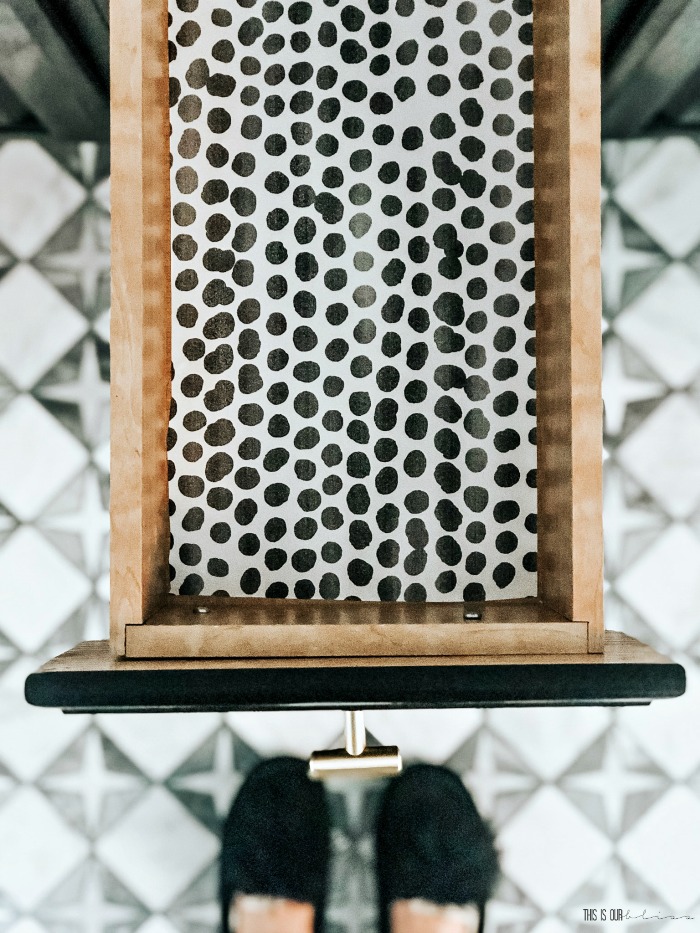
This step is very much optional, but absolutely gives the entire organizing project a polished look. I decided to line the drawers and cabinet base with a decorative adhesive, removable, repositionable paper. When I saw this playful dot patterned paper in black and gray, I knew it would be the perfect finishing touch to the boys’ vanity.
 A sweet little surprise when you open the drawers!
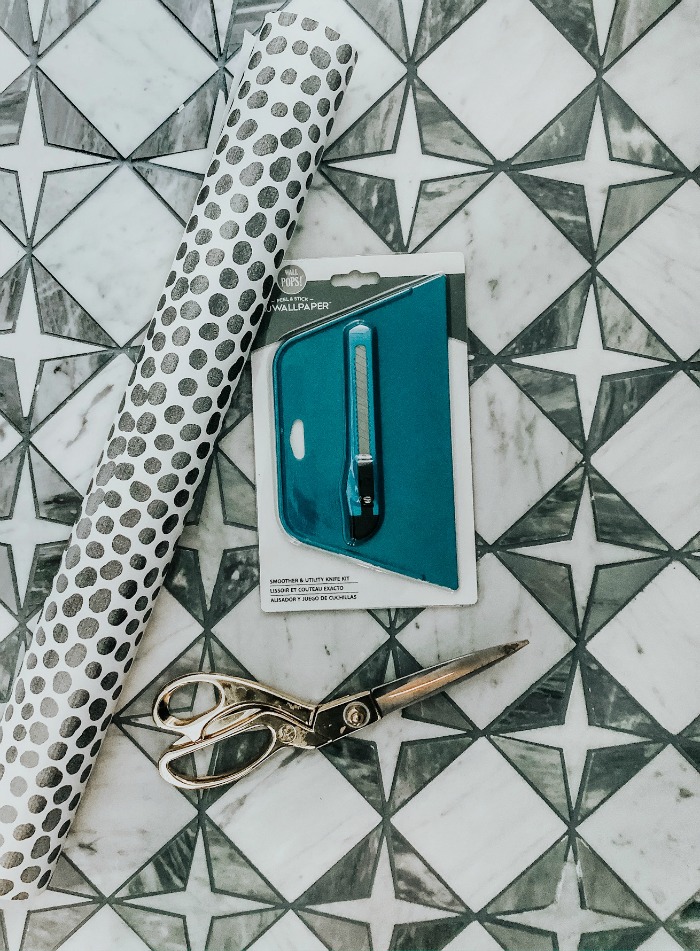
I simply measured the inside of the drawers and cut a piece of paper leaving a little excess on the the side. Then I peeled off the backing and placed in the drawer, lining up the right side and front and back edges. Lastly, I used a knife to carefully cut along the side to remove the excess paper.
You can totally just cut your exact dimensions with scissors and then put the liner in place without using a knife to cut the excess.

I did a combination of these two methods.
I also cut paper to line the base of the cabinets.
STEP 5 || PLACE ORGANIZING TRAYS, CADDIES AND STORAGE CONTAINERS INSIDE & FILL UP.
Once you’ve found the right type and size organizers for your needs. then you can begin putting back all of your edited items and store them together.
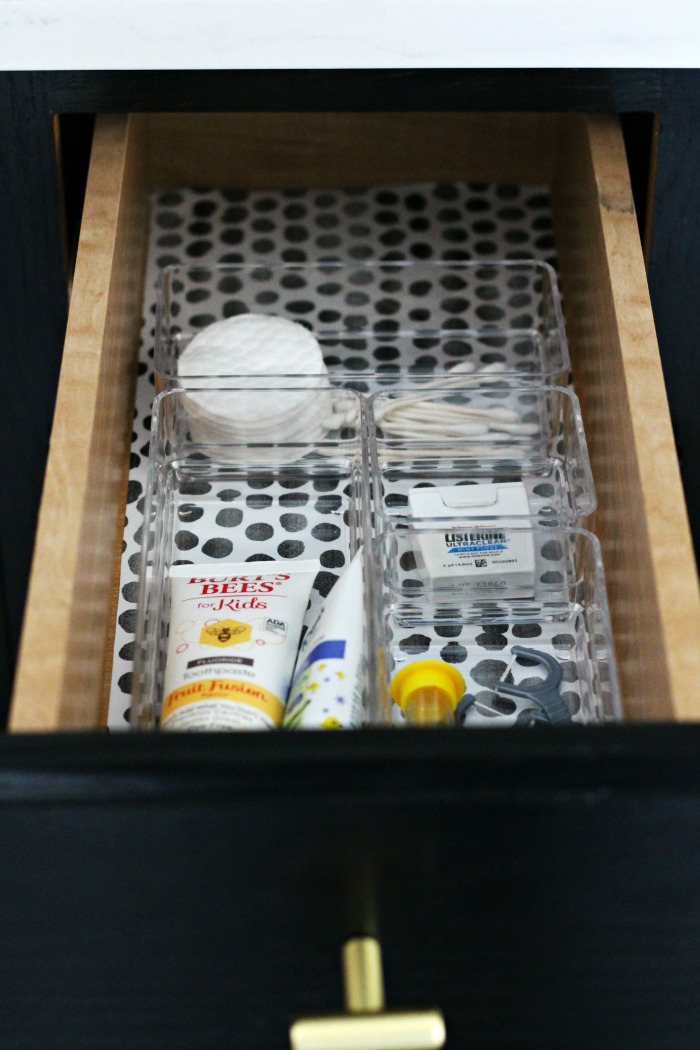
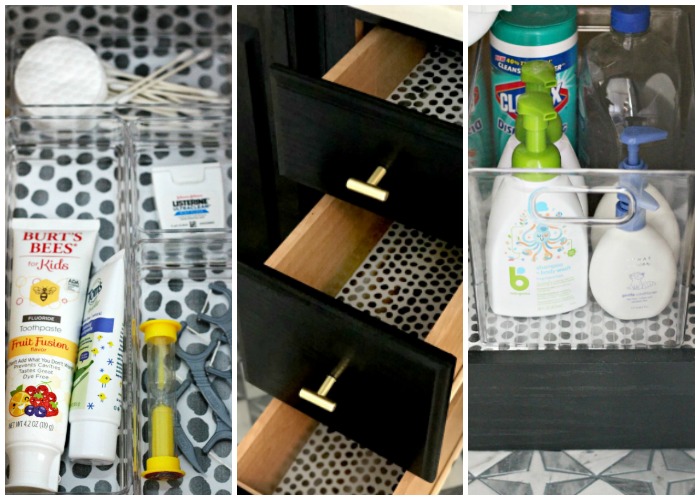
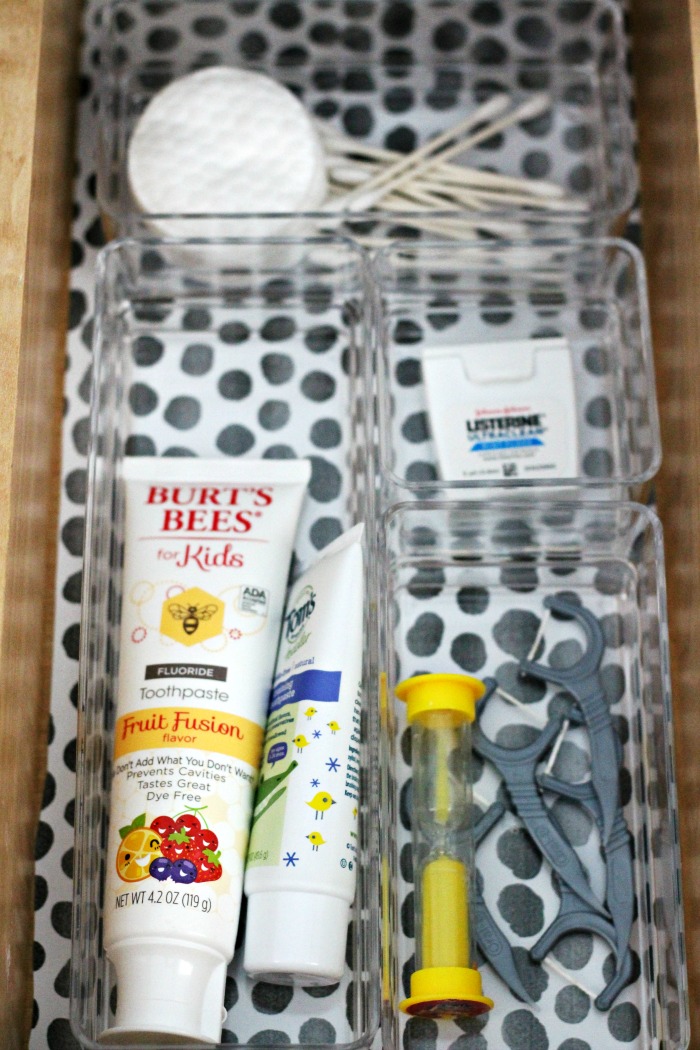
I used this set of clear organizing trays in the top drawer to house toothpaste, floss, floss picks, cotton swabs and the boys’ tooth-brushing timer. I like that you can configure them to fit your drawer size and needs.
QUICK TIP: I added these clear bumpers to the bottom corners to help prevent sliding and keep them in place.
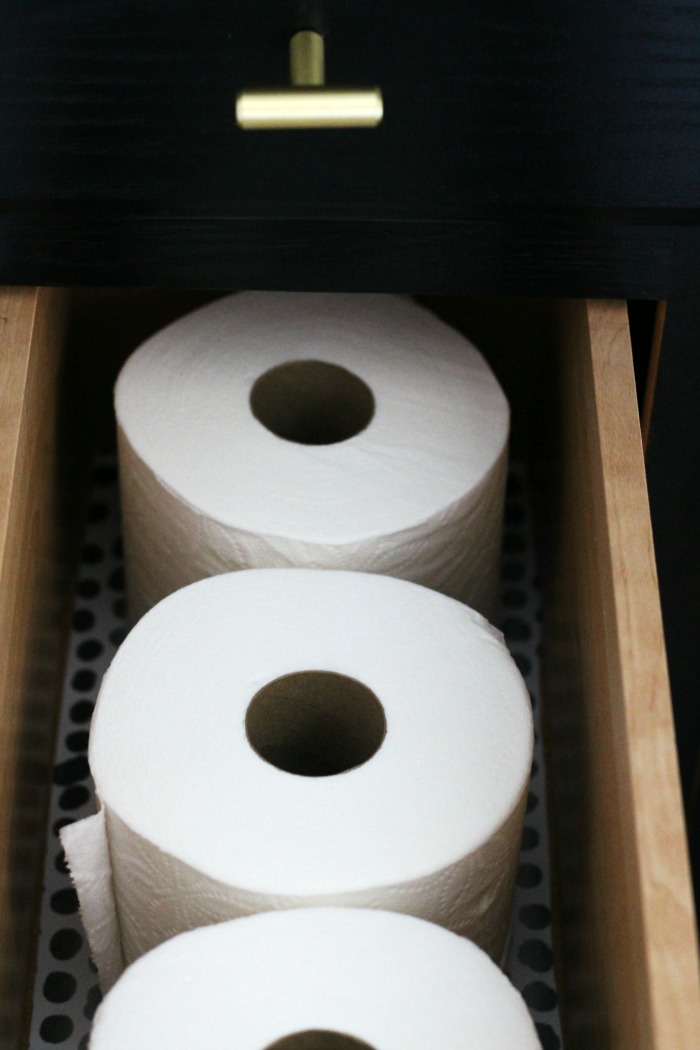
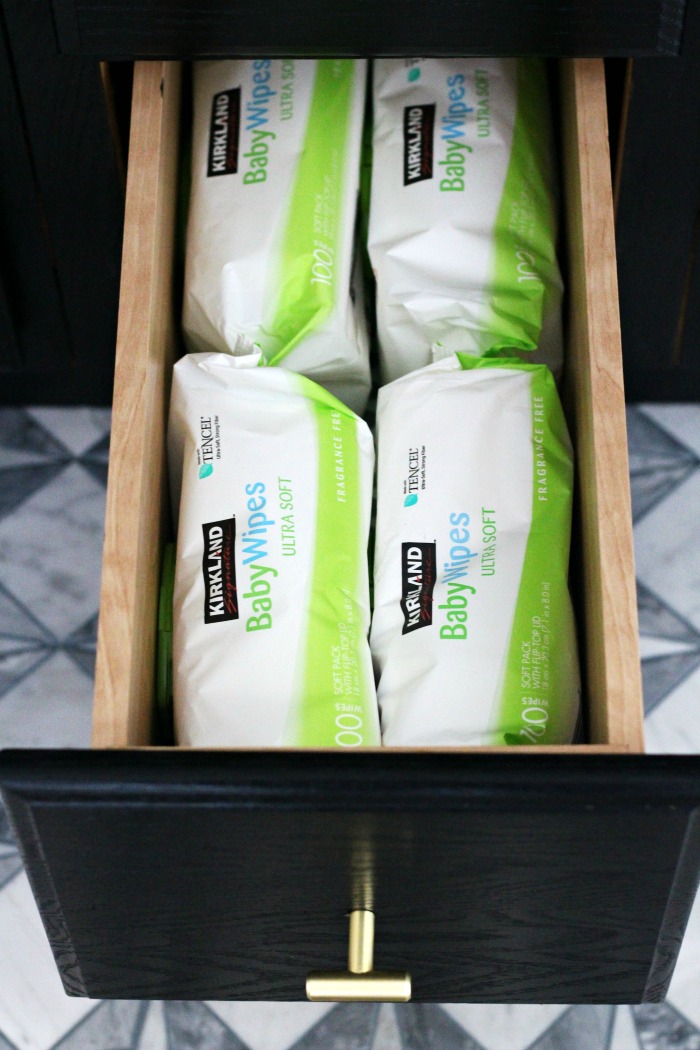
In the other two drawers, I placed our overflow tp rolls and baby wipes.
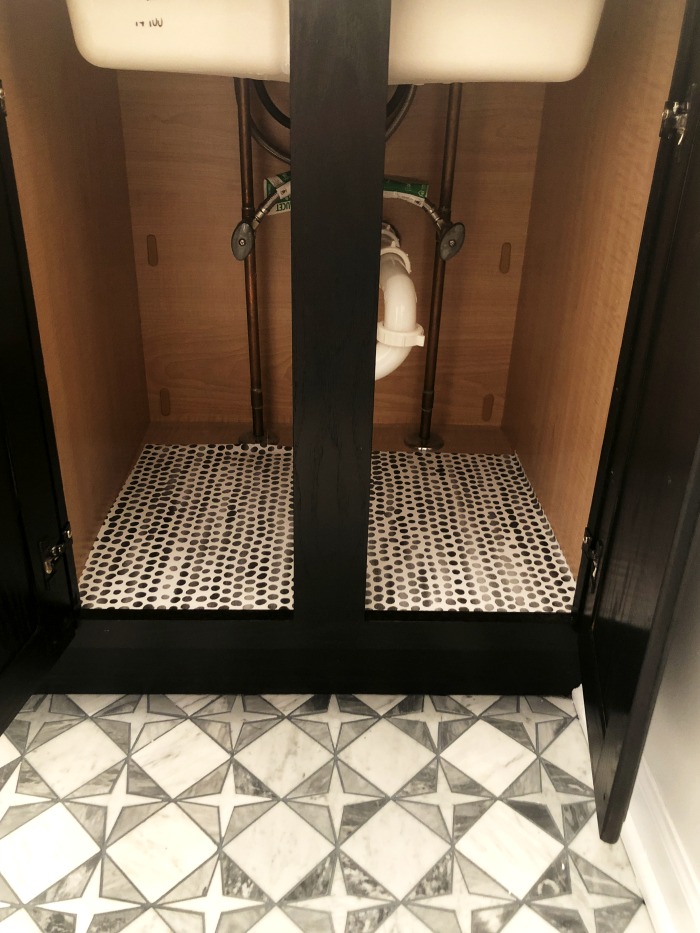
In the cabinets, I also wanted to use clear storage bins to easily see what’s inside. Plus the sink plumbing runs so low that I struck out with a couple different stackable drawer organizers I purchased, so I went with a clear bin on each side.
![]()
I love using these acrylic organizers for cabinet storage!
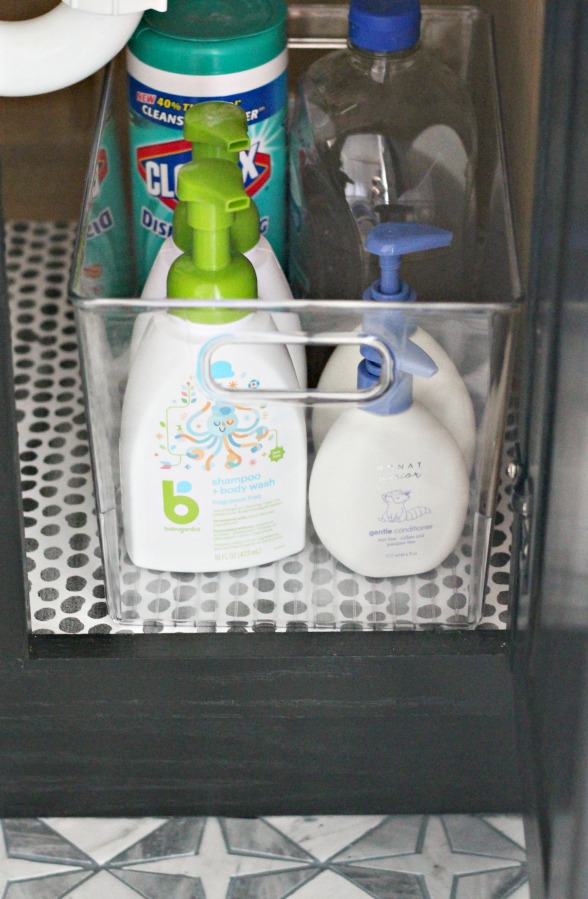
I have Clorox wipes, liquid hand soap refill, extra body wash and shampoo and conditioner we’ve stocked up on. The other bin has toilet paper and Kleenex boxes.
Under the other sink, are the boys’ towels and wash cloths. I forgot to take a picture of that side, so I’ll try to remember to go in and snap a couple.
If you don’t want to spend much money on bathroom drawer organization, you can round up drawer organizers from around the house. We’ve also picked up a few from Dollar Tree. We used them in our kid lid and silverware drawer as well as in the drawer by the coffee maker to house excess k-cups and tea bags, etc.
Any baskets or totes will work under the sink, too. So if you’re on a budget, use what you have instead!
After all of that is done, you’ve got a clean and organized bathroom vanity. The best part is, you probably only sacrificed 20-30 minutes of your time.
It felt soooo great to have done! I highly recommend tackling this project asap. You don’t have to be like me and wait around until you are ready to makeover the whole bathroom.
I hate to admit this, but having the inside of the vanity cleaned, purged and re-organized was almost as gratifying as having the entire bathroom updated. Almost!!
Yes, there will still be crusted toothpaste spillage, but the drawer liners can easily be wiped down. And the clear organizers can be cleaned, too.
The boys are seeing how nice it is to have organized bathroom drawers. What a concept that their things now have a designated home! They’ve learned how helpful it is to know exactly where something is when you go to reach for it!
What about you? Whose bathroom drawers need to be tackled first in your home?!
Are you confident you can get an organized bathroom vanity now?
Now, to tackle the master bathroom vanity. I hope to work on our master bathroom vanity makeover with paint and hardware as well as adding a stylish liner and organizers sometime this year.
No guarantees on a timeline, but it is now officially on the list!
You can also check out this post on starting small and organizing one drawer at a time. You’d be surprised at how satisfying ONE drawer clean-out can really be!
For other organizing posts, you can see my full Organization Tips & Ideas gallery here.
Don’t forget to pin for later!


Neutral & Modern Shared Boys' Bathroom Reveal | This is our Bliss
February 12, 2020 at 7:11 AM[…] wrote a whole post on how I got the vanity organized using these trays in the drawers and these clear bins under the […]
Penny
February 11, 2020 at 10:55 AMRachel – years ago a contractor/handyman gave me a tip regarding the bottom space below sinks (kitchen and baths) is to use peel and stick tile, trimmed exactly for the purpose. These tiles are very easy to clean and won’t leave behind all of the yucky stains and such. Also, a great tip for garage work benches too. Thought I would pass along especially since they make such good looking peel and stick these days!